Copyright
This document is Copyright © 2021 by the LibreOffice Documentation Team. Contributors are listed below. You may distribute it and/or modify it under the terms of either the GNU General Public License (http://www.gnu.org/licenses/gpl.html), version 3 or later, or the Creative Commons Attribution License (http://creativecommons.org/licenses/by/4.0/), version 4.0 or later.
All trademarks within this guide belong to their legitimate owners.
Contributors
|
Felipe Viggiano |
Kees Kriek |
Jean Hollis Weber |
|
Barbara Duprey |
Jean Hollis Weber |
John A Smith |
|
Peter Schofield |
Christian Chenal |
Martin Saffron |
|
Drew Jensen |
Kees Kriek |
Steve Fanning |
|
Leo Moons |
Felipe Viggiano |
|
Feedback
Please direct any comments or suggestions about this document to the Documentation Team’s mailing list: documentation@global.libreoffice.org.
Note
Everything you send to a mailing list, including your email address and any other personal information that is written in the message, is publicly archived and cannot be deleted.
Publication date and software version
Published May 2021. Based on LibreOffice 7.1 Community.
Other versions of LibreOffice may differ in appearance and functionality.
Using LibreOffice on macOS
Some keystrokes and menu items are different on macOS from those used in Windows and Linux. The table below gives some common substitutions for the instructions in this book. For a more detailed list, see the application Help and Appendix A (Keyboard Shortcuts) to this guide.
|
Windows or Linux |
macOS equivalent |
Effect |
|
Tools > Options menu selection |
LibreOffice > Preferences |
Access setup options |
|
Right-click |
Control+click and/or right-click depending on computer setup |
Open a context menu |
|
Ctrl (Control) |
⌘ (Command) |
Used with other keys |
|
F11 |
⌘+T |
Open the Sidebar’s Styles deck |
Introduction
Calc is used to present and analyze data and to make forecasts and predictions. Graphics can turn an average spreadsheet into a more memorable document. Calc can import various vector (line drawing) and raster (bitmap or photo) file formats. Commonly used graphic formats include GIF, JPG, and PNG. See the LibreOffice Help for a full list of the formats that Calc can import.
Graphics in Calc are of three basic types:
-
Image files, such as photographs, drawings, and scanned images
-
Diagrams created using LibreOffice’s drawing tools
-
Charts and graphs created using LibreOffice’s Chart facility; see Chapter 3, Creating Charts and Graphs, for more information
Using graphics in Calc is similar to using graphics in other components of LibreOffice. For more detailed descriptions, please refer to the Getting Started Guide or the Draw Guide.
Note
In LibreOffice, the terms graphics and images refer to both pictures and drawing objects. Often the word images is used when referring to pictures and other graphics that are not drawing objects.
Adding graphics (images) to a spreadsheet
Images, such as corporate logos and photographs, are probably the most common types of graphics added to a spreadsheet. They may be downloaded from the Internet, scanned, created with a graphics program, photographs taken with a digital camera, or clip art in the Gallery.
Inserting an image file
When the image is in a file stored on the computer, you can insert it into a spreadsheet using one of the following methods.
Drag and drop
1) Open a file browser and locate the image you want to insert.
2) Drag the image into the spreadsheet and drop it where you want it to appear.
This method embeds (saves a copy of) the image file in the document. To link the file instead of embedding it, hold down the Ctrl+Shift keys while dragging the image. See “Linking or embedding an image file” below for more information.
Insert Image dialog
1) Click in the spreadsheet where you want the image to appear.
2) Choose Insert > Image on the Menu bar.
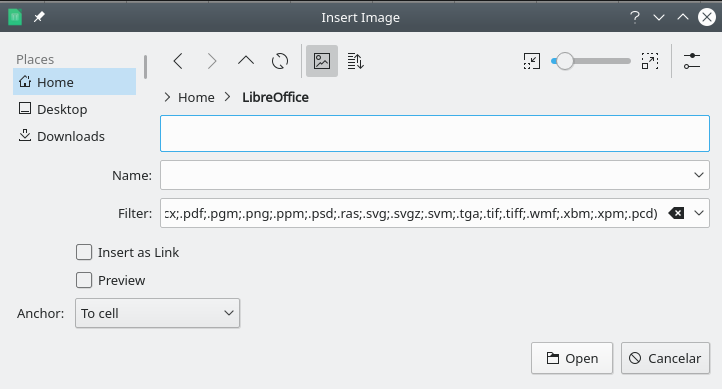
3) On the Insert Image dialog (Figure 1), navigate to the file to be inserted, and select it.
4) Select the Link option if you want to link the file instead of embedding it.
5) Select the required option in the Anchor menu: To cell, To cell (resize with cell), or To page. See “Anchoring images” below for more information about these options.
6) Click Open. The image is inserted into the spreadsheet.
Note
If you have selected to link the image, Calc may present a confirmation dialog with options to continue with the link or to embed the image instead. An option is provided on this dialog to prevent it being displayed in future.
Figure 1: Insert Image dialog
Linking or embedding an image file
Embedding an image into a spreadsheet makes the image a permanent part of the spreadsheet file. Any changes you make to an embedded image will appear only in that spreadsheet; the original image will not be affected.
If you select the Link option in the Insert Image dialog, or use Ctrl+Shift during the drag and drop method, Calc creates a link to the file containing the image instead of embedding it. The image is displayed in the document, but when the document is saved, it contains only a reference to the image file, not the image itself. The document and the image remain as two separate files, and they are merged together only when you open the document again.
Linking an image has two advantages and one disadvantage:
-
Advantage – You can modify the image file separately. The modified image will appear on the next time you open the spreadsheet. This can be a big advantage if you (or someone else, perhaps a graphic artist) is updating images.
-
Advantage – Linking can reduce the file size of the spreadsheet when it is saved, because the image file itself is not included. However, file size is usually not a problem on modern computers, and Calc can easily handle large files.
-
Disadvantage – If you send the document to someone else, or move it to a different computer, you must also send the image files and keep the same file structure. For example, you might keep image files in a subfolder named Images inside the same folder containing the Calc document. Any recipient of the spreadsheet needs to put the image files in a subfolder with the same name in the same named folder as the spreadsheet.
Note
When inserting the same image several times in a document, it might appear beneficial to create links. However, this is not necessary, as LibreOffice embeds only one copy of the image file in the document. Deleting one or more of the copies does not affect the other copies of the same file.
Embedding linked images
If you originally linked the images, you can easily embed one or more of them later.
1) Open the spreadsheet in Calc.
2) Choose Edit > Links to External Files on the Menu bar to open the Edit Links dialog (Figure 2), which shows all the linked files.
Figure 2: Edit Links dialog
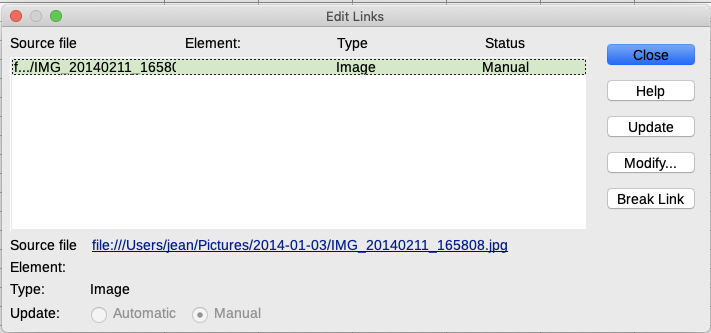
3) Select the files you want to change from linked to embedded.
4) Click Break Link and confirm you want to remove the selected link. The file then becomes embedded into the spreadsheet.
Note
Going from embedded to linked images is not so easy. You must replace them one at a time, selecting the Insert as Link option when you reinsert each file.
Inserting an image from the clipboard
Using the clipboard, you can copy images into a Calc spreadsheet from another LibreOffice document and from other programs. To do this:
1) Open both the source document and the target document.
2) In the source document, copy the image to the clipboard – the exact interactions will vary from program to program.
3) Switch to the target document and click to place the cursor in the cell where the image is to be anchored.
4) Select Edit > Paste on the Menu bar, or click the Paste icon on the Standard toolbar, or right-click and select Paste in the context menu, or press Ctrl+V.
Caution
If the application from which the image was copied is closed before the image is pasted into the target, the image stored on the clipboard could be lost.
Inserting an image using a scanner
If a scanner is connected to your computer, Calc can call the scanning application and insert the scanned item into the document as an image. To start this procedure, choose Insert > Media > Scan > Select Source. After selecting the scanner, place the cursor where you want the image to be inserted, and choose Insert > Media > Scan > Request.
Although this practice is quick and easy, it is unlikely to result in a high-quality image of the correct size. You may get better results by passing scanned material into a graphics program and cleaning it up there, before inserting the resulting image into Calc.
Inserting an image from the Gallery
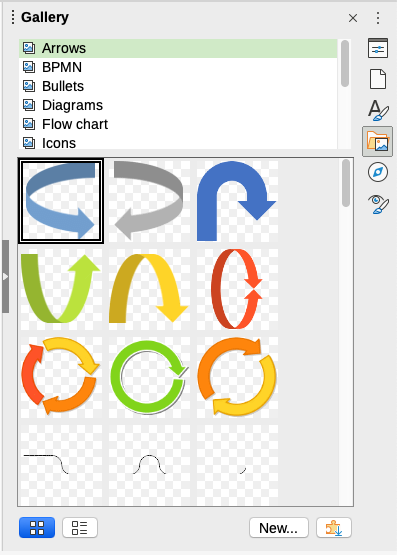
The Gallery (Figure 3) provides a convenient way to group reusable objects such as images and sounds that you can insert into your documents. The Gallery is available in all components of LibreOffice. You can add your own images as well as using the ones supplied with LibreOffice. For more information, see the Getting Started Guide Chapter 11, Images and Graphics.
Figure 3: The Gallery in the Sidebar
To insert an image from the Gallery:
1) Click the Gallery icon on the Sidebar, or select View > Gallery on the Menu bar.
2) Select a theme.
3) Select an object with a single click.
4) Drag and drop the image into the document.
5) Alternatively right-click on the object in the Gallery and choose Insert in the context menu, in which case the image will be positioned according to the cells selected in the spreadsheet.
Tip
If you wish to use gallery images from earlier versions of LibreOffice, go to https://extensions.libreoffice.org/ and search for items with a tag filter of “Gallery” or click on the Add more galleries via extension button, on the bottom right of the Gallery to open the Extensions: Gallery dialog.
Modifying images
When you insert a new image, you may need to modify it to suit the document. Any changes made in Calc do not affect the original image, whether it is an embedded or a linked image file.
Calc provides several tools for working with images. These tools are sufficient for most requirements. However, for professional results it is generally better to use Draw or other software designed to modify image files, and then insert the result into Calc.
Using the Image toolbar
When you insert an image or select one already present in the spreadsheet, the Image toolbar (Figure 4) replaces the Formatting toolbar. If it does not appear, go to View > Toolbars > Image on the Menu bar. The tools available on the Image toolbar are described below.
Figure 4: Image toolbar

Note
Changes to image properties affect only the display and printing of the image. The original image file remains unchanged.
-
Anchor – choose between anchoring the image to a cell (with or without resize) or to a page. See “Anchoring images” below.
-
Align Objects – if two or more images are selected, you can adjust the horizontal and vertical alignment of the images in relation to each other. See “Aligning images” below.
-
Six buttons for arrangement (positioning images in the stacking order): Bring to Front, Forward One, Back One, Send to Back, To Foreground, To Background. See “Arranging images” below.
-
Line Style, Line Width, Line Color – set the attributes of the border around the image.
-
Area Style / Filling – sets the color or other characteristics of the background area that contains the image, not the image itself. To see the background, you must set the transparency of the image to a suitably high value. See the Draw Guide for more information on how to modify areas.
-
Shadow – sets the default shadow effect around the image. To adjust the shadow effect, open the Area dialog (Format > Object > Area) and choose the Shadow tab.
-
Filter – opens the Image Filter toolbar. See the Draw Guide for details on image filters.
-
Image Mode – changes the display of the image from color (Default) to grayscale, black and white, or a watermark. This setting affects only the display and printing of the image; the original image file remains unchanged.
-
Crop Image – places cropping handles around the image. Drag a handle to crop (hide) the edges of the image.
-
Flip Horizontally and Flip Vertically – changes the orientation of the image.
-
Rotate – places rotation handles around the image.
-
Transparency – adjusts the degree of transparency of the image between 0% (opaque) and 100% (fully transparent).
-
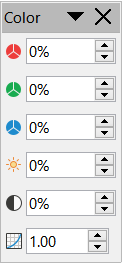
Color – opens the Color toolbar (Figure 5) to adjust the values of the red, green, blue colors, brightness, contrast and gamma.
Figure 5: Color toolbar
Using the Properties deck in the Sidebar
Some of the settings in the Image toolbar are also available in the Properties deck on the Sidebar when an image is selected. The options on the Properties deck include the Color, Line, Transparency, and Position and Size settings.
Adding text
You can add text to an image or drawing object. That text will move with the image when the image is repositioned. For more information on adding text to images, see the Draw Guide.
1) Double-click on the image. The text cursor flashes in the center of the image. The Text Formatting toolbar automatically opens at the top of the spreadsheet.
Figure 6: Text Formatting toolbar for images

2) Type your text and use the tools on the Text Formatting toolbar to format it. Most of the tools are the same as those for formatting text in cells.
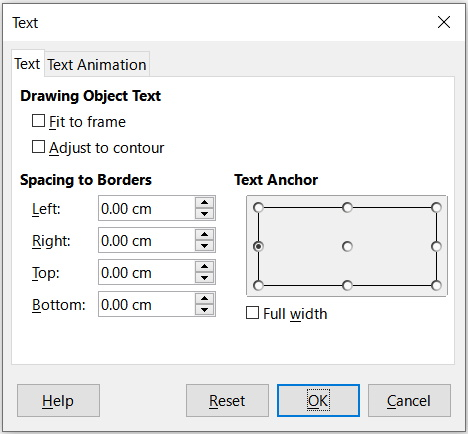
3) To adjust the position of the text or how it appears in the image, right-click on the image (when the text cursor is flashing) and select Text in the context menu to open the Text dialog (Figure 7).
4) Make any necessary changes and click OK to close the dialog.
Figure 7: Text dialog
Positioning, resizing, and arranging images
Using the mouse
To move an image to a new position in your spreadsheet, click on the image and drag it to a new position. The image will still be anchored as it was originally.
1) Click on the image to display the selection handles.
2) Position the cursor over one of the selection handles. The cursor changes shape, giving a graphical representation of the direction of the resizing. The corner handles resize both the width and the height of the image simultaneously. The top, bottom, left and right handles only resize one dimension at a time.
3) Click and drag to resize the image.
Tip
To retain the original proportions of the image, click and drag one of the corner handles. If you want to change the original proportions, Shift+Click one of the corner handles, then drag.
Using the Position and Size dialog
To accurately position and size an image in your spreadsheet, click on the image and then go to Format > Object > Position and Size on the Menu bar, or right-click on the image and select Position and Size in the context menu.
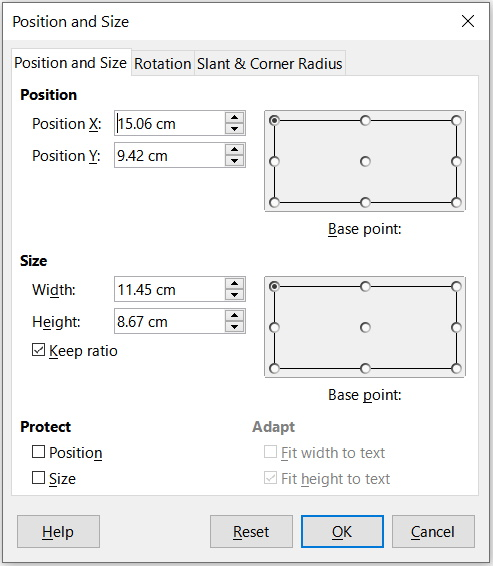
On the Position and Size tab (Figure 8) of the Position and Size dialog, you can set these values:
-
Position – the location of the selected image on the spreadsheet.
-
Position X – the horizontal distance from the base point selected in the grid.
-
Position Y – the vertical distance from the base point selected in the grid.
-
Size – the width and height of the image with respect to the selected base point.
-
Protect – to prevent accidental movement or resizing of the image, select the relevant option.
The units of measurement used for X / Y coordinates and the width and height of the image are set by going to Tools > Options > LibreOffice Calc > General > Measurement unit.
The default location of the base points for position and size is the upper left corner of the spreadsheet. You can temporarily change this base point to make positioning or dimensioning simpler by clicking on a position corresponding to the location of the base point you want to use. This change in base point is only valid for single use and the base point is reset to the standard position of top left corner when you close the Position and Size dialog.
You can also rotate or slant an image (using the Rotation or Slant & Corner Radius tabs of the Position and Size dialog). See the Draw Guide for details.
Figure 8: Position and Size dialog – Position and Size tab
Arranging images
Each image that you place in a spreadsheet is successively stacked on the preceding image, whether or not they overlap. Use the arrange commands to change the stacking order of images. You cannot change the stacking order of text.
1) Select the image you want to change.
2) Go to Format > Arrange on the Menu bar, or right-click on the image and select Arrange in the context menu, then select one of the available arrangement options.
3) Alternatively, click on one of the six arrangement icons on the Image toolbar to quickly move the image up or down the stacking order.
The arrangement options are as follows:
-
Bring to Front – moves the selected image to the top of the stacking order, so that it is in front of other images.
-
Forward One – moves the selected image up one level, so that it is closer to top of the stacking order.
-
Back One – moves the selected image down one level, so that it is closer to the bottom of the stacking order.
-
Send to Back – moves the selected image to the bottom of the stacking order, so that it is behind the other images.
-
To Foreground – moves the selected image in front of text.
-
To Background – moves the selected image behind text. To select a background image so that you can modify or replace it, you have to use the Navigator. Other methods of selection, such as clicking or double-clicking, do not work.
Anchoring images
Anchor images so they stay in their position in relation to other items.
-
To Page – anchor an image to the page to position it in a specific place. The image does not move when cells are added or deleted; it will always stay in the same position on the page where it is placed.
-
To Cell – anchor an image to a cell to ensure that the image always stays with the content it is originally anchored to. If an image is anchored to cell B10, and a new row is inserted above row 10, the image will then be anchored to cell B11.
-
To Cell (resize with cell) – similar to To Cell but with the additional property that the image resizes as you resize the cell to which it is anchored.
To anchor a selected image or change the type of anchor used:
-
Go to Format > Anchor on the Menu bar, or right-click on the image and select Anchor in the context menu, or click on the Anchor icon on the Image toolbar.
-
Select To Page, To Cell, or To Cell (resize with cell) in the menu.
Aligning images
When you have more than one image in your spreadsheet, you can align these images to give your spreadsheet a more professional look. The options include three for aligning the images horizontally (left, centered, right) and three for aligning the images vertically (top, center, bottom).
1) Select all of the images to be aligned (select one and hold down the Shift key while selecting others).
2) Go to Format > Align on the Menu bar, or click the down arrow at the right of the Align icon on the Image toolbar, or right-click on one of the images and select Align in the context menu.
3) Select one of the options available for alignment.
Tip
Press the main area of the Align icon on the Image toolbar (to the left of its down arrow) to quickly left align the selected images.
Grouping and ungrouping images
To group several images so that they become a single object in the spreadsheet:
1) Select the images you want to group (select one and hold down the Shift key while selecting others).
2) Go to Format > Group > Group on the Menu bar, or right-click on one of the selected images and select Group in the context menu.
1) Select the image group you want to ungroup.
2) Go to Format > Group > Ungroup on the Menu bar, or right-click on one of the selected images and select Ungroup in the context menu.
1) Select the image group where you want to edit an image within the group.
2) Go to Format > Group > Enter Group on the Menu bar, or right-click on one of the selected images and select Enter Group in the context menu.
3) Select the image you want to make changes to and make the changes.
4) Go to Format > Group > Exit Group on the Menu bar, or right-click on one of the selected images and select Exit Group in the context menu.
Using LibreOffice’s drawing tools
Calc, like all other components of LibreOffice, has a range of tools to create drawings such as simple diagrams, using rectangles, circles, lines, text, and other shapes. You can group several drawing objects to make sure they maintain their relative position and proportion if you move or resize them.
You can also use the drawing tools to annotate photographs, screen captures, or other illustrations produced by other programs, but this is not recommended. If you need to create complex drawings, it is recommended to use LibreOffice Draw and then insert the drawing into your spreadsheet. For a more detailed explanation, see the Draw Guide.
Drawing toolbar
To begin using the drawing tools, go to View > Toolbars > Drawing to open the Drawing toolbar, which appears in its default position at the bottom of the spreadsheet. You can make this toolbar a floating toolbar and move it to a more convenient position.
When the Drawing toolbar opens, it displays a default set of tools as shown in Figure 9. Hover the mouse pointer over a tool to see a tooltip describing its function. Icons with small arrows on the right side open with palettes of tools. To add tools to the Drawing toolbar, right-click in an empty area on the toolbar and select Visible Buttons in the context menu.
Figure 9: Drawing toolbar

To use a drawing tool:
1) Click on the tool in the Drawing toolbar (Figure 9). The mouse pointer changes to a drawing-functions pointer and the normal Formatting toolbar changes to the Drawing Object Properties toolbar (Figure 11).
2) Move the cross-hair pointer to the place in the document where you want the drawing object to appear and then click and drag to create the object. Release the mouse button. The selected drawing function remains active, so that you can draw another object of the same type.
3) To cancel the selected drawing function, click on the tool’s icon again, press the Esc key, or click on the Select icon (the arrow) on the Drawing toolbar.
4) You can now change the properties (fill color, line type and weight, anchoring, and others) of the drawing object using the Drawing Object Properties toolbar (Figure 11), the Properties deck on the Sidebar, or the choices reached by right-clicking on the drawing object.
Setting the properties of drawing objects
For more information on the properties of drawing objects, see the Draw Guide.
You can set some default properties for a drawing object before you draw an object. These default properties are applied only to the current spreadsheet and are not retained when you close the spreadsheet. The properties apply only to drawing objects.
1) Click Select on the Drawing toolbar (Figure 9).
2) On the Drawing Object Properties toolbar (Figure 10), some controls are active, so you can set the default values you want to use for each property. When you select area or line properties, palettes open where you can choose the values to be used for areas or lines.
Figure 10: Drawing Object Properties toolbar – some controls are available for setting default properties

3) After you draw an object or group it with another object, more properties become active. These appear on the toolbar (Figure 11) and some are shown in the Properties deck of the Sidebar (Figure 12).
Figure 11: Drawing Object Properties toolbar after inserting an object

You can change the properties of an existing drawing object (fill color, line type and weight, anchoring, and so on) using the Drawing Object Properties toolbar (Figure 10), the Properties deck on the Sidebar, or the context menu when you right-click on the drawing object.
Figure 12: Properties deck in Sidebar for drawing object

Resizing drawing objects
Select the object and click on one of the selection handles then drag the object to its new size. For a scaled resizing, select one of the corner handles and keep the Shift key pressed while dragging the handle. For more information, see “Positioning, resizing, and arranging images” above.
Grouping and ungrouping drawing objects
For grouping, ungrouping, and editing grouped drawing objects, see “Grouping and ungrouping images” above.
Additional tools
Some additional tools are available when you right-click on an image or drawing object and open the context menu.
Using Fontwork
With Fontwork, you can create graphical text art objects to make your work more attractive. There are many different settings for text art objects (line, area, position, size, and more), so you have a large choice.
Fontwork is available with each component of LibreOffice, but you will notice small differences in the way that each component displays it.
Creating a Fontwork object
1) On the Fontwork toolbar (View > Toolbars > Fontwork, see Figure 13) or the Drawing toolbar (View > Toolbars > Drawing), click the Insert Fontwork Text icon.
Figure 13: Fontwork toolbar

2) In the Fontwork Gallery (Figure 14), select a Fontwork style, then click OK. The Fontwork object will appear in the document.
3) Double-click the object to edit the Fontwork text (Figure 15). Select the text and type your own text in place of the black Fontwork text that appears over the object.
4) Click anywhere in a free space or press Esc to apply your changes.
Figure 14: The Fontwork Gallery
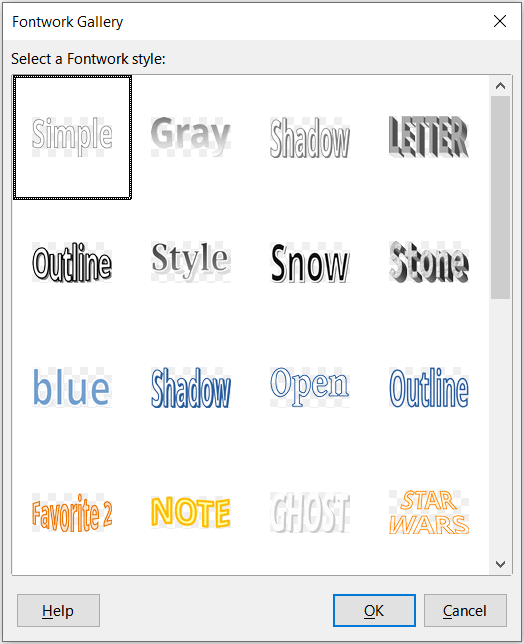
Figure 15: Editing Fontwork text

Editing a Fontwork object
Now that the Fontwork object is created, you can edit some of its attributes. To do this, you can use the Fontwork toolbar, the Formatting toolbar, or menu options. For more information, see Chapter 11, Images and Graphics, in the Getting Started Guide.