
Getting Started Guide 24.8
This document is Copyright © 2024 by the LibreOffice Documentation Team. Contributors are listed below. This document maybe distributed and/or modified under the terms of either the GNU General Public License (https://www.gnu.org/licenses/gpl.html), version 3 or later, or the Creative Commons Attribution License (https://creativecommons.org/licenses/by/4.0/), version 4.0 or later. All trademarks within this guide belong to their legitimate owners.
Contributors for this edition:
Contributors for previous editions:
Please direct any comments or suggestions about this document to the Documentation Team forum at https://community.documentfoundation.org/c/documentation/loguides/ (registration is required) or send an email to: loguides@community.documentfoundation.org.
Note
Everything sent to a forum, including email addresses and any other personal information that is written in the message, is publicly archived and cannot be deleted. Emails sent to the forum are moderated.
Published August 2024. Based on LibreOffice 24.8 Community.
Other versions of LibreOffice may differ in appearance and functionality.
Some keystrokes and menu items are different on macOS from those used in Windows and Linux. The table below gives some common substitutions used in this document. For a detailed list, see LibreOffice Help.
|
Windows or Linux |
macOS equivalent |
Effect |
|
Tools > Options |
LibreOffice > Preferences |
Access setup options |
|
Right-click |
Control+click, Ctrl+click, or right-click depending on computer setup |
Open a context menu |
|
Ctrl or Control |
⌘ and/or Cmd or Command, depending on keyboard |
|
|
Alt |
⌥ and/or Alt or Option depending on keyboard |
Used with other keys |
|
F11 |
⌘+T |
Open the Styles deck in the Sidebar |
LibreOffice can open a wide variety of file formats as shown below in addition to the Open Document Format (ODF), including Portable Document Format (PDF).
Most file formats are automatically detected by LibreOffice and can be opened without explicitly selecting the document format in the file picker.
Writer can read Open Document text formats (.odt, .ott, .oth, .odm, and .fodt), and the following text formats (including various legacy formats):
|
|
When opening .htm or .html files used for web pages, LibreOffice customizes Writer for working with these files.
Calc can open Open Document spreadsheet formats (.ods, .ots, and .fods) as well as the following spreadsheet formats (including various legacy formats):
|
|
Impress can open the various Open Document presentation formats (.odp, .odg, .otp, and .fopd) as well as the following presentation formats:
|
|
Draw can use the Open Document graphic file formats (.odg and .otg) and PDF files as well as the following graphic formats:
|
|
Math can use Open Document Formula files (.odf) as well as the formats used by OpenOffice.org 1.x (.sxm), StarMath (.smf), and MathML (.mml) files.
When opening a Word document that contains an embedded equation editor object, if the option MathType to LibreOffice Math or reverse is checked in Tools > Options > Load/Save > Microsoft Office (macOS LibreOffice > Preferences > Load/Save > Microsoft Office), the object is automatically converted to a LibreOffice Math object.
If you save a LibreOffice file in an ODF format, that file will be correctly rendered if it is transferred to another user;reopened in a later version of LibreOffice; or opened with another application that can open ODF files. Thus, we strongly recommend that you save files in an ODF as file format. However, files can be saved in other formats, if required.
Tip
If the document needs to be shared and it is not going to be modified, the preferred option is to convert the document to PDF. LibreOffice has an easy method to convert documents to PDF.
In addition to the ODF text formats (.odt, .ott, and .fodt), Writer can save files in the following formats:
|
|
Notes
Since LibreOffice provides encryption support within the Microsoft Word filter, password protected Microsoft Word documents can be saved.
While the .rtf format is often used to transfer text files between applications, there is a loss of formatting and images. Thus, users should employ other formats.
Calc can save in the ODF spreadsheet formats (.ods, .ots, and .fods) as well as the following formats:
|
|
Impress can save in the ODF presentation formats (.odp, .otp, .fodp, and .odg), as well as the following formats. Impress can also export to Draw-compatible graphic formats.
|
|
Draw can save in the ODF Drawing formats (.odg, .otg, and .fodg) and it can also export to the graphics formats:
|
|
Writer/Web can save to the following formats:
HTML document (.html and .htm), as HTML 4.0 Transitional
Text and Text Encoded (LibreOffice Writer/Web) (.txt)
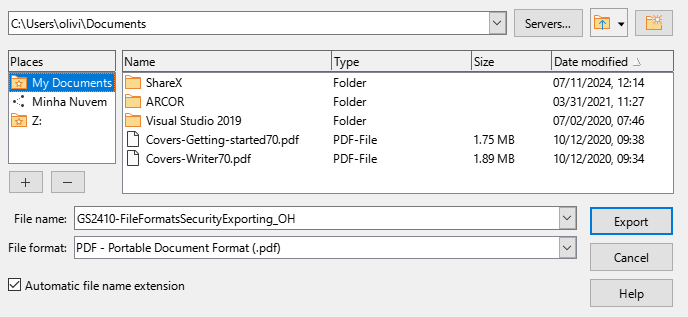
LibreOffice uses the term “export” for file operations where there is a change of file type. Unlike Save As, exporting the file produces a document while keeping the current file format of the actual document. If the file type cannot be found in File > Save As on the Menu bar, check File > Export on the Menu bar (not available in Math) for additional file types.
Figure 1: Export dialog
If the PDF file format is needed, LibreOffice can export Writer, Calc, Impress, and Draw, documents in that format. Writer can also export in EPUB. Also, LibreOffice can export files in HTML and XHTML formats. Draw and Impress can also export in several image and graphic formats.
Note
If you use the Export command, LibreOffice will create a copy of the file as a new file using the selected format. The original file will remain open in LibreOffice.
If a file needs to be quickly exported to the PDF format, LibreOffice is unable to select various file options such as file format, page range, and image compression. For a quick PDF export, do the following:
Open the target file in LibreOffice.
Open the Export dialog (Figure 1) and use one of the following methods:
Click on Export Directly as PDF on the Standard toolbar.
Go to File > Export As > Export Directly as PDF on the Menu bar.
Enter a file name and select the required location for the PDF file in the Export dialog.
Click on Export to create the PDF file and close the Export dialog.
Note
By default, a file in PDF format is not protected against contents tampering, or editing. Contents of a PDF file can be edited by specialized software tools, including LibreOffice Draw.
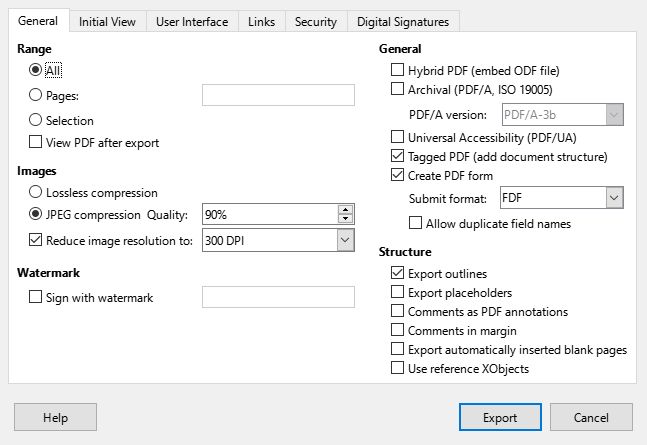
If you need more control over the content and quality of a file that will be exported in the PDF format, do the following in the PDF Options dialog (Figure 2):
Figure 2: PDF Options dialog — General page
Open the target file in LibreOffice.
Access PDF Options by going to File > Export As > Export as PDF.
Select the various options required on each tabbed page of the PDF Options dialog.
Click on Export to open the Export dialog.
Navigate to the required folder for the PDF file.
Enter a file name the PDF file and click on Export to save the PDF file in its selected location.
Refer to Figure 2 to see the PDF options available on the General page of the PDF dialog.
Range
All
Exports all defined print ranges. If no print range is defined, the entire document will be exported.
Pages
Exports the pages that you have selected. To export a range of pages, use the format 3-6. To export single pages, use the format 7;9;11. If you want, you can export a combination of page ranges and single pages, by using a format like 3-6;8;10;12.
Selection
Exports all the current selection.
View PDF after export
Opens the exported PDF file in the default PDF viewer application.
Images
Lossless compression
Selects lossless compression for the image. All pixels are preserved. This setting can create large files when used with photographs.
JPEG compression quality
Determine the JPEG compression’s quality level. Almost all pixels are preserved if you choose a high quality level, but if you use a low quality level, file sizes are reduced but some pixels are lost and artifacts are introduced.
Reduce image resolution
Lower DPI (dots per inch) images have lower quality. Lower resolutions (100 DPI or less) may be sufficient for viewing on a computer screen, but many modern devices have much higher resolutions. For printing it is generally preferable to use at least 300 or 600 DPI, depending on the capability of the printer. Higher DPI settings increase the size of the exported file.
Note
Encapsulated PostScript (EPS) images with embedded previews are exported only as previews. EPS images without embedded previews are exported as empty placeholders.
Watermark
Sign with watermark
General
Hybrid PDF (embed ODF file)
Use this setting to export the document with a hybrid file format: PDF and ODF. In PDF viewers it behaves like a normal PDF file, but remains fully editable in LibreOffice.
Archive (PDF/A, ISO 19005)
Converts to the PDF/A-1b, PDF/A-2b, or PDF/A-3b format. All fonts used in the source document are embedded in the generated PDF file, and PDF tags are created. The primary purpose is to create an electronic document whose appearance is independent of device and application, making it suitable for long term preservation.
PDF/A-2b is recommended for most users, because it allows for layers and transparency with shapes and images. It also compresses better (JPEG 2000) than PDF/A-1b, usually producing smaller files. PDF/A-3b is identical to PDF/A-2b, but also accepts embedding of other file formats.
Universal Accessibility (PDF/UA)
Creates a universal, accessible PDF file that follows the requirements of PDF/UA (ISO 14289) specifications.
Tagged PDF (add document structure)
Tagged PDFs contain information about the structure of document contents. This can help to display the document on devices with different screens and using screen reader applications. Some tags that are exported are table of contents, hyperlinks, and controls. This option can increase file sizes significantly.
Create PDF form
If you are submitting forms within the PDF file, select the available options from the Submit format drop‑down list. This menu will override the URL property that is set in the document. Only one setting is valid for the PDF document: PDF (sends the whole document); FDF (sends the control contents); HTML, and XML. Normally PDF format is selected.
Allow duplicate field names
Allows the use of the same field name for multiple fields in a generated PDF file. If disabled, field names are assigned generated unique names.
Structure
Export outlines
Use this option to export bookmarks of Writer documents as PDF bookmarks. Bookmarks are created for all outline paragraphs and for all table of contents entries where hyperlinks are assigned in the source document.
Only paragraphs with Outline level 1 — 10 are exported. The name of the Paragraph Style is irrelevant. For example, the default version of Paragraph Style Title is not exported when its Outline level is Text Body.
Export placeholders
This option is only available in Writer. The user can choose if the PDF file will include any defined placeholder fields, which can be filled in by users.
Comments as PDF annotations
If this option is selected, comments are included in the PDF file as annotations.
To export comments of Writer documents as displayed in LibreOffice, select Tools > Options > LibreOffice Writer > Print (macOS LibreOffice > Preferences > LibreOffice Writer > Print) and select the In margins option in Comments. The exported pages are scaled down and the comments are placed into margins.
Export automatically inserted blank pages
If selected, blank pages are automatically inserted in the PDF file. This is recommended if you are printing the PDF file as a double-sided document. For example, books usually have chapters set to start on an odd-numbered (right-hand) page. When the previous chapter ends on an odd page, LibreOffice inserts a blank page between the two odd pages. This option controls whether to export that blank page.
Use reference XObjects
This option determines how PDF images will be exported back into a PDF file.
When this option is disabled, the first page of the PDF data is included in the output. The PDF export merges images, fonts and other resources during export. This is a complex operation, but the result can be viewed in various viewers.
If this option is enabled, the reference XObject markup is used. This is a simple operation, but PDF viewers must support this to use vector images. Otherwise, a fallback bitmap is shown in the viewer.
More information can be found in the PDF specification, ISO 32000-2:2017 (https://www.iso.org/standard/63534.html).
The Initial View page in the PDF Options dialog (Figure 3) allows users to determine how the PDF file opens by default in a PDF viewer.
Figure 3: PDF Options dialog — Initial View page
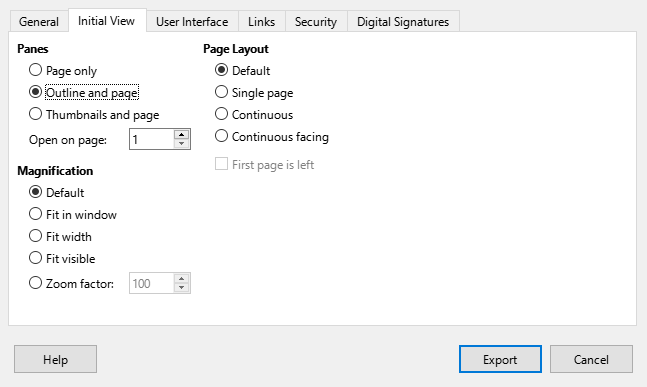
Panes
Page only
Generate a PDF file that shows only page contents.
Outline and page
Generate a PDF file that shows a bookmarks palette and page contents.
Thumbnails and page
Generate a PDF file that shows a thumbnails palette and the page contents.
Open on page
Enter a page number to display that page when a PDF reader opens a PDF file.
Magnification
Default
Generate a PDF file that shows the page contents without zooming. If the PDF reader application is configured to use a zoom factor by default, the page displays with that zoom factor.
Fit in window
Generate a PDF file that displays the page zoomed to fit entirely into a PDF reader window.
Fit width
Generate a PDF file that displays the page zoomed to fit the width of a PDF reader window.
Fit visible
Generate a PDF file that displays the text and graphics on the page zoomed to fit the width of a PDF reader window.
Zoom factor
Enter a zoom factor which determines when a PDF reader opens a PDF file.
Page layout
Default
Generate a PDF file that displays the pages according to the layout setting of the PDF reader application.
Single page
Generate a PDF file that displays one page at a time.
Continuous
Generate a PDF file that displays pages in a continuous vertical column.
Continuous facing
Generate a PDF file that displays pages side by side in a continuous column. For more than two pages, the first page is displayed on the right.
First page is left
Generate a PDF file that shows pages side by side in a continuous column. For more than two pages, the first page is displayed on the left. Complex Text Layout must be enabled in Tools > Options > Language Settings > Languages (macOS LibreOffice > Preferences Language Settings > Languages) for this option to be available.
The User Interface page in the PDF Options dialog (Figure 4), allows users to specify how the interface for an external PDF viewer will appear. If you need to create a PDF file that will be used as a presentation or a kiosk-type display, these options are useful.
Window Options
Resize window to initial page
Generate a PDF file that is shown in a window displaying the whole initial page.
Center window on screen
Generate a PDF file that is shown in a PDF reader application that is centered on the display.
Open in full screen mode
Generate a PDF file that is shown in full screen in a PDF reader window and in front of all other windows.
Display document title
Generate a PDF file that will display the file title in the PDF reader’s title bar.
Figure 4: PDF Options dialog — User Interface page
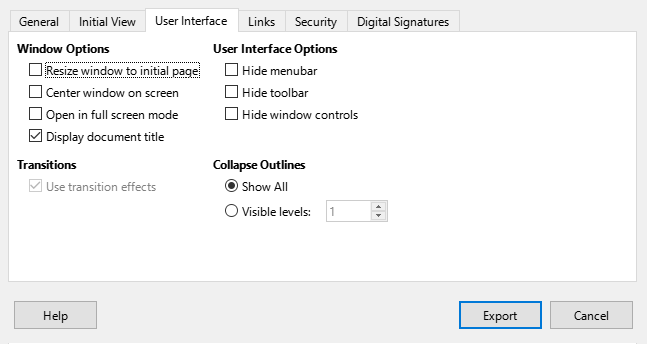
User Interface Options
Hide menubar
Hide the menu bar when a PDF file is active.
Hide toolbar
Hides the toolbar when a PDF file is active.
Hide window controls
Hides the reader controls when a PDF file is active.
Transitions
Use transition effects
Exports Impress slide transition effects to respective PDF effects.
Collapse Outlines
Show All
Select to show all outline levels as bookmarks when a PDF reader opens a PDF file.
Visible levels
Select to show bookmarks down to the selected level when a PDF reader opens a PDF file.
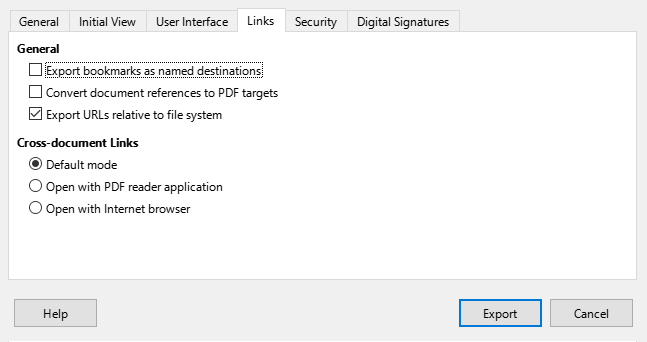
The PDF Options dialog Links page (Figure 5) specifies how outlines and hyperlinks will be exported in a document.
Figure 5: PDF Options dialog — Links page
General
Export outlines as named destinations
The bookmarks (targets of references) in PDF files are defined as rectangular areas. Additionally, bookmarks to named objects are defined by their names. A checkbox can allow you to export the names of objects in a document as valid bookmark targets. This allows objects to be exported by name from other documents.
Convert document references to PDF targets
This option automatically converts filename extensions in URLs from ODF to PDF. In the referencing URLs, the extensions .odt, .odp, .ods, .odg, and .odm are converted to the extension .pdf.
Export URLs relative to file system
This option allows URLs to be exported to other documents as relative URLs in the file system.
Cross-document links
Default mode
All links from a PDF document to other documents are handled as specified in the computer operating system.
Open with PDF reader application
Cross-document links are opened with the PDF reader application that currently shows the document. The PDF reader application must be able to handle the specified file type inside the hyperlink.
Open with Internet browser
Cross-document links are opened with a web browser. The web browser must be able to handle the specified file type inside the hyperlink.
The Security page in the PDF Options dialog (Figure 6) specifies the security options used by an exported PDF file.
Figure 6: PDF Options dialog — Security page
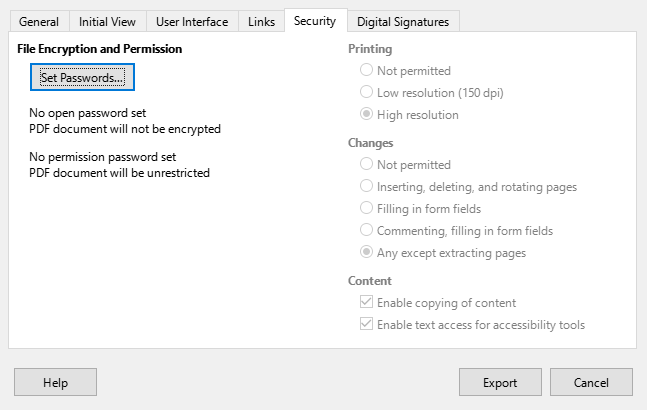
Note
The document permission restrictions set by a password are observed only by PDF readers compliant with the version 1.5 of the PDF format. For older PDF readers, these restrictions may have no effect.
File Encryption and Permission
Set passwords
Opens a dialog box where passwords are entered. Specify a password required for viewing a PDF file. Enter an optional password that allows a user viewing the PDF to edit and/or print the document.
Printing
Not permitted
Users will not be able to print the document.
Low resolution (150 dpi)
The document can only be printed in low resolution (150 dpi). However, some PDF readers ignore this option.
High resolution
The document can be printed in high resolution.
Changes
Not permitted
The content of the PDF file cannot be changed.
Inserting, deleting, and rotating pages
Inserting, deleting, and rotating pages will be permitted.
Filling in form fields
Filling in form fields is permitted.
Commenting, filling in form fields
Only commenting and filling in form fields is permitted.
Any except extracting pages
All changes are permitted, except extracting pages.
Contents
Enable copying of content
Content can be copied to the clipboard.
Enable text access for accessibility tools
Select to enable text access for accessibility tools.
The PDF Options dialog’s Digital Signatures page in Figure 7 specifies how the exported PDF file can be digitally signed.
Figure 7: PDF Options dialog — Digital Signatures page
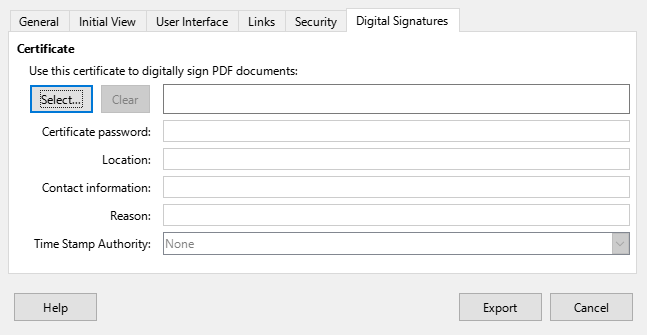
Digital signatures are used to ensure that the PDF was really created by the original author and that the document has not been modified since it was signed.
The signed PDF export uses the keys and X.509 certificates already stored in a default key store location, or on a smart card.
When using a smart card, it must already be configured for use by a key store. This is usually done during installation of smart card software.
Certificate
Use this certificate to digitally sign PDF documents
Allows users to select a certificate to be used for signing a PDF export.
Select
Opens the Select Certificate dialog.
All certificates found in the selected key store are displayed. If the key store is protected by a password, there is a prompt to enter a password. When using a smart card that is protected by a PIN, there is a prompt to enter the PIN.
Select the certificate to use for digitally signing the exported PDF by clicking on the corresponding line, then click OK.
All other fields on the Digital Signatures page are only accessible after a certificate has been selected.
Certificate password
Enter the password that will be used to protecting the private key associated with the selected certificate. Usually this is the key store password.
Notes
If the key store password has already been entered in the Select Certificate dialog box, the key store may already be unlocked and not require the password again. But to be on the safe side, enter the password.
When using a smart card, enter the PIN here. Some smart card software prompts you to enter the PIN again before signing.
Location, Contact information, Reason
These three fields allow additional information to be entered about the digital signature that is applied to the PDF (where, by whom and why it was made). It is embedded in the appropriate PDF fields and is visible to anyone viewing the PDF. Each, or all of the three fields, are optional and may be left blank.
Time Stamp Authority
The PDF signing process uses the Time Stamp Authority (TSA) to obtain a digitally signed timestamp that is then embedded in the signature. This (RFC 3161) timestamp allows viewing of the PDF to verify when the document was signed.
If no TSA URL is selected (the default), the signature is timestamped, but it uses the current time from the local computer.
EPUB is standard for electronic book files with the extension .epub that can be downloaded and read on devices like smartphones, tablets, computers or e-readers. The EPUB format is implemented as an archive file consisting of HTML files carrying the content, along with images and other supporting files.
Writer can export a file to EPUB. A text-only document generally exports well, but some contents (such as illustrations, tables, and cross-references) may not export correctly.
If you choose to quickly export a Writer file to the EPUB file format, there is no control over content and quality of the EPUB file.
Open the Writer file that is going to be converted.
Go to File > Export As > Export Directly as EPUB on the Menu bar and the Export dialog opens.
Navigate to the folder where the EPUB file is going to be saved.
Enter a file name in the File name text box. The format of the exported file is fixed to EPUB Document (.epub).
Click on Export and the Writer file is converted to an EPUB file and saved in the selected location.
To control the content and quality of the resulting EPUB file in Writer, do the following:
Open the Writer file that is going to be converted.
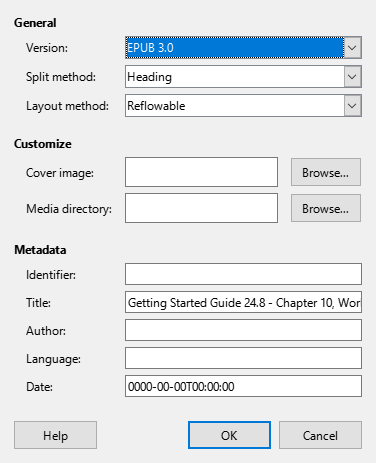
Go to File > Export As > Export as EPUB and open the EPUB Export dialog (Figure 8).
Enter the necessary information into the various options in EPUB Export dialog. For more information, refer to “EPUB export options” below.
Click OK to close the EPUB Export dialog and open the Export dialog.
Navigate to the folder where the EPUB file is going to be saved.
Enter a file name in the File name text box. The format of the exported file is fixed to EPUB Document (.epub).
Click on Export and the Writer file is converted to an EPUB file and saved in the selected location.
Figure 8: EPUB Export dialog
Tip
Other ways to export to EPUB from Writer (.odt) files include Calibre, an open source e‑book manager that runs on Windows, macOS, and Linux. Calibre provides many e‑book conversion facilities (including PDF to EPUB) and allows editing of the conversion. See https://calibre-ebook.com/ for more information.
General
Version
Sets the version of the resulting EPUB file.
Split method
Select the type of start of the next EPUB section.
Heading — Starts the next section on headings, according to the document outline numbering.
Page break — Starts the new section on a page break.
Layout method
Determines the layout that is generated for the EPUB document.
Reflowable — Content flows (or reflows) to fit the screen and to fit the needs of the user. This also means that page style information (for example, page size or header/footer content) will not be exported.
Fixed — Gives greater control over presentation when a reflowable EPUB is not suitable for its content.
Customize
Custom cover image
Enter the full path of the custom cover image file. If the entry is empty, the exporter uses the cover image in the media directory when the name is one of the following: cover.gif, cover.jpg, cover.png, or cover.svg. The custom cover image is embedded in the EPUB file.
Custom media directory
Enter the custom media directory for the EPUB file. The media directory may contain a cover image as seen above, custom metadata and image links.
By default, the exporter looks inside a folder in the current document directory with the same name of the document file name for custom media and custom metadata. For example, if the document name is MyText.odt, the default media folder for cover and metadata is MyText in the current directory.
For custom metadata, provide a file with same name as the original filename with the extension .xmp. The provided metadata overrides the internal document metadata. In the example above, the custom metadata must exist in the MyText directory as MyText.xmp.
Image links mean that if create relative links are created on images or text and they link an image that is available in the media directory, then this media is available in the EPUB export file as a pop-up.
Metadata
Identifier
Enter a unique identifier for the publication.
Title
Enter the title of the publication.
Author
Enter the Author of the publication.
Language
Language of the publication (see RFC4646 and ISO 639 for possible values).
Date
Last modification date for the publication. The value of this property must be an XML Schema date Time conformant date in the form: CCYY-MM-DDThh:mm:ssZ. Default is the date and time when the export dialogue box opened.
The easiest way to create HTML documents in LibreOffice is to start with an existing text document. For example, in Writer, go to View > Web and the view will change to show how the text document appears as a web page. However, Web view does not show which features will, or will not be saved correctly in HTML format. Refer to “HTML files using Writer/Web” below for more information on creating a web page from a text document.
Note
The use of styles in the text document is strongly recommended when saving, or exporting to HTML, or XHTML format.
Saving a text document as HTML is limited by the HTML 4.0 Transitional specification. Text documents in office suites normally use a richer set of resources that do not appear in HTML, for example page formatting. Do not expect the same layout when saving a file in HTML format.
A text document can be saved in HTML format so that it can be viewed in a web browser. To generate a separate HTML page, you can associate a page break with a specific heading paragraph style each time that style appears in the document. The Writer module automatically creates a page containing hyperlinks to each of these pages.
When you save a text document in HTML format, any graphics in the document are saved into the HTML document as embedded data streams. For graphics, JPEG, or SVG formats are saved as HTML and all other graphic formats are saved as PNG.
LibreOffice generates the image files and the HTML file necessary to create an HTML page in a browser. The number of files generated by the format conversion depends on the number of images and objects in the original text document. Refer to Table 1 for the file types created and file content when saving HTML format.
Table 1: File types created saving in HTML format
|
File |
Contents |
|
Myfile.html |
The text contents, page layout, text attributes, meta tags, and styles. |
|
Myfile_html_[random number].gif |
GIF images of visible contents of OLE objects. |
|
Myfile_html_[random number].png, jpg, or bmp |
Images inserted in the text document as PNG, BMP, or JPEG keep their original format. |
To create a HTML file from a text document, do the following:
Create a new folder which will be a location for the HTML file and images.
To open the Save As dialog, select File > Save As on the Menu bar.
Navigate to the required location in the Save As dialog.
Enter a file name for the HTML file in the File name: text box.
In File type:, select HTML Document (Writer) (.html) as the file type.
Click on Save to save the file as HTML and close the Save As dialog.
If necessary, click on Use HTML Document (Writer) Format in the Confirmation dialog that opens confirming the file is saved as HTML.
If you want LibreOffice to export a text document as a XHTML file, LibreOffice generates an XHTML file for each text document. Image files are also embedded in the XHTML file. LibreOffice-generated XHTML files have better layout rendering, but fail to render objects other than images.
If necessary, create a new folder as a location for the HTML file and images.
Go to File > Export on the Menu bar to open the Export dialog (Figure 1 above).
Navigate to the location of the new folder in the Export dialog.
Enter a file name for the HTML file in the File name: text box.
In File type:, select XHTML (Extensible Hypertext Markup Language) as the file type.
Click on Export to save the file as XHTML and close the Export dialog.
Notes
Writer does not replace multiple spaces in the original document with the HTML code for non-breaking spaces. To create extra spaces in a HTML file or web page, insert non-breaking spaces in LibreOffice. To enter non-breaking spaces, use the keyboard shortcut Ctrl+Spacebar (macOS ⌘+Shift+Spacebar).
The Tab character is not rendered when LibreOffice exports to XHTML. Instead, use borderless tables to position contents instead of the Tab character in a line. You will have to change the bullet and number lists that insert a Tab character between the bullet or number and the text—instead, create a list style where the Tab character is replaced by a space.
Objects that are different from usual image formats are not rendered in LibreOffice XHTML output. This includes drawings, spreadsheets, charts, and OLE objects in general. To render an OLE object in XHTML, replace the document’s OLE object with an image of the OLE object.
Writer can save a large document as a series of web pages (HTML files) with a table of contents page. To this, follow these steps:
Decide which heading style in a document starts a new page and make sure all those headings have the same paragraph style, for example, Heading 1.
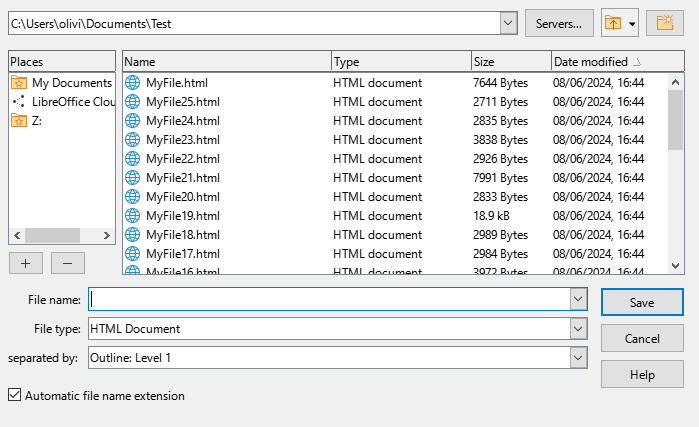
Go to File > Send > Create HTML Document on the Menu bar and open the Name and Path of the HTML Document dialog (Figure 9).
Navigate to the place where the HTML file is going to be saved.
Enter a file name in the File name: text box.
Select HTML Document from options available from the File type:.
In separated by:, select the style from the drop-down list that is going to create a new page in the HTML file, for example Heading 1.
Click on Save to create the multi-page HTML document and close the dialog. The HTML files created conform to the HTML 4.0 Transitional standard.
Figure 9: Name and Path of the HTML Document dialog
Calc can save spreadsheet files as HTML documents. If the file contains more than one sheet, the additional sheets follow each other in the HTML file. Links to each sheet are placed at the top of the HTML document. To do this task, perform the following steps:
If necessary, create a new folder as a location for the HTML file.
Open the Save As dialog by selecting File > Save As on the Menu bar.
Navigate to the required location in the Save As dialog.
Enter a file name for the HTML file in the File name: text box.
Select HTML Document (Calc) (.html) in the File type: field.
Click on Save to save the file as HTML and close the Save As dialog.
If necessary, click on Use HTML Document (Calc) Format in the Confirmation dialog that opens confirming the file is saved as HTML.
Note
Calc allows the insertion of links directly into a spreadsheet using the Hyperlink dialog. See Chapter 4, Working with Styles, Templates and Hyperlinks, for more information on hyperlinks.
Impress presentations and Draw drawings cannot properly be saved in HTML format, but can be exported as SVG documents with the Export command. To export a presentation or a drawing:
Select the slides or pages to export.
Open the Export dialog by selecting File > Export.
Navigate to the required location in the Export dialog.
Select SVG – Scalable Vector Graphics (.svg) in the File format list box.
Click on Export to export to SVG format and close the dialog.
The export SVG file contains the selected exported slides or drawing pages.
TIP
Most modern browsers can open and render SVG files. On a multi slide or page export, use the mouse wheel, mouse buttons, left and right arrows, Page Up and Page Down keys to scroll the slides or pages. You can use the browser zoom keyboard and mouse combination to enlarge or shrink the exported images. Most modern browsers also have a full-screen mode suitable to display the exported page as in a slide show.
Note
The SVG export preserves slide transition and object animation.
LibreOffice Writer has a configuration called Writer/Web that can create, edit, and save files in HTML format. Writer/Web is only available when working with documents that are in HTML format.
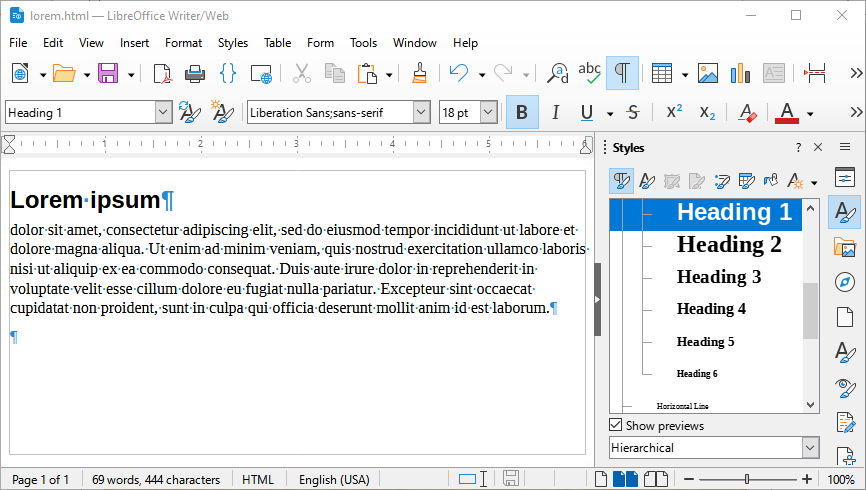
By default, Writer/Web opens an HTML file in Normal view (Figure 10). To change Writer/Web to Web view, go to View > Web on the Menu bar (Figure 11). If necessary, Normal or Web view are used to add to an HTML document, then edit and format the contents of the HTML document. The contents in an HTML document are rendered as if displayed in a browser.
Figure 10: Example of Normal view in Writer/Web
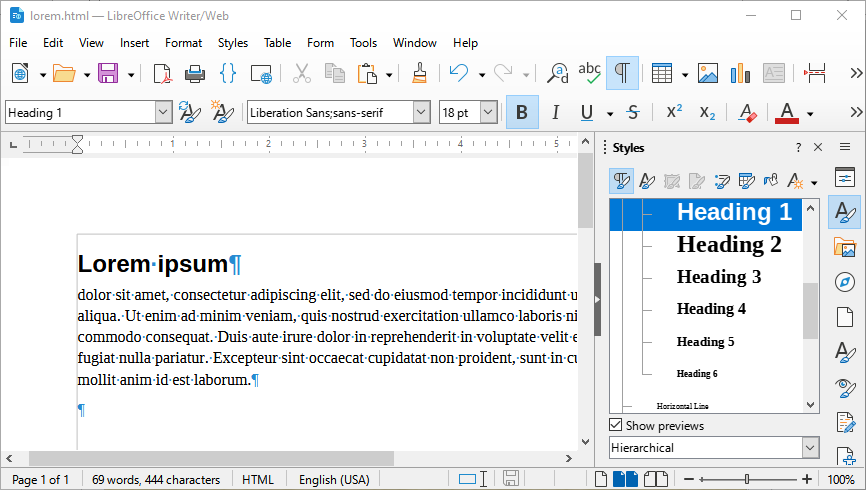
Figure 11: Example of Web view in Writer/Web
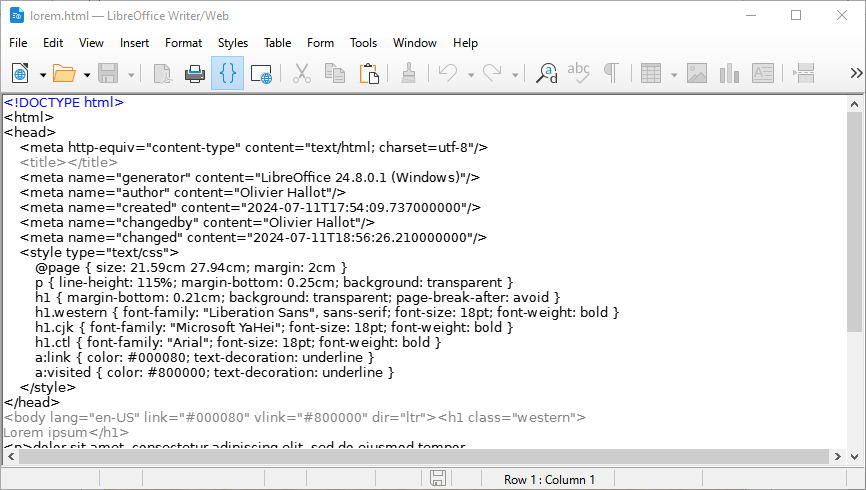
Writer/Web can also display the source code of an HTML document. Go to View > HTML Source on the Menu bar to open the source code display for an HTML document (Figure 12). The HTML Source display mode is used to change the formatting and page elements of a web page. Using this display mode for editing requires familiarity and knowledge of the HTML markup language.
Figure 12: Example of HTML Source view in Writer/Web
Notes
HTML markup language has fewer formatting options than a ODF text document. Writer/Web does not provide all formatting features for HTML documents and some formatting dialogs have fewer options available. For example, a HTML paragraph has no tab settings.
HTML markup content generated by Writer/Web is limited to the elements used to produce a displayable document in a web browser. It does not contain other components of a website such as external cascading style sheets (CSS), external JavaScript, or other script languages. When you manually insert links to any external components into the web page, you must do it in HTML Source display mode.
To create an HTML document, do the following:
Select File > New > HTML Document and Writer/Web opens a blank document in Web display mode (Figure 11).
Add content to the document by typing or pasting text, images, tables, and other objects.
Use all the formatting resources available in Writer/Web, including the capability to edit and format the content in styles.
When all editing is complete, go to File > Save As on the Menu bar and save the document in the HTML file type.
Preview the HTML document in a browser to make sure it has rendered correctly.
To edit the source code of an HTML document:
Open or create an HTML document.
Open HTML source view (Figure 12) using one of the following methods:
Go to View > HTML Source on the Menu bar.
Click on HTML source on the Standard toolbar.
Add, or edit the HTML source code.
When all editing is complete, go to File > Save As on the Menu bar and save the document as HTML file type.
Preview the HTML document in a browser to make sure it renders correctly.
It is important to preview HTML documents in a web browser to make sure it displays correctly. Since not all browsers render HTML files the same way, you should preview an HTML document in several browsers.
To make LibreOffice open the default web browser and display an HTML document, use one of the following methods:
Go to File > Preview in Web Browser on the Menu bar.
Click Preview in Web Browser on the Standard toolbar.
Open the web browser and then open the HTML file in the browser.
Go to Tools > Options > LibreOffice Writer/Web (macOS LibreOffice > Preferences > LibreOffice Writer/Web) on the Menu bar to open the Options LibreOffice Writer/Web dialog (Figure 13), and then you can define the basic settings for LibreOffice documents in HTML format. For more information on the options available for Writer/Web, go to the LibreOffice Help website.
Figure 13: Options LibreOffice Writer/Web dialog
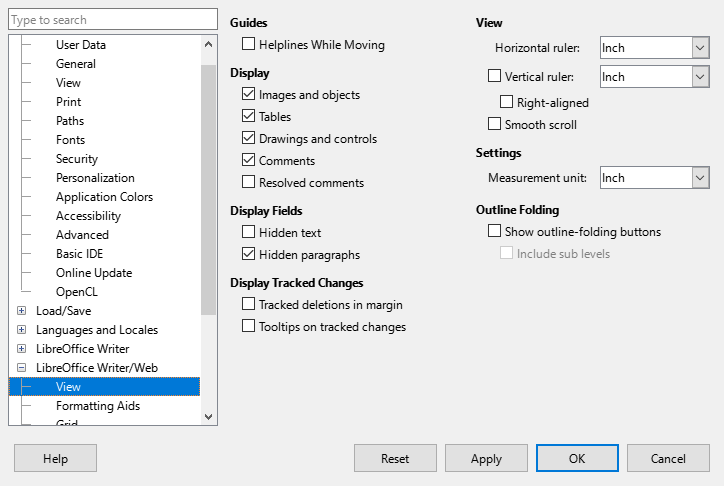
Click on a tab in the dialog to access the available options. The tabbed pages are as follows:
View
Formatting Aids
Grid
Table
Background
LibreOffice has multiple ways to send documents as email attachments in one of three formats — Open Document Format (LibreOffice default format); Microsoft Office format; Portable Document Format.
Go to File > Send on the Menu bar and use one of the following options:
Email Document — The default email program is opened and the document is attached to the email message.
Email as OpenDocument text — The default email program is opened and the document is attached to the email message.
Email as Microsoft Word — LibreOffice creates a file in Microsoft Word format, opens the default email program, and the document is attached to the email message.
Email as PDF — First, the PDF Options dialog opens. Next, select the required settings required and click OK. LibreOffice will open the default email program with the PDF file attached to the email message.
Enter the recipient name, subject, and message, then send the email.
Note
The above procedure is for sending text documents as an attachment to an email. When sending spreadsheets, presentations, or drawings, the email options change to reflect the type of document being attached to an email message.
LibreOffice can open and save files stored on remote servers. Keeping files on remote servers allows access to documents using different computers. For example, working on a document in the office during the day and edit the same document at home for last-minute changes. Storing files on a remote server also backs up documents from computer loss or hard disk failure. Some remote servers can also check-in and check-out files controlling usage and access for documents.
LibreOffice supports many document servers that use well known network protocols such as FTP, WebDav, Windows share, and SSH. It also supports popular services like Google Drive and Microsoft OneNote, as well as commercial and open source servers that implement the OASIS CMIS standard.
Access a remote server connection as follows. The following procedure is an example only. Actual procedure depends on operating system, computer setup and type of remote file service selected.
Open the Remote Files dialog (Figure 14) using one of the following methods:
Click on Remote Files in the LibreOffice Start Center.
Select File > Open Remote on the Menu bar.
Select File > Save Remote on the Menu bar.
Click on Manage Services, and select Add service to open the File Services dialog (Figure 15).
Figure 14: Remote Files dialog
Figure 15: File Services dialog
Select the type of file service required from options available in the Type drop‑down list. Depending on the file service selected, different parameters are necessary for connection to a remote server.
Enter the necessary information in the text boxes. The text boxes change depending on the type of service that has been selected in Type.
If necessary, enter a label for the remote server in the Label text box.
Click on OK to save the details and close the File Services dialog.
In the Remote Files dialog, select the service from the Service drop-down list.
Navigate to where the remote file is located and select the required file.
Click on Open to open the file and close the Remote Files dialog.
To sign a file digitally, a personal key, also known as a certificate, is required. This personal key is stored on the computer being used as a combination of a private key, which must be kept secret, and a public key. These keys are added to a drawing when a digital signature is applied. A certificate is obtained from a certification authority, which may be a private company or a government institution.
When a digital signature is applied to a document, a checksum is computed from the document content, plus the personal key being used. The checksum and public key are stored together with the document.
When the document is opened on another computer with a recent version of LibreOffice, the program computes the checksum again and compares it with the stored checksum. If both checksums are the same, the program opens the original, unchanged document.
In addition, the program can display the public key information from the certificate. This information can then be compared with the public key that is published on the web site of the certificate authority. Whenever a document is changed, this change breaks the digital signature.
For more information on digital signatures, see “About Digital Signatures” and “Applying Digital Signatures” on the LibreOffice Help website.
This is a sample method for digitally signing a document in LibreOffice. Your actual procedure depends on how your computer is set up and what operating system is being used.
Go to File > Digital Signatures > Digital Signatures on the Menu bar and open the Digital Signatures dialog (Figure 16) that lists the available digital signatures for the document.
Figure 16: Digital Signatures dialog
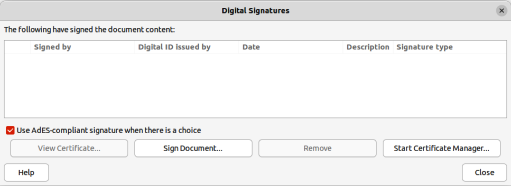
If a message box opens advising to save the document, click on Yes to save the document.
If necessary, click on Sign Document to open the Select Certificate dialog (Figure 17).
Figure 17: Select Certificate dialog
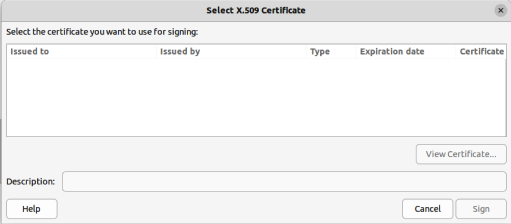
Select the required digital signature in the Select Certificate dialog.
Click on Sign to apply the digital signature to the document and close the Select Certificate dialog.
In the Digital Signatures dialog, select the required digital signature from the signature list.
Click on Close to apply the selected digital signature to the document and close the Digital Signatures dialog.
Go to File > Save on the Menu bar to save the document.
Notes
A signed document displays a Digital Signature icon in the Status Bar. Double‑click on this Digital Signature icon to view the certificate. More than one digital signature can be added to a document.
Changing an existing description invalidates a digital signature. However, multiple digital signatures from the same author are allowed, because each digital signature can have a different description.
Graphic boxes, that includes a signature line, can also be added to a document. This allows the user to optionally sign a document with their signature. This option is only available for Writer and Calc documents.
Add a graphic signature box to a Writer, or Calc document as follows:
Go to Insert > Signature Line on the Menu bar to open the Signature Line dialog (Figure 18).
Enter the necessary details and select the required options.
Click OK to close the Signature Line dialog and a graphic box with a signature line is inserted into the document. An example is shown in Figure 19.
Figure 18: Signature Line dialog
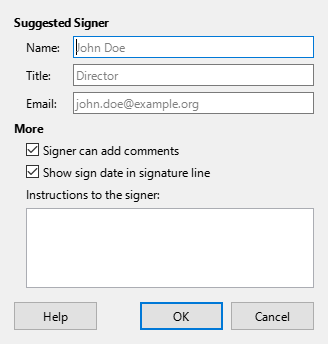
Figure 19: Example of a signature box
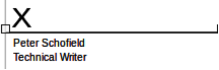
Figure 20: Drawing Object Properties dialog

Click on the signature box to select it and display the object selection handles.
Use the keyboard arrow keys to move the signature box to the required position on the page. The normal position for a signature box is at the bottom of a page.
Right click on the selected signature box to open the Drawing Object Properties toolbar (Figure 20).
Click on Select anchor for object and select the required anchor type from the options available in the drop‑down list.
If necessary, use the other tools available on the Drawing Object Properties toolbar to format the signature box to the document requirements.
Deselect the signature box to close the Drawing Object Properties toolbar.
Save the document and fix the signature box into the document.
To open a document’s Properties dialog (Figure 21), go to File > Properties on the Menu bar. The tabbed pages in the Properties dialog provides information about the document and allows the document’s properties to be changed.
Figure 21: Properties dialog
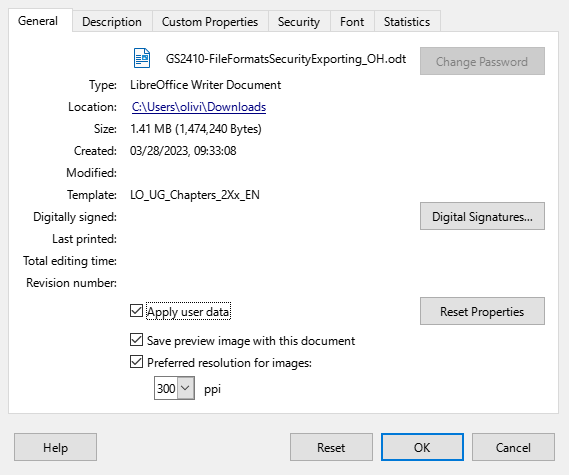
Contains basic information about the current file as follows:
File
Change Password
Type
Location
Size
Created
Modified
Template
Digitally signed
Digital Signatures
Last printed
Note
After printing, a document must be saved to preserve the Last printed data. No warning message is displayed if an unsaved document is closed.
Total editing time
Revision number
Apply user data
Reset Properties
Save preview image with this document
Preferred resolution for images
Reset
Contains optional editable descriptive information about the document, which may be exported as metadata to other file formats.
Title
Subject
Keywords
Contributor, Coverage, Identifier, Publisher, Relation, Rights, Source, Type
Comments
Tip
Title, Subject and Keywords are exported to PDF files as PDF Document Properties. Entered values are exported and appear in the corresponding fields in the PDF Document Properties Description.
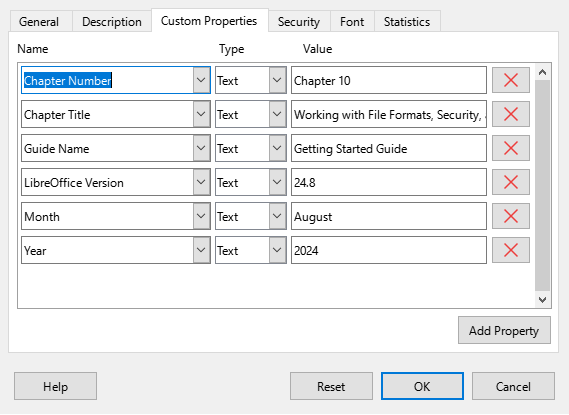
Allows custom information fields to be added to a document. In a new document, this page may be blank. If the new document is based on a template, this page may contain custom properties (Figure 22).
Properties
Add
Figure 22: Custom Properties page
Sets the password options for the current document.
Open file read-only
Note
This file sharing option protects the document against accidental changes. It is still possible to edit a copy of the document and save that copy with the same name as the original.
Record changes
Tip
To protect the recording state with a password, select Protect and enter a password. Other users of this document can apply changes, but cannot disable change recording without knowing the password.
Protect/Unprotect
When Embed fonts in the document is selected, any fonts used in the document will be embedded into the document. This may be useful if you are creating a PDF and want to control how it will look on other computer systems.
Only embed the fonts that are used in your documents. If fonts have been defined for the document (for example, in the template), but have not been used, select this option to not embed them. You can choose which types of fonts are embedded: Latin, Asian, Complex.
Font Embedding
Note
Font licenses may restrict embedding fonts in documents. Font files contain flags that indicate if and how they can be embedded within a document file. LibreOffice parses these flags and determines if and how it may be embedded in a document file. When opening a document containing embedded fonts, LibreOffice looks at these flags to determine if and how a document can be viewed or edited.
Font scripts to embed
Displays statistics for the current file, for example number of pages, words, and characters.
Document classification and security is an important issue for businesses and governments. LibreOffice has implemented the open standards produced by TSCP (Transglobal Secure Collaboration Participation, Inc.) containing three BAF (Business Authentication Framework) categories: Intellectual Property, National Security and Export Control with each category having four BAILS (Business Authorization Identification and Labeling Scheme) levels: Non-Business, General Business, Confidential, and Internal Only.
While this standard has been developed with the intent that it would be applicable in any domain of activity, LibreOffice retained the aerospace and defense industry nomenclature and categories, where sensitivity marking results from national security, export control and intellectual property policies.
To enable document classification, go to View > Toolbars > TSCP Classification on the Menu bar to open the TSCP toolbar. This toolbar contains list boxes helping in selection of security for a document. LibreOffice then adds custom fields in the document properties (File > Properties, Custom Properties on the Menu bar) to store the classification policy as document metadata.
To prevent a breach in security policy, contents with a higher classification level cannot be pasted into documents with a lower classification level.
The default BAF categories for LibreOffice are listed below.
Intellectual Property
Tip
The Intellectual Properties category modifies the layout of a document with a watermark, fields in the header and footer and an information bar on top of the document area. Each item inserted in the document is controlled by the classification configuration file.
National Security
Export Control
Note
Refer to the corporate data security policy and information security officers for support in document classification.
LibreOffice provides default levels of document classification (BAILS) shown below, sorted by increasing level of business sensitivity:
Non-Business
General Business
Confidential
Internal use only
LibreOffice allows users to customize the levels of classification for a business. To customize the number and the name of the levels, copy a file, for example example.xml, located in Tools > Options > LibreOffice > Paths > Classification (macOS LibreOffice > Preferences > LibreOffice > Paths > Classification) into a local folder and edit the contents. Save the file and make the required changes to the classification path to access the file.
Pasting contents in documents with different levels of classification prevents a breach in the security policy, contents with high classification level pasted to documents with lower classification level are not allowed. LibreOffice displays a warning message wherever it detects that the contents of the clipboard have higher security classification than the target document.
If you need to remove personal data, versions, notes, hidden information, or recorded changes are removed from a file before sending it to other users, take the following steps:
Go to Tools > Options > LibreOffice > Security (macOS LibreOffice > Preferences > LibreOffice > Security) on the Menu bar to open the Security page of the Options LibreOffice dialog.
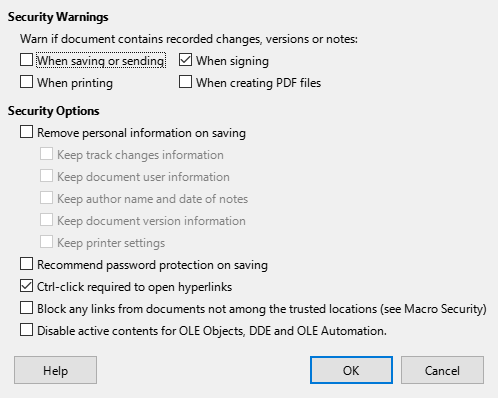
Click Options to open the Security Warnings dialog (Figure 23).
Select the required options to display warnings and/or set security options. See “Security Warnings” below for more information.
Click OK to close the Security Options and Warnings dialog.
Go to File > Properties on the Menu bar to open the Properties dialog (Figure 21 ) and click on General to open the General page.
Figure 23: Security Options and Warnings dialog
Deselect the option Apply user data and click on Reset Properties to do the following:
Removes names in the created and modified fields.
Deletes modification and printing dates.
Resets editing time to zero, creation date to the current date and time, and version number to 1.
Click OK to close the Properties dialog.
Go to File > Versions on the Menu bar, select the versions from the Existing Versions list and click Delete. Alternatively, go to File > Save As on the Menu bar and save the file with a different name.
The Security Warnings dialog allows users to set the following options:
When saving or sending
When printing
When signing
When creating PDF files
Remove personal information on saving
Recommend password protection on saving
Ctrl-click required to follow hyperlinks
Block any links from documents not among the trusted locations (see Macro Security)
LibreOffice documents can be redacted to remove, or hide, any sensitive information allowing selective disclosure of information in a document while keeping other parts of the document secret. When a LibreOffice document is redacted, it is exported as a new PDF file with all the redacted portions removed and replaced by redaction blocks of pixels preventing any attempt to restore or copy the original contents. A redacted document is exported in PDF format for publication, or sharing.
A copy of any documents redacted in LibreOffice Writer, Calc, or Impress are automatically transferred to LibreOffice Draw where the redaction is carried out.
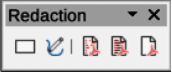
The tools available on the Redaction toolbar (Figure 24) are as follows:
Rectangle Redaction
Freeform Redaction
Redacted Export (Black)
Redacted Export (White)
Export Preview PDF
Figure 24: Redaction toolbar
A copy of a document, spreadsheet, or presentation is automatically transferred to LibreOffice Draw where the redaction is carried out.
Open the document to be redacted in LibreOffice Writer, Calc or Impress, then go to Tools > Redact on the Menu bar and the following happens:
The document is copied, prepared and transferred to LibreOffice Draw as an untitled file.
LibreOffice Draw opens with the untitled document displayed.
The Redaction toolbar automatically opens. If the Redaction toolbar is not displayed, go to View > Toolbars on the Menu bar in LibreOffice Draw and select Redaction.
Go to Tools > Redact on the Menu bar and click on Rectangle Redaction or Freeform Redaction in the Redaction toolbar.
Draw the required shapes to redact the sensitive areas in the document. The redaction shape is gray allowing the sensitive areas in the document to be visible before they are redacted.
If necessary, click on Export Preview PDF to create a preview copy of the PDF file to review the redaction areas before it is finalized.
If necessary, delete the PDF copy after reviewing the redaction areas in the file.
Click on Redacted Export (White), or Redacted Export (Black) in the Redaction toolbar to export the presentation file as a redacted PDF file.
Navigate to the folder in the file browser window that opens where the redact PDF file is going to be saved and enter a name for the file.
Click on Save to create the redacted PDF file. The gray redaction shapes are converted to white, or black shapes and the document is exported as a PDF
Open a drawing file in Draw, then use Steps 2) through 8) in “Documents, spreadsheets, or presentations” above to create a redacted PDF copy of the drawing file.
Note
When a redacted document is exported as a new PDF file, any redacted areas are removed from the new document and replaced by redacted blocks of pixels. These blocks of pixels prevent any attempt to restore, or copying the original contents that have been redacted.
When LibreOffice conducts automatic redaction, it allows the user to define words and patterns that are automatically marked for redaction. Automatic redaction is useful for documents that have multiple occurrences of names and other personal information (for example credit cards, phone numbers, and so on). Manually redacting this type information in a document would require significant effort, but automatic redaction makes redaction of a document easier and more efficient.
Targets are rules and patterns used by automatic redaction to find words and information in a document that are to be marked for automatic redaction.
Figure 25: Automatic Redaction dialog
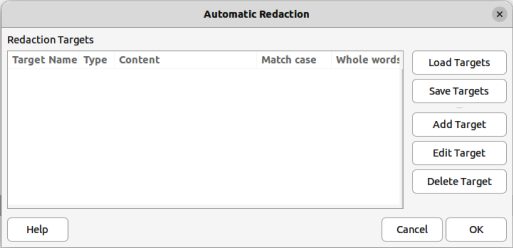
Open a document and use Tools > Auto-Redact on the Menu bar to open the Automatic Redaction dialog (Figure 25).
Click on Add Target to open the Add Target dialog (Figure 26).
Enter a target name in the Name text box.
Select a target type from the available options in the Type drop‑down list.
Figure 26: Add Target dialog
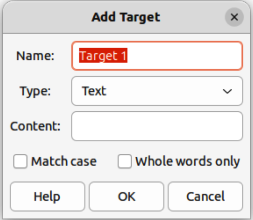
Text — automatic redaction looks for all occurrences of the specified text and marks them for redaction.
Regular expression — define a regular expression for searching in a document. All matches are marked for redaction.
Predefined — select predefined regular expressions for automatic redaction, such as credit card numbers, email addresses and so on.
Enter the content in the Content text box.
If necessary, select the options Match case and Whole words only to help define which targets are auto-redacted.
Click OK to close the Add Target dialog and the target is added to the Redaction Targets list in the Automatic Redaction dialog.
Repeat Steps 2 through 7 above until all targets required have been added to the document.
Click OK to close the Automatic Redaction dialog. This opens the document as a drawing in LibreOffice Draw with all targets automatically redacted using Rectangle Redaction.
Print the document, or export the document as a PDF file.
Open a document where targets for automatic redaction have been added.
Go to Tools > Auto-Redact on the Menu bar to open the Automatic Redaction dialog.
Select the targets for export in the Redaction Targets list.
Click on Save Targets to open the Save Targets dialog and navigate to the location where the JSON file is going to be saved.
Enter a file name for the JSON file in the File name text box.
Click on Save to save the JSON file and close the Save Targets dialog.
Click OK to close the Automatic Redaction dialog.
Open a document where targets for automatic redaction are going to be used.
Go to Tools > Auto-Redact on the Menu bar to open the Automatic Redaction dialog.
Click on Load Targets to open the Load Targets dialog and navigate to the location of the JSON file.
Select the required file and click on Open to import the targets into the document and close the Load Targets dialog.
Click OK to close the Automatic Redaction dialog. This opens the document as a drawing in LibreOffice Draw with all targets automatically redacted using Rectangle Redaction.
Print the document, or export the document as a PDF file.
Note
The automatic redaction targets are saved in a document. The targets are available after the document is saved and closed.
LibreOffice provides two types of document protection: password protection and OpenPGP encryption.
Files encrypted with the Save password option enabled cannot be decrypted without the password.
Files encrypted with OpenPGP encryption, the document is encrypted using an algorithm, which requires a key. Each key is used only once and is sent to the recipient along with the document.
LibreOffice provides two levels of password protection:
The document file cannot be opened without entering a password.
The document cannot be edited until a second password is entered.
The two options above make a document available for reading by one group of people and for reading and editing by a different group. This is compatible with Microsoft Word file protection.
Go to File > Save As on the Menu bar to open the Save as dialog.
Navigate to the folder where the file is going to be saved.
If necessary, enter a file name in the File name text box and select the file type from the available options in the File type drop‑down list.
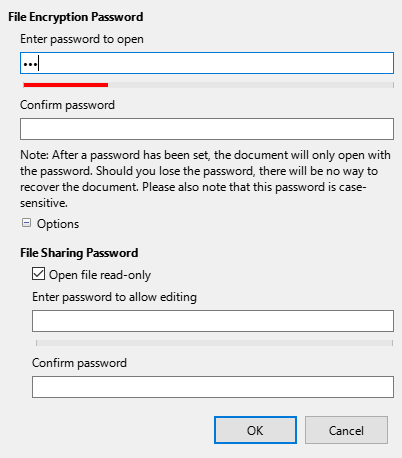
Select the Save with password option, then click on Save to open the Set Password dialog (Figure 27).
In File Encryption Password, enter a password to open the document and then enter the same password as confirmation. Passwords are case sensitive. A color password strength meter appears below the password box, where red is for weak passwords, yellow is just a bit better, blue is even better and green is a secure password.
Click on Options to open File Sharing Password.
Select Open file read-only to prevent any editing being carried out on the document.
To allow editing of the document, enter a password in Enter password to allow editing and repeat the password as confirmation.
Click OK and the Set Password dialog closes and the file is saved with password protection.
Figure 27: Set Password dialog
Notes
If the passwords match, the document is saved password protected. If either the passwords do not match, an error message is displayed.
LibreOffice uses a very strong encryption mechanism that makes it almost impossible to recover the contents of a document if the password is lost or forgotten.
When a document is password protected, the password can be changed while the document is open.
Go to File > Properties > General on the Menu bar to open the Properties dialog.
Click on Change Password to open the Set Password dialog.
Enter a new password to open the file and to allow editing of the document.
Click OK to close the Set Password dialog.
Click OK again to close the Properties dialog.
LibreOffice can encrypt documents confidentially using OpenPGP. The document is encrypted using a symmetric encryption algorithm, which requires a symmetric key. Each symmetric key is used only once and is also called a session key. The document and its session key are sent to the recipient. The session key must be sent to the recipients so they know how to decrypt the document. To protect the document during transmission, it is encrypted with the public key belonging to the recipient. Only the private key belonging to the recipient can decrypt the session key. For more information on using OpenPGP encryption, go to the LibreOffice Help website.
LibreOffice uses the OpenPGP software installed on a computer. If no OpenPGP software is available, download and install OpenPGP software that is compatible with the computer operating system before using OpenPGP encryption.
A personal pair of cryptography keys must be defined using the OpenPGP software. Refer to the OpenPGP software installed on how to create a pair of keys.
OpenPGP encryption requires the use of the public key belonging to the recipient. This key must be available in the OpenPGP key chain stored in the computer.
The following is an example of how to use OpenPGP encryption on a document:
Set the preferred public key for OpenPGP encryption and digital signature. This preferred key is pre-selected in the key selection dialog each time a document is signed or encrypted. This removes the requirement to select the preferred key when frequently signing a document with one specific key.
Go to Tools > Options > LibreOffice > User Data (macOS LibreOffice > Preferences > LibreOffice > User Data) on the Menu bar and select the following options in the Cryptography section:
OpenPGP signing key — select an OpenPGP key from the drop-down list for signing ODF documents.
OpenPGP encryption key — select an OpenPGP key from the drop-down list for encrypting ODF documents.
When encrypting documents, always encrypt to self — select this option to also encrypt the file with a public key, allowing the document to be opened with a private key.
Caution
Keep this option selected to allow decryption of documents that have been encrypted for other people. If not selected, you will not be able to decrypt your own files.
Go to File > Save As on the Menu bar to open the Save as dialog.
Navigate to the required location for the file, then enter a file name and file type in the Save as dialog.
Select Encrypt with GPG key option and click on Save to open the Select X.509 Certificate dialog.
Select the public key for the recipient. Multiple keys can be selected.
Click Encrypt to close the dialog and save the file encrypted with the selected public keys.