
Getting Started Guide 7.5
This document is Copyright © 2023 by the LibreOffice Documentation Team. Contributors are listed below. This document may be distributed and/or modified under the terms of either the GNU General Public License (https://www.gnu.org/licenses/gpl.html), version 3 or later, or the Creative Commons Attribution License (https://creativecommons.org/licenses/by/4.0/), version 4.0 or later. All trademarks within this guide belong to their legitimate owners.
Contributors for this edition:
Peter Schofield
Nay Catina Dia-Schneebeli
Contributors for previous editions:
Dave Barton
Felipe Viggiano
Jean Hollis Weber
Kees Kriek
Oliver Hallot
Paul Figueiredo
Skip Masonsmith
Steve Fanning
Please direct any comments or suggestions about this document to the Documentation Team forum at https://community.documentfoundation.org/c/documentation/loguides/ (registration is required) or send an email to: loguides@community.documentfoundation.org.
Note
Everything sent to a mailing list, including email addresses and any other personal information that is written in the message, is publicly archived and cannot be deleted.
Published March 2023. Based on LibreOffice 7.5 Community.
Other versions of LibreOffice may differ in appearance and functionality.
Some keystrokes and menu items are different on macOS from those used in Windows and Linux. The table below gives some common substitutions used in this document. For a detailed list, see LibreOffice Help.
|
Windows or Linux |
macOS equivalent |
Effect |
|
Tools > Options |
LibreOffice > Preferences |
Access setup options |
|
Right-click |
Control+click, Ctrl+click, or right-click depending on computer setup |
Open a context menu |
|
Ctrl or Control |
⌘ and/or Cmd or Command, depending on keyboard |
|
|
Alt |
⌥ and/or Alt or Option depending on keyboard |
Used with other keys |
|
F11 |
⌘+T |
Open the Styles deck in the Sidebar |
Adding image and graphic files to LibreOffice documents consist of the following types:
Image and graphic files, for example photos, drawings, PDF documents, and scanned images.
Diagrams created using LibreOffice Draw.
Artwork created using clipart or Fontwork.
Charts created using LibreOffice Calc.
Images, clipart and diagrams from the LibreOffice Gallery.
This chapter provides basic instructions and information for image and graphic files. For more detailed information and instructions on image and graphic files, see the specific user guide available for each LibreOffice module.
Image and graphic files are created using a graphics program, scanning, or downloading from the Internet, or photos from a digital camera. When downloading image and graphic files from the Internet, make sure the licensing, or copyright, allows the use of an image or graphic.
LibreOffice can import, rotate and flip various vector (line drawing) image and graphic files. LibreOffice also supports raster (bitmap) file formats and the most common formats for raster files are GIF, JPG, PNG, and BMP. See Appendix B for a full list of image and graphic formats that LibreOffice can import.
LibreOffice can also import SmartArt images from Microsoft Office files. For example, Writer can open a Microsoft Word file that contains SmartArt and edit the SmartArt images.
To edit photos and other bitmap images, use a bitmap editor. To edit line drawings, use a vector drawing program. There is no need to use additional graphic applications because LibreOffice Draw has the capability to edit images and graphics.
Freely available Open-source tools are also a good alternative when editing image and graphic files, for example GIMP (bitmap editor) and Inkscape (vector drawing program). Open-source tools and many other Open-source applications work on Windows, macOS, and Linux operating systems.
Image and graphic files can be added to a document using one of the following methods:
Inserting a file directly from a graphics program, or a scanner.
Dragging images and graphics from a clipart gallery.
Copying and pasting from a source on a computer.
When an image, or graphic, file is available on the computer being used, the file is inserted into a LibreOffice document using one of the following methods. These insertion methods are only examples because actual insertion does depend on the following:
Computer operating system.
Computer setup.
LibreOffice module being used.
Dragging and dropping embeds a copy of the file into a document.
1) Open a file browser window and locate the file to be inserted.
2) Drag the file into the LibreOffice document and drop it on the selected page.
Note
To link an image, or graphic, file instead of embedding, hold down the Ctrl+Shift keys (macOS ⌘+Shift) while dragging the file.
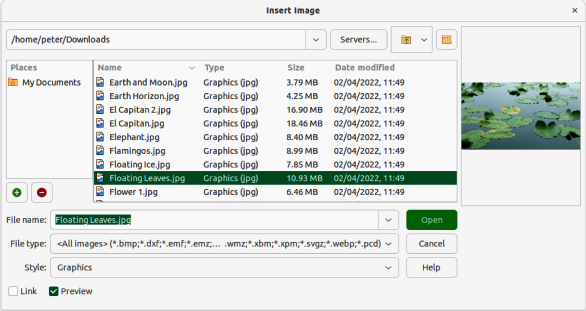
1) Open a LibreOffice document and click on the page where the image, or graphic, is to be inserted.
2) Go to Insert > Image on the Menu bar to open the Insert Image dialog (Figure 1). This dialog is similar to a file browser window.
3) Navigate to where the file is located and select it. If the Preview option is selected in the Insert Image dialog, a preview of the selected image, or graphic, appears in the Preview box.
4) Click on Open and the image, or graphic, is embedded into the document and Insert Image dialog closes.
Figure 1: Insert Image dialog
5) If the image, or graphic, is going to be linked and not embedded, select the Link option before clicking Open.
Note
If the Link option is selected, a message box appears when Open is clicked and the Confirm Linked Graphic dialog opens. Select Keep Link to the link the file, or Embed Graphic to embed the image, or graphic. To prevent this message from appearing again, deselect the option Ask when linking a graphic. When inserting the same image, or graphic, several times in a document, LibreOffice embeds only one copy of the file.
1) Open both the source and target documents.
2) In the source document, select the image to be copied and copy the image to the clipboard.
3) In the target document, click at the position where the image is to be placed.
4) Paste the image from the clipboard into the document.
Note
If the source document is closed before the image is pasted into the target document, the image stored on the clipboard could be lost.
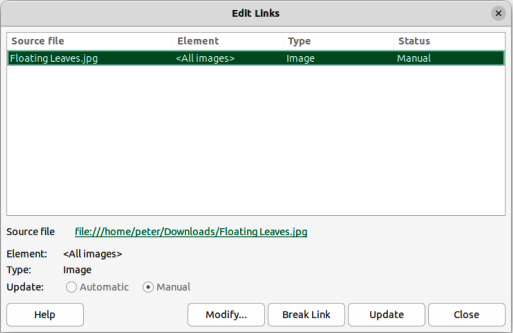
Embedding linked image, or graphic, files breaks the link to the file and becomes part of the document. Linked images, or graphics can be embedded as follows:
1) Open a document in LibreOffice and go to Edit > External Links on the Menu bar to open the Edit Links dialog (Figure 2).
2) Select the files that are going to be embedded.
3) Click on Break Link, then click Yes to confirm embedding the files.
Figure 2: Edit Links dialog
When linking images, or graphics, LibreOffice creates a link to the file instead of saving a copy of the file in a document. The result is that the image, or graphic, is displayed in the document. However, when the document is saved, it contains only a reference to the linked file, not the file itself. The document and the image, or graphic, remain as two separate files reducing file size.
Advantage
Advantage
Disadvantage
If a scanner is connected to a computer, LibreOffice can use the scanning software to scan an image, graphic, or document, then place the scanned media into the open document. The following scanning procedure is an example of how to insert scanned media into a document.
1) Go to Insert > Media > Scan > Select Source on the Menu bar and select the scanning source from the list of available devices.
2) Click in the document where the scanned media is to be inserted.
3) Place the media for scanning onto the selected scanner.
4) Go to Insert > Media > Scan > Request on the Menu bar to open the scanning software.
5) Click on Preview in the scanning software to scan the media and a preview image appears in the scanning software.
6) Adjust settings for image quality, size, and other attributes in the scanning software.
7) Click on Scan in the scanning software and the media is scanned. A scanned copy of the media is inserted into the LibreOffice document.
8) Click on Close in the scanning software to close the scanning application.
Note
The scanning software must be an application that LibreOffice recognizes and is compatible to scan and insert media into a document.
After a scanning sources has been selected, LibreOffice remembers the selected scanning source. This eliminates the need to select a scanning source each time scanned media is inserted into a document.
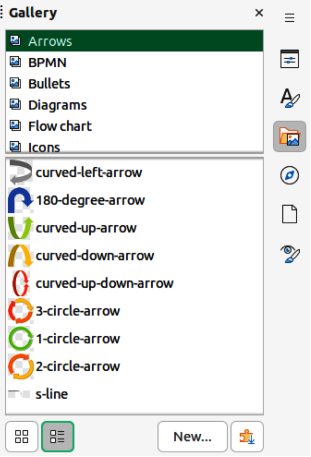
Figure 3: Gallery deck in Sidebar — Icon View
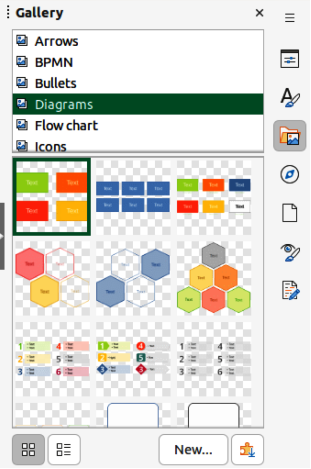
The Gallery (Figure 3) provides a convenient way to insert media, such as graphics and sounds, into documents. The Gallery is available in the Writer, Calc, Impress, and Draw modules of LibreOffice. When copied, Gallery images are embedded into a document, but can also be linked to the Gallery image. See “LibreOffice Gallery” on page 1 for more information.
1) Click on Gallery on the right side of the Sidebar, or use the keyboard shortcut Ctrl+Alt+3 (macOS ⌘+⌥+3) to open the Gallery deck.
2) Select a Gallery theme from the list provided.
3) Select the required image from the displayed images with a single click.
4) To insert the required image into the document use one of the following methods:
Drag and drop the image into the document.
Right‑click on the image and select Insert in the context menu. This places the image in the center of the document.
5) To insert an image as a link, hold down the Shift and Ctrl (macOS ⌘) keys, then drag and drop the object into the document.
LibreOffice provides many tools for editing images and graphics. These tools are described in more detail in the relevant user guide for each LibreOffice module. Editing images, or graphics, consists of the following:
Cropping, resizing, modifying, filtering, and positioning.
Wrapping text around images.
Using images as backgrounds and watermarks.
For complex editing, it is recommended to use a graphics application, such as Gimp, or Inkscape. The edited image, or graphic, can then be inserted into LibreOffice.
When an image is inserted, or an image is selected in the document, the Image toolbar opens automatically. If the Image toolbar does not open, go to View > Toolbars on the Menu bar and select Image from the submenu. Two other toolbars also become available when an image is selected:
Image Filter toolbar, which can be used as a floating toolbar.
Color toolbar, which opens as a separate floating toolbar.
Using these three toolbars together, corrections and adjustments can be applied to an image. Also, special effects can be applied, such as transparency, color adjustment, flipping and rotation, and special effect filters.
If only a part of an image, or graphic, is to be used in a document, it can be cropped. LibreOffice provides two ways to crop an image, or graphic:
Crop tool — available as a tool on toolbars, or in a context menu after right‑clicking on an image, or graphic. The Crop tool provides a quick and easy way to crop an image, or graphic.
Crop page in the Writer Image dialog — accessed by right‑clicking on the image, or graphic, and selecting Properties in the context menu. The Crop page provides more control when cropping.
Note
When an image, or graphic, is inserted into a LibreOffice document and is cropped, the image, or graphic, itself is not cropped. LibreOffice masks the parts of the image, or graphic, that have been cropped. If the document is exported as HTML, the original image, or graphic, is also exported. For exporting individual cropped images, or graphics, see “Exporting” on page 1.
To fit an image, or graphic, into a LibreOffice document, it may have to be resized. The quickest way to resize an image, or graphic, is to use the selection handles as shown by the following example.
1) Click on an image, or graphic, to display the selection handles.
Figure 4: Example of resizing an image
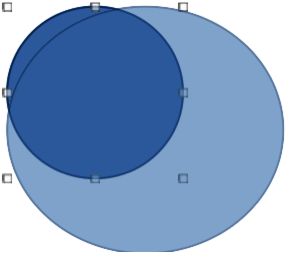
2) Position the cursor over one of the selection handles and the cursor changes shape, giving a graphical representation of the resizing direction as follows:
Corner handles simultaneously resizes both width and height of an image.
Horizontal handles resizes the height of an image.
Vertical handles resizes the width of an image.
3) Click on a selection handle and drag to resize the image, or graphic. During resizing, a ghost image appears helping to resize an image, or graphic, (Figure 4).
4) To maintain the original height and width proportions of an image while dragging using a selection handle, hold down the Shift key before dragging a selection handle. Remember to release the Shift key before releasing the selection handle.
After inserting an image, or graphic, into a LibreOffice document, it may have to be repositioned to achieve the correct document format. The quickest way to resize an image, or graphic, is to use the cursor as shown by the following example.
1) Select an image, or graphic, to display the selection handles.
2) Move the cursor over a selected image, or graphic, and the cursor changes shape to a grabbing cursor. The grabbing shape depends on the computer setup and the computer operating system.
3) Click and drag the selected image, or graphic, to the desired position. During movement, a ghost image appears helping with repositioning (Figure 5).
4) Release the cursor when the image, or graphic, is in the desired position.
Tip
The arrow keys on the keyboard can also be used to quickly move a selected image, or graphic, into a new position.
Figure 5: Example of positioning an image
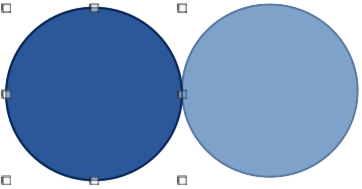
Figure 6: Example of rotating an image
After inserting an image, or graphic, into a LibreOffice document, it can be rotated to achieve the correct document format. The quickest way to rotate an image, or graphic, is to use the cursor as shown by the following example.
1) Click on an image, or graphic, to display the selection handles.
2) Click again (NOT double‑click) on the selected image, or graphic, switching on rotation mode, or go to Format > Rotate on the Menu bar.
Note
Using a double‑click on an image, or graphic, switches on text editing mode for the selected image, or graphic.
3) Move the cursor over one of the corner handles and the cursor changes shape indicating the movement direction.
4) Click on a corner selection handle and move in the direction required to rotate the object. Only the corner selection handles are active for rotation.
5) When satisfied with the rotation, release the cursor.
6) To change the rotation center of the object, click and drag the central pivot point to the desired position before rotating. The central pivot point can be moved to any position on the document, even outside of the image boundaries.
7) To restrict the rotation angles to multiples of 15 degrees, press and hold the Shift key while rotating the image. This is useful for rotating images through a right angle, for example from portrait to landscape. Remember to release the Shift key before releasing the cursor.
After inserting an image, or graphic, into a LibreOffice document, it can be flipped either vertically, or horizontally. Depending on which LibreOffice module is being used, use one of the following methods to quickly flip an image, or graphic:
Right-click on the selected image, or graphic, and select Flip > Vertically or Horizontally from the context menu.
Click on Vertically, or Horizontally on the Line and Filling toolbar.
Click on Flip Vertically, or Flip Horizontally on the Image toolbar.
Go to Format > Flip > Vertically, or Horizontally on the Menu bar.
Go to Format > Rotate or Flip > Flip Vertically, or Flip Horizontally on the Menu bar
Click on Flip Vertically, or Flip Horizontally in the Position and Size panel on the Properties deck of the Sidebar.
LibreOffice organizes images and graphics in a stack. The image, or graphic, on the top level of a stack covers the images and graphics on the lower levels, if any overlapping occurs. Select images, or graphics, and use one of the following methods to change the stack level:
Click on the required arrange tool on the Line and Filling toolbar.
Right-click on selected objects and select Arrange from the context menu, then select the required arrange option from the sub-context menu.
Go to Format > Arrange on the Menu bar and select an option from the submenu.
Use the keyboard shortcut available for each arrangement option.
The stack level of each image, or graphic, can be changed. The options available for arranging the stack level of images, or graphics are as follows:
Bring to Front
Bring Forward
Send Backward
Send to Back
In Front of Object
Behind Object
Reverse
When an image, or graphic, is added to a document, the alignment and positioning has to be selected in respect to text and other objects on a document page.
Arrangement
Alignment
Anchoring
Text wrapping
One or both sides of the image, or graphic.
Above or below of the image, or graphic.
Allow text overprint of the image, or graphic.
Allow of the image, or graphic, to cover the text.
Treat the image, or graphic, as a separate paragraph, or character.
To use another graphics application to edit an image, or graphic, the file is exported directly from the document. The following procedure is an example only. Actual procedure depends on the computer operating system and computer setup.
1) Right-click on the image, or graphic.
2) Select Save from the context menu to open the Image Export dialog (Figure 7).
3) Navigate to the folder where the image, or graphic, is going to be exported to.
4) Enter a file name in the File name text box and select the file type from the options available from the drop-down list in File type.
5) Click on Save to export the file and close the dialog.
6) Open the graphics program, then navigate to the folder where the file is located.
7) Carry out the necessary editing to the file and save the file in the required format. The image, or graphic, can then be re-inserted back into the document.
Figure 7: Image Export dialog
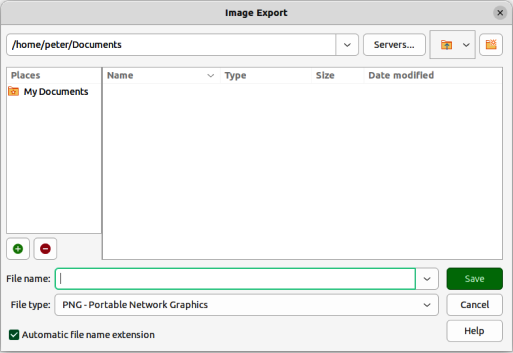
Figure 8: Compress Image dialog
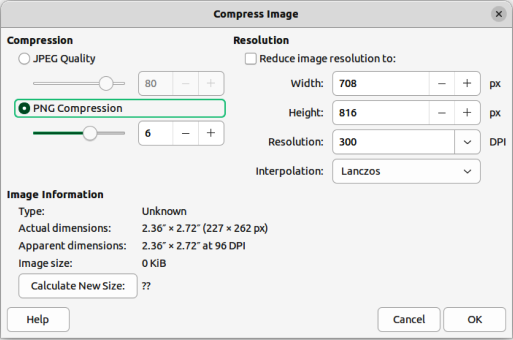
If an image, or graphic, has a large file size, it can be compressed to reduce the file size. This results in a smaller file size for the document, but may result in a loss of quality when the image, or graphic, is compressed. The following procedure is an example only. Actual procedure depends on the computer operating system and computer setup.
1) Right-click on the image, or graphic.
2) Select Compress from the context menu to open the Compress Image dialog (Figure 8).
3) Use options available in Compression and Resolution to compress the image, or graphic.
4) If necessary, click on Calculate New Size and check the file file size of the compressed image, or graphic.
5) Click on OK to save the changes and close the dialog.
6) If the resulting image is not acceptable, undo the changes and repat the procedure using different compression settings.
Graphics in the Gallery are grouped by themes, such as Arrows, Diagrams, and Icons, and are installed when LibreOffice is installed on a computer. The Gallery can be displayed in Icon View (Figure 3 above), or Detailed View (Figure 9).
The Gallery deck on the Sidebar contains a collection of images and graphics that can be used in a document. Images and graphics can also be added to the Gallery, making it an essential tool for inserting images and graphics into a document quickly. The Gallery is available for all LibreOffice modules.
1) Open the Gallery deck in the Sidebar using one of the following methods:
Go to Insert > Media > Gallery on the Menu bar.
Click on Gallery in the Sidebar.
Figure 9: Gallery deck on Sidebar — Detailed View
2) Select a theme from the available themes and the images and graphics for that theme are displayed.
3) Scroll through the available images and graphics and select the required image or graphic.
4) Click and hold on the image or graphic and drag it onto the slide. Release the hold and the image or graphic is inserted centrally onto the page.
5) Format the image or graphic to the document requirements.
Images and graphics in the Gallery are grouped by themes, such as Arrows, Bullets, Diagrams and so on. These default themes are listed alphabetically in the box at the top of the Gallery deck on the Sidebar. Click on a theme name to see its images and graphics displayed in the Gallery deck.
The Gallery default themes are read-only. No images or graphics can be added to or deleted from these themes. The default themes are easily identified by right-clicking on a theme name and the only available option in the context menu is Properties.
Custom themes, when added to the Gallery, are the only themes where images and graphics can be added. Custom themes are listed alphabetically, along with the default themes, in the box at the top of the Gallery deck on the Sidebar. Custom themes are easily identified by right-clicking on a theme name and the options available in the context menu are Delete, Rename, and Properties.
Custom themes can also be added to the Gallery to hold any images or graphics that are used frequently. For example, a company logo, or images and graphics that are used for specific projects.
Tip
Gallery themes are available from the LibreOffice extensions website at https://extensions.libreoffice.org/. This website also includes themes from previous versions of LibreOffice that are no longer installed when newer versions of LibreOffice are installed. See Chapter 13, Customizing LibreOffice for information on managing extensions.
1) Open the Gallery deck in the Sidebar using one of the following methods:
Go to Insert > Media > Gallery on the Menu bar.
Click on Gallery in the Sidebar.
2) Click New at the bottom of the Gallery deck and the Properties of New Theme dialog opens (Figure 10).
3) Click on General and type a name for the new theme in the text box.
4) Click OK to save the new theme and close the dialog. The new theme is displayed in the list of themes in the Gallery.
Figure 10: Properties of New Theme dialog — General page
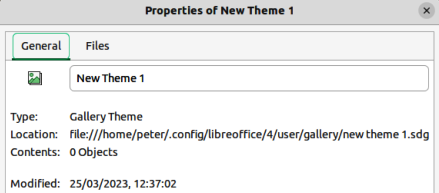
Figure 11: Properties of New Theme dialog — Files page
Note
The name of the Properties of New Theme dialog changes to show the name of the newly created custom theme in the Gallery deck.
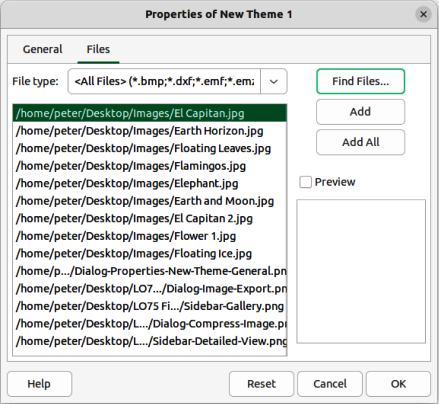
1) Right-click on a custom theme name in the theme list on the Gallery deck and select Properties from the context menu to open the Properties of New Theme dialog.
2) Click on Files to open the Files page (Figure 11), then click on Find Files to open a Select Path dialog.
3) Navigate to the folder that contains the images and graphics required and select the folder.
4) Click OK to close the Select Path dialog. The files contained in the folder appear in the Properties of New Theme dialog.
5) If necessary, select Preview and any image or graphic selected appears in the preview box.
6) Select the files required for the custom theme and click on Add. The added files disappear from the file list and the images and graphics appear in the custom theme on the Gallery deck.
7) To add all the files in the list, then click Add All. All the files disappear from the list and the images and graphics appear in the custom them on the Gallery deck.
8) Click OK and close the Properties of New Theme dialog.
Only images and graphics added to a custom themes can be deleted.
1) Open the Gallery deck and select a custom theme.
2) Right-click on the image or graphic and select Delete from the context menu.
3) Click Yes in the confirmation message to delete the image.
Note
Images and graphics in custom themes are linked files and are deleted from the Gallery only. The original image and graphic files are not deleted.
All images and graphics in the Gallery are linked files. It is recommended that any custom themes are updated on a regular basis to make sure that all the files are still available.
1) Open the Gallery deck and select a custom theme that contains at least one image or graphic.
2) Right-click on the name of the selected custom theme.
3) Select Update from the context menu and the links to all the image and graphic files are updated.
Images and graphics in the Gallery can be located anywhere on a computer, or a network drive. When adding graphics to the Gallery, the files are not moved or copied. Only the location of each image or graphic added to the Gallery is used as a reference.
The location of the Gallery is specified in Tools > Options > LibreOffice > Paths (macOS LibreOffice > Preferences > LibreOffice > Paths). If necessary, this location can be changed and gallery files (*.sdv) can be copied to other computers.
Gallery contents provided with LibreOffice are stored in a different location. You cannot change this location.
Note
The location of Gallery themes installed using LibreOffice extensions are determined by the extension settings.
Figure 12: Image Map Editor dialog
An image map defines areas of an image (called hotspots) with hyperlinks to web addresses, other files on the computer, or parts of the same document. Hotspots are the graphic equivalent of text hyperlinks (for more information, see Chapter 4, Working with Styles, Templates, and Hyperlinks).
Clicking on a hotspot causes LibreOffice to open the linked page in the appropriate program (for example, the default browser for an HTML page; LibreOffice Calc for an ODS file; a PDF viewer for a PDF). Hotspots can be in various shapes and several hotspots can be included on the same image.
1) In a LibreOffice document, select the image where hotspots are going to be defined.
2) Go to Tools > ImageMap on the Menu bar to open the ImageMap Editor dialog (Figure 12). The main part of the dialog displays the image where hotspots are to be defined.
3) Use the tools and fields in the dialog to define the required hotspots and links. A hotspot is identified by a line indicating its shape. The information needed for the hotspot includes the address pointed to by the hyperlink and the text to be displayed when the cursor is moved over the hotspot.
4) Click on Apply to apply the settings.
5) Click Save to save the image map to a file, then close the dialog.
The toolbar at the top of the dialog contains the following tools and text boxes to specify the properties of an image map:
Apply
Open
Save
Close
Select
Rectangle, Ellipse, Polygon and FreeForm Polygon
Edit Points, Move Points, Insert Points, Delete Points
Undo
Redo
Active
Macro
Properties
Address
Text
Frame
_blank
Opens in a new browser window.
_self
Default selection and opens in the current window.
_top
File opens in the topmost frame in the hierarchy.
_parent
File opens in the parent frame of the current frame. If there is no parent frame, the current frame is used.
Note
The value _self for the target frame works in the vast majority of occasions. It is not recommended to use the other selections unless absolutely necessary.
Drawing tools in LibreOffice are used to create graphics consisting of rectangles, circles, lines, text, and other predefined shapes. Also several graphics can be grouped to maintain their relative position and proportion with each other. Graphics are placed directly on a page in a document, or inserted into a frame.
Tip
When creating complex drawings, it is recommended to use LibreOffice Draw to make use of more advanced drawing features, for example drawing layers and styles.
An example Drawing toolbar is shown in Figure 13. If the Drawing toolbar is not displayed, it can be opened by going to View > Toolbars > Drawing on the Menu bar, or by clicking on Show Draw Functions on the Standard toolbar.
The default tools available on a Drawing toolbar do vary slightly between the LibreOffice modules. Tools can be added to a Drawing toolbar using Visible Buttons, or customizing the toolbar. See Chapter 12, Configuring LibreOffice, Chapter 13, Customizing LibreOffice for more information, or the specific user guide for each LibreOffice module.
Figure 13: Drawing toolbar — Writer module
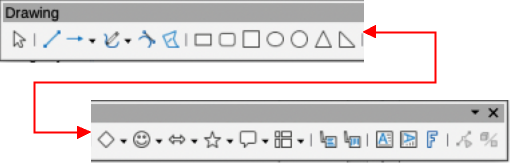
Drawing tools numbered from left to right for Figure 13
1) Select
2) Insert Line
3) Lines and Arrows
4) Curves and Polygons
5) Curve
6) Polygon
7) Rectangle
8) Rectangle, Rounded
9) Square
10) Ellipse
11) Circle
12) Isosceles Triangle
13) Right Triangle
14) Basic Shapes
15) Symbol Shapes
16) Block Arrows
17) Stars and Banners
18) Callout Shapes
19) Flowchart
20) Callouts
21) Vertical Callouts
22) Insert Text Box
23) Insert Vertical Text
24) Insert Fontwork Text
25) Points
26) Toggle Extrusion
Figure 14: Drawing Object Properties toolbar

Drawing object properties numbered from left to right for Figure 14
1) Select anchor for object
2) None
3) Parallel
4) Optimal
5) Before
6) After
7) Through
8) Align Objects
9) Bring to Front
10) Forward One
11) Back One
12) Send to Back
13) To Foreground
14) To Background
15) Select start and end arrowheads for lines
16) Line Style
17) Line Width
18) Line Color
19) Area Style/Filling
20) Fill Color
21) Rotate
22) Points
23) Group
24) Enter Group
25) Exit Group
26) Ungroup
27) Insert Caption
Note
The following procedures are examples only using LibreOffice Writer. Actual procedures depend on the LibreOffice module being used, computer operating system, and computer setup.
1) Click in the document at the position where the drawing is to be placed.
2) Select the drawing required tool on the Drawing toolbar and the following happens:
The cursor changes shape to indicate drawing mode is selected.
The Formatting toolbar changes to the Drawing Object Properties toolbar (Figure 14).
3) Click and drag to create the drawing object using the default properties.
4) Release the cursor and the selected drawing tool remains active. This allows drawing another object of the same type.
5) If necessary, select another drawing object to draw a different shape of drawing object.
6) Press the Esc key, or deselect the drawing object to cancel drawing mode.
1) Click on Select on the Drawing toolbar, then select the drawing object.
2) On the Drawing Object Properties toolbar, select each property tool required for the drawing object.
3) If necessary, select the property value from the available options.
4) Select the type of drawing object required on the Drawing toolbar.
5) Click and drag to create the drawing object using the selected properties.
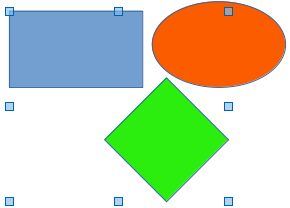
Figure 15: Example of grouping objects
6) To change properties for another drawing object, repeat Steps 2 and 3 before drawing the object.
7) Press the Esc key, or deselect the drawing object to cancel drawing mode.
Editing drawing objects uses the same procedures that are used for editing images and graphics. See “Images and graphics” on page 1 for more information.
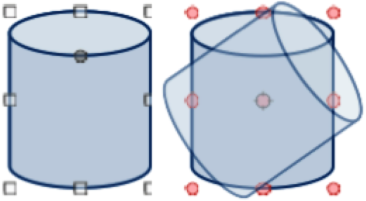
This section gives only a brief introduction to grouping of objects. An example of grouping two objects together is shown in Figure 15. For more information on working with grouped objects, see the specific user guide for each LibreOffice module.
Grouping of objects is similar to putting objects into a container. Objects within a group are moved together as one object and any changes made are applied globally to the objects within the group. A group can always be undone and the objects that make up the group can always be manipulated separately.
Temporary grouping is when several objects are selected together. Any changes to the objects are applied to all of the objects within the temporary group. For example, a temporary group of objects can be rotated in its entirety.
A temporary group is created using one of the following methods:
Hold down the Shift key whilst clicking multiple objects on a slide.
Click and drag the cursor to create a marquee around multiple objects. Release the cursor and all the objects within the marquee are selected.
To cancel a temporary grouping of objects, simply click outside of the selection handles displayed around the objects.
1) Objects are grouped together using one of the following methods:
Hold down the Shift key whilst clicking multiple objects on a slide.
Click and drag the cursor to create a marquee around multiple objects. Release the cursor and all the objects within the marquee are selected.
To select all the objects on the slide, go to Edit > Select All on the Menu bar, or use the keyboard shortcut Ctrl+A (macOS ⌘+A).
2) With selection handles displayed, use one of the following methods to create a group of selected objects:
Go to Format > Group > Group on the Menu bar.
Use the keyboard shortcut Ctrl+Shift+G (macOS ⌘+Shift+G).
Right-click on an object within the selected group and select Group from the context menu.
1) Click on an object in the group to select the group. Any editing or formatting can then be carried out on all the objects within the group or on individual objects within the group.
2) To edit an individual object within a group, enter the group using one of the following methods:
Use the keyboard shortcut F3.
Go to Format > Group > Enter Group on the Menu bar.
Right-click and select Enter Group from the context menu.
3) Select individual objects within the group for editing or formatting. An example of editing individual objects in a group is shown in Figure 16.
4) When editing or formatting is completed, use one of the following methods to exit the group and the whole group then becomes selected:
Use the keyboard shortcut Ctrl+F3 (macOS ⌘+F3).
Go to Format > Group > Exit Group on the Menu bar.
Right-click and select Exit Group from the context menu.
1) Click on any one of the objects in the group to select the group.
Figure 16: Example of editing inside a group

2) With selection handles displayed, use one of the following methods to ungroup a group of objects:
Go to Format > Group > Ungroup on the Menu bar.
Use the keyboard shortcut Ctrl+Alt+Shift+G (macOS ⌘+⌥+Shift+G).
Right-click on the group and select Ungroup from the context menu.
With Fontwork, graphical text art objects can be created to make a document more attractive. There are many different settings for text art objects (line, area, position, size, and more) giving a large selection of effects. Fontwork is available with the Writer, Calc, Draw, and Impress modules of LibreOffice, but there are small differences in the way that each module displays Fontwork.
1) Click on Insert Fontwork Text on the Drawing toolbar, or go to Insert > Fontwork on the Menu bar to open the Fontwork Gallery dialog (Figure 18).
2) Select a Fontwork style from the dialog and click OK. The selected Fontwork appears centrally on the page and the dialog closes.
3) Double-click on the Fontwork text graphic to switch on editing mode.
4) Type in the required text to replace the default text in the Fontwork graphic and the text appears over the default text as shown by the example in Figure 19.
5) Press Esc key, or click outside the Fontwork graphic and the text replaces default text.
Figure 17: Fontwork toolbar
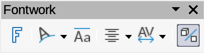
Figure 18: Fontwork Gallery dialog
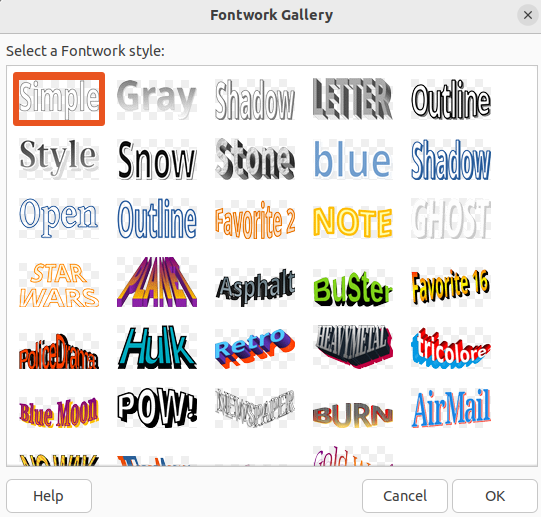
Figure 19: Example of creating Fontwork

Figure 20: Fontwork panel in Properties deck on Sidebar
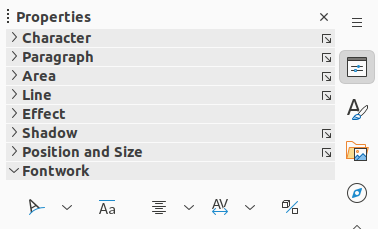
The Fontwork toolbar (Figure 17) becomes visible and active when a Fontwork object is selected. If the toolbar is not visible, go to View > Toolbars > Fontwork on the Menu bar. Also, the Fontwork panel opens in the Properties deck on the Sidebar (Figure 20) and contains the same tools as the Fontwork toolbar.
Insert Fontwork Text
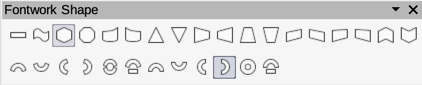
Fontwork Shape
Figure 21: Fontwork Shape sub-toolbar
Fontwork Same Letter Heights
Fontwork Alignment
Fontwork Character Spacing
Toggle Extrusion
It is possible to treat Fontwork text as an object and apply all the formatting that has been described in this chapter. Assign line properties only to Fontwork that does not have a 3D effect, otherwise the changes are not visible. Also, modify some of the Fontwork shapes by moving the dot that is displayed along with the selection handles. This is similar to modification of the angles of trapezoid and parallelogram basic shapes.
Writer, Calc, Impress, and Draw can generate barcodes and QR (Quick Response) codes. Barcodes are used for many purposes to easily identify items using a code scanner. QR codes are a type of barcode containing, for example, data that points to a website or application.
1) Go to Insert > OLE Object > QR and Barcode on the Menu bar to open the QR and Barcode Code dialog.
2) Enter the required information in the URL/Text field. This can be, for example, a website address, or a product number.
3) Select the error correction factor from the options available in Error correction. This is the complexity of the graphic generated.
4) Enter the margin required in the Margin text box. The margin is placed around the code when it is generated.
5) Select the type of code from the options available in the Type drop-down list.
6) Click OK to generate the code and close the QR and Barcode dialog.
Figure 22: Example QR code
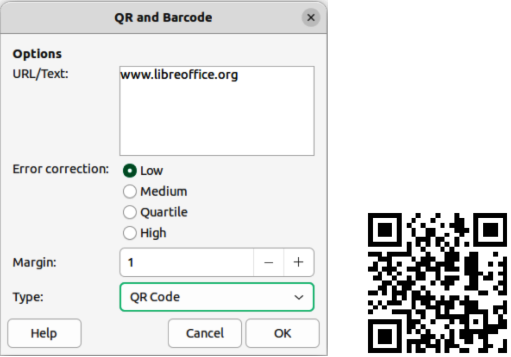
Figure 23: Example Barcode
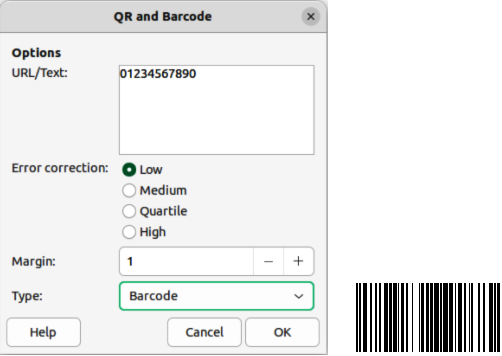
1) After the barcode, or QR code has been generated, right-click in the code and select Edit Barcode from the context menu to open the QR and Barcode dialog.
2) Make the necessary changes to the information in the QR and Barcode dialog.
3) Click OK to regenerate the code and close the QR and Barcode dialog.