
Impress Guide 24.2
Chapter 11, Setting Up and Customizing Impress
This document is Copyright © 2024 by the LibreOffice Documentation Team. Contributors are listed below. This document maybe distributed and/or modified under the terms of either the GNU General Public License (https://www.gnu.org/licenses/gpl.html), version 3 or later, or the Creative Commons Attribution License (https://creativecommons.org/licenses/by/4.0/), version 4.0 or later. All trademarks within this guide belong to their legitimate owners.
Contributors for this edition:
Peter Schofield
Contributors for previous editions:
Jean Hollis Weber
Kees Kriek
Michele Zarri
Olivier Hallot
Peter Schofield
Rachel Kartch
T. Elliot Turner
Vasudev Narayanan
Please direct any comments or suggestions about this document to the Documentation Team Forum at https://community.documentfoundation.org/c/documentation/loguides/ (registration is required) or send an email to: loguides@community.documentfoundation.org.
Note
Everything sent to a mailing list, including email addresses and any other personal information in the message, is publicly archived and cannot be deleted.
Published May 2024. Based on LibreOffice 24.2 Community.Other versions of LibreOffice may differ in appearance and functionality.
Some keystrokes and menu items are different on macOS from those used in Windows and Linux. The table below gives some common substitutions used in this document. For a detailed list, see LibreOffice Help.
|
Windows or Linux |
macOS equivalent |
Effect |
|
Tools > Options |
LibreOffice > Preferences |
Access setup options |
|
Right-click |
Control+click, Ctrl+click, or right-click depending on computer setup |
Open a context menu |
|
Ctrl or Control |
⌘ and/or Cmd or Command, depending on keyboard |
|
|
Alt |
⌥ and/or Alt or Option depending on keyboard |
Used with other keys |
|
F11 |
⌘+T |
Open the Styles deck in the Sidebar |
This chapter provides information on LibreOffice settings that apply when using Impress, but may also apply to all the other LibreOffice modules. The illustrations in this chapter have been taken from LibreOffice Impress. For more information on setting up and customizing all LibreOffice modules, see the Getting Started Guide.
Note
Revert has the same effect on all options in the pages of the Options LibreOffice and Options LibreOffice Impress dialogs. Using Revert resets the options to values that were in place when LibreOffice was opened.
Impress uses the first name, last name and initials of a user stored in User Data for document properties, optional author field used in slides, and identification of any comments made.
1) Go to Tools > Options (macOS LibreOffice > Preferences) on the Menu bar to open the Options LibreOffice dialog (Figure 1). The list on the left-hand side of the dialog changes to match the LibreOffice module that is open.
2) Click the expansion marker next to LibreOffice on the left-hand side and select User Data to open the user data options page for LibreOffice.
3) Enter or edit details in Address and Cryptography sections. These details are used for the document properties in a LibreOffice file.
4) Click OK to save the changes and close the Options LibreOffice dialog.
Figure 1: Options LibreOffice dialog — User Data page
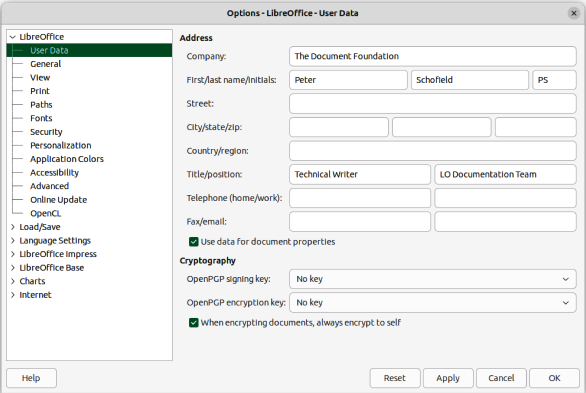
Figure 2: Options LibreOffice dialog — View page

1) Go to Tools > Options (macOS LibreOffice > Preferences) on the Menu bar to open the Options LibreOffice dialog. The list on the left-hand side of the dialog changes to match the LibreOffice module that is open.
2) Click the expansion marker next to LibreOffice on the left-hand side and select View to open the View options page for LibreOffice (Figure 2).
3) Enter or edit details for how the LibreOffice interface appears on a computer display.
4) Click OK to save the changes and close the Options LibreOffice dialog.
The View options control how the LibreOffice user interface appears when LibreOffice is opened. For more information on customizing the user interface, see the Getting Started Guide.
Appearance
Mode
Select how LibreOffice is displayed from the drop-down list: System, Light, Dark. A change in appearance is only available if the computer operating system supports a change of appearance.
Icon style
Icon size
Toolbar
Sets the icon size used for toolbar tools: Automatic, Small, Large, Extra Large.
Notebookbar
Specifies the display size of notebook bar icons: Automatic, Small, Large.
Sidebar
Specifies the display size of sidebar icons: Automatic, Small, Large.
Mouse
Middle button
Defines the function of the middle mouse button, if available.Automatic scrolling — dragging the cursor while pressing the middle mouse button scrolls the view of the displayed file.Paste clipboard — inserts the clipboard contents at the cursor position when the middle mouse button is pressed.
Graphics Output
Use hardware acceleration
Directly accesses hardware features of the graphical display adapter to improve the screen display. The support for hardware acceleration is not available for all operating systems and platform distributions of LibreOffice.
Use anti-aliasing
When supported, enables and disables anti-aliasing of graphics. With anti-aliasing enabled, the display of most graphical objects looks smoother and with less artifacts.
Use Skia for all rendering
Currently this option is disabled in LibreOffice.
Font Lists
Show preview of fonts
Displays how a selected font appears on the user interface.
Screen font antialiasing
When selected, the display of fonts looks smoother and with less artifacts.
From:
Sets the minimum size of a font being used before Screen font antialiasing is applied to smooth the font.
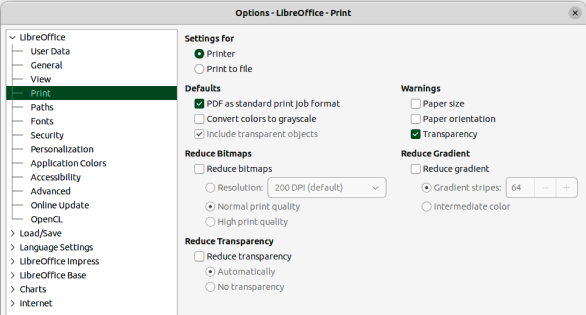
Print options are selected and changed in the Print page of the Options LibreOffice dialog, or during the printing process. Available print options shown in the print dialog do depend on operating system, computer setup, and the type of printer being used. An example of print options available are shown in Figure 3. For more information about the printing of slide shows, see Chapter 10, Saving Slide Shows, Printing, Emailing, and Exporting.
1) Go to Tools > Options (macOS LibreOffice > Preferences) on the Menu bar to open the Options LibreOffice dialog.
2) Click the expansion marker next to LibreOffice on the left-hand side and select Print to open the Print options page for LibreOffice.
3) Select the print settings for the selected printer and the required printing method.
4) Click OK to save the changes and close the Options LibreOffice dialog.
Using print options it is possible to reduce amount of data sent to the printer which results in printing speed increasing because print files are smaller. It is also easier for printers with a smaller memory to print large files. However, reducing print data can result in slightly lower print quality.
Settings for
Printer
Define options for reducing data while printing directly to a printer.
Print to file
Define options for reducing data while printing to a file.
Figure 3: Options LibreOffice dialog — Print page
Defaults
PDF as standard print job format
Specifies the use of PDF format when sending a file to the printer.
Convert colors to grayscale
Specifies that all colors are printed only as grayscale.
Include transparent objects
When selected, any reduction in print quality also applies to the transparent areas of objects.
Reduce Bitmaps
Resolution
Specifies the maximum print quality available in DPI.
Normal print quality
Corresponds to a resolution of 200 DPI.
High print quality
Corresponds to a resolution of 300 DPI.
Reduce Transparency
Automatically
Specifies transparencies are only printed if the transparent areas cover less than 25% of the entire page.1
No transparency
When selected, transparencies are not printed.
Note
Transparencies cannot be sent directly to a printer. Document areas where transparencies are visible are calculated as bitmaps and sent to the printer. Depending on bitmap size and print resolution, a large amount of data may result.
Warnings
Paper size
Select this option if a certain paper size is required for printing a document. If the paper size required is not available in the current printer, a warning is displayed.
Paper orientation
Select this option if a specific page orientation is required for a document. If the format is not available, a warning is displayed.
Transparency
Select this option if a warning is required when transparencies are contained in the document. A dialog appears allowing selection if the transparency is to be printed.
Reduce gradient
Gradient stripes
Specifies the maximum number of gradient stripes for printing.
Intermediate color
Specifies that gradients are only printed in a single intermediate color.
Figure 4: Options LibreOffice — Application Colors page
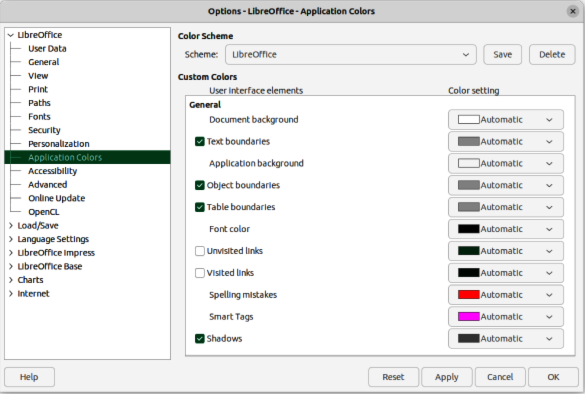
Application colors specify the colors is used to display various elements of the user interface in LibreOffice. The only option specific for LibreOffice Impress is the color of the grid points.
1) Go to Tools > Options (macOS LibreOffice > Preferences) on the Menu bar to open the Options LibreOffice dialog.
2) Click the expansion marker next to LibreOffice on the left-hand side to open the Application Colors page for LibreOffice (Figure 4).
3) In Custom Colors, scroll down to Drawing/Presentation and select from the list of color palettes a color to use for the Grid.
4) Click OK to save the changes and close the Options LibreOffice dialog.
Note
To save any color changes as a color scheme, click on Save and type a name in the dialog that opens, then click OK.
1) Go to Tools > Options (macOS LibreOffice > Preferences) on the Menu bar to open the Options LibreOffice dialog.
2) Click the expansion marker next to LibreOffice on the left-hand side to open a list of sections (Figure 5).
3) Select an option section from the list of sections that are available, then select from the required options from the options available.
4) Click OK to save the changes and close the Options LibreOffice dialog.
Select LibreOffice Impress > General (Figure 5) to specify the General options:
New document
Start with Template Selection
If selected, the Select a Template dialog opens when creating a new presentation.
Figure 5: Options LibreOffice Impress dialog — General page
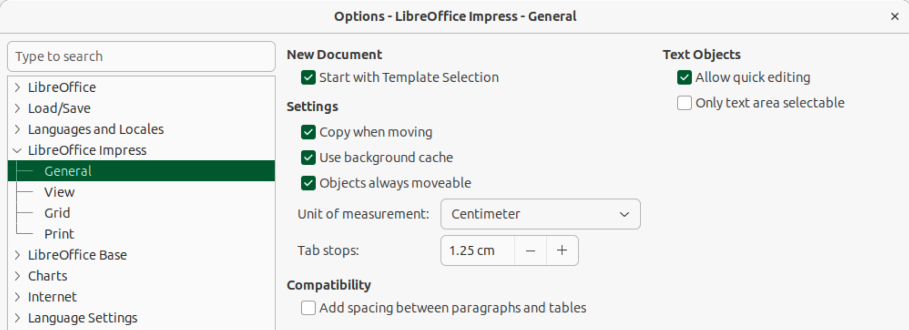
Settings
Copy when moving
If selected, a copy is created when an object is moved while holding down the Ctrl key (macOS ⌘). The same applies for rotating and resizing an object. The original object remains in its current position and size.
Use background cache
Specifies whether to use the cache for displaying objects on the master slide. This speeds up the display. Deselect this option to display contents being changed on the master slide.
Objects always moveable
When selected, it allows moving an object in rotation mode. If this option is not selected, the rotation mode can only be used for rotating an object.
Unit of measurement
Determines the unit of measurement used in LibreOffice Impress.
Tab stops
Defines the spacing between tab stops.
Compatibility
Use printer metrics for document formatting
Specifies that printer metrics are applied for printing and also for formatting the display on the screen. If this option is not selected, a printer independent layout is used for screen display and printing. If this option is set for the current document and the document is saved, for example, in an older binary format. Selection of this option is not saved when the file closes. If a file is opened using the older format, this option is set by default.
Add spacing between paragraphs and tables
Specifies that LibreOffice Impress calculates the paragraph spacing. Selection adds bottom spacing of a paragraph to the top spacing of the next paragraph when calculating the total spacing between both paragraphs. LibreOffice Impress utilizes only the larger of the two spacings. This is similar to the option available in Microsoft PowerPoint
Presentation
Enable remote control
When selected, allows a remote control to be used for presentations.
Enable Presenter Console
When selected, the Presenter Console opens for presentations when using multiple displays.
Text objects
Allow quick editing
If selected, text is edited immediately after clicking a text object. If deselected, double click is used to edit text. This mode is also activated by clicking on Allow Quick Editing in the Options toolbar (Figure 6).
Only text area selectable
Specifies text frame selection by clicking the text. Any area in a text frame that does not contain text, any object behind the text frame can be selected. This mode can be activated by clicking on Select Text Area Only in the Options toolbar.
Figure 6: Options toolbar

Figure 7: Option LibreOffice Impress dialog — View page
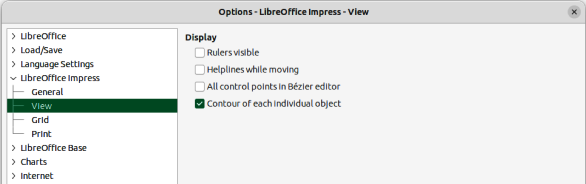
Select LibreOffice Impress > View (Figure 7) to specify the View options for available display modes.
Display
Rulers visible
When selected, rulers are displayed at the top and left of the work area.
Helplines while moving
When selected, displays guides when moving an object. LibreOffice Impress creates dotted guides that extend beyond the box containing the selected object and covering the entire Workspace. These guides help in positioning an object. This mode can also be activated by clicking on Helplines While Moving on the Options toolbar.
All control points in Bézier editor
Displays the control points for all Bézier points if a Bézier curve is selected. If this option is not selected, only the control points of the selected Bézier points are visible.
Contour of each individual object
Impress displays the contour line of each individual object when moving an object. When an objects is being moved, this option shows if there is any conflict with other objects in the target position. If this option is not selected, Impress displays only a square contour that includes all selected objects.
Select LibreOffice Impress > Grid (Figure 8) to specify the grid settings for LibreOffice Impress. Using a grid helps in determining the exact position of objects. The grid can also be aligned with the snap grid.
Grid
Snap to grid
Activates the snap function and objects snap to the grid when being moved or created. To move individual objects without snapping to the grid, this option can be temporarily deactivated by pressing the Shift key while moving the individual object. Snap to grid can also be activated by clicking on Snap to Grid on the Options toolbar.
Figure 8: Options LibreOffice Impress dialog — Grid page
Visible grid
Displays grid points on the screen. Grid points do not display when a slide or presentation is displayed or printed.
Resolution
Horizontal
Defines the spacing measurement unit between grid points on the X‑axis.
Vertical
Defines the spacing measurement unit between grid points on the Y‑axis.
Synchronize axes
When selected, the measurement and spacing settings for X- and Y-axes are synchronized for Resolution and Subdivision.
Subdivision
Horizontal
Specify the number of spaces between grid points on the X‑axis.
Vertical
Specify the number of spaces between grid points on the Y‑axis.
Snap
To snap lines
Snaps the object edge when being dragged to the nearest snap line when released. This mode can also be activated by clicking on Snap to Snap Lines on the Options toolbar.
To the page margins
Specifies how the contour of a graphic object aligns to the nearest page margin. The cursor or a contour line of a graphics object must be in snap range. This mode can also be activated by clicking on Snap to Page Margins on the Options toolbar.
To object frame
Specifies how the contour of a graphic object aligns to the border of the nearest graphic object. The cursor or a contour line of a graphics object must be in snap range. This mode can also be activated by clicking on Snap to Object Border on the Options toolbar.
To object points
Specifies how the contour of a graphic object aligns to the points of the nearest graphic object. This only applies if the cursor or a contour line of a graphics object is in snap range. This mode can also be activated by clicking on Snap to Object Points on the Options toolbar.
Snap range
Defines the snap distance between the cursor and the object contour. If the cursor is nearer than the distance specified, the cursor snaps to a snap point.
Constrain Objects
When creating or moving objects
Specifies that graphic objects are restricted vertically, horizontally or diagonally (45°) when being created or moved. This setting can be temporarily deactivated by pressing and holding the Shift key.
Extend edges
Specifies that a square is created based on the longer side of a rectangle when the Shift key is pressed before releasing the cursor. This also applies to an ellipse where a circle is created based on the longest diameter of the ellipse. When this option is NOT selected, a square or a circle is created based on the shorter side or diameter.
When rotating
Specifies that graphic objects can only be rotated when using the rotation angle that is selected. If an object is to be rotated outside the defined angle, press and hold the Shift key when rotating. Release the Shift key when the desired rotation angle is reached.
Point reduction
Defines the angle for point reduction. When working with polygons, this is useful to reduce editing points.
Select LibreOffice Impress > Print (Figure 9) to specify print settings for a presentation. See Chapter 10 Saving Slide Shows, Printing, E-mailing, and Exporting for more information about printing and the options available.
Default
Pages are printed at the default setting for printing.
Fit to page
A slide is resized to fit the printed page, while maintaining the relative positions of the objects on the slide.
Tile pages
Specifies that slides are printed in tiled format. If the slides are smaller than the paper size, several slides are printed on one page of paper.
Brochure
Select this option to print the document in brochure format. Select Front to print from the front to the back of a brochure. Select Back to print from the back to the front of a brochure.
Paper tray from printer settings
When selected, the paper tray used is defined in the printer setup.
Figure 9: Options LibreOffice Impress dialog — Print page
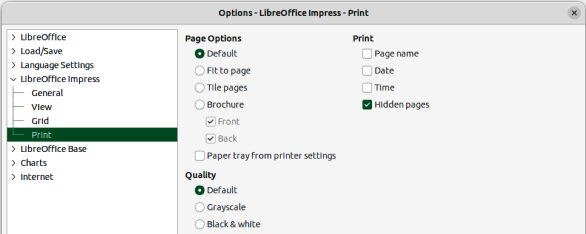
Page name
When selected, the page name is printed.
Date
When selected, the current date is printed.
Time
When selected, the current time is printed.
Hidden pages
When selected, any hidden pages in the slide show are printed.
Quality
Default
When selected, the slides are printed in color.
Grayscale
When selected, the slides are printed as grayscale.
Black & white
When selected, the slides are printed in black and white.
Menus, toolbars, and keyboard shortcuts in LibreOffice Impress are customized by adding, deleting, or modifying items in the menus, toolbars, and keyboard shortcuts when used to create slides and slide shows. For more information on customizing the user interface, see Chapter 12 User Interface Variants, Appendix A Keyboard Shortcuts, Appendix B Toolbars, and the Getting Started Guide.
Extensions are packages installed into LibreOffice Impress to add new functions. Although individual extensions can be found in different places, the official LibreOffice extension repository is at https://extensions.libreoffice.org/. Some extensions are free of charge, while some are available for a fee. Check the descriptions to see what licenses and fees apply to each extension. For more information on extensions, see the Getting Started Guide.