Copyright
This document is Copyright © 2026 by the LibreOffice Documentation Team. Contributors are listed below. This document may be distributed and/or modified under the terms of either the GNU General Public License (https://www.gnu.org/licenses/gpl.html), version 3 or later, or the Creative Commons Attribution License (https://creativecommons.org/licenses/by/4.0/), version 4.0 or later. All trademarks within this guide belong to their legitimate owners.
Contributors
To this edition
Peter Schofield
To previous editions
Jean Hollis Weber, Kees Kriek, Michele Zarri, Peter Schofield, Rachel Kartch, Samantha Hamilton, T. Elliot Turner, Vasudev Narayanan.
Feedback
Please direct any comments or suggestions about this document to the Documentation Team Forum at https://community.documentfoundation.org/c/documentation/loguides/ (registration is required) or send an email to: loguides@community.documentfoundation.org.
-
Note
Everything sent to a forum, including email addresses and any other personal information that is written in the message, is publicly archived and cannot be deleted. Emails sent to the forum are moderated.
Publication date and software version
Published August 2026. Based on LibreOffice 26.2 Community.
Other versions of LibreOffice may differ in appearance and functionality.
Introduction
Images are normally used in presentations to convey information as support for the written word. For instance, images, for example a company logo, can give a presentation a more professional look. An Impress presentation can also consist of images only, for example a slideshow of holiday snapshots to share with friends and family.
Images
Inserting images
-
Create a new slide for a presentation, or select a slide in a presentation. See Chapter 1, Introducing Impress for more information.
-
Select a layout for the slide. See Chapter 1, Introducing Impress for more information.
-
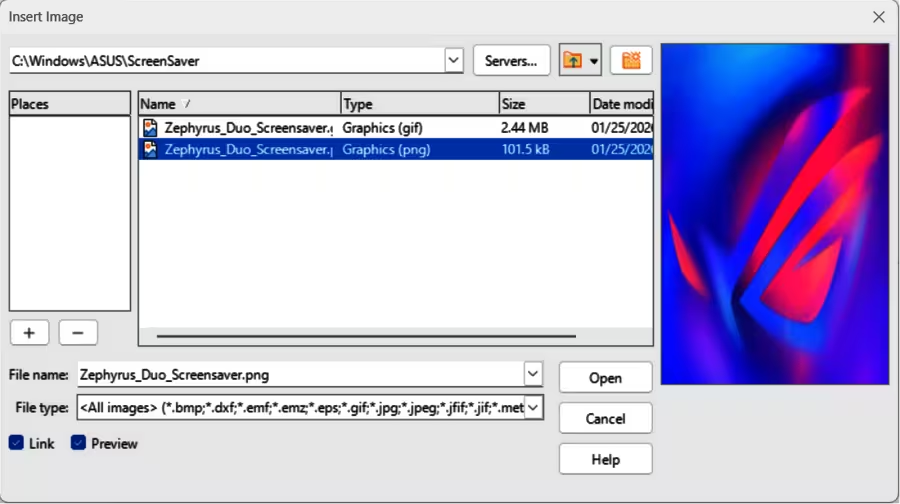
Go to Insert > Image on the Menu bar and the Insert Image file browser opens (Figure 1).
Figure 1: Example of Insert Image file browser
-
Navigate to the file directory containing the required image and select the file. LibreOffice is compatible with a large number of image formats.
-
If necessary, select Preview and a thumbnail of the selected file is displayed in the preview pane on the right of the file browser.
-
Click on Open to place the image in the centre of the selected slide and close the file browser window. The image is displayed with selection handles around the image border.
-
Format the image to the presentation requirements. See “Formatting images” below for more information.
Linking image files
To insert linked images, select Link in the Insert Image file browser. A selected image file is then inserted as a link to a file rather than embedding the image file into a presentation. This reduces file size of a presentation, but ALL files used must remain on the same computer.
It is preferable to embed images so that a presentation can be copied and used on other computers. Reasons for linking an image file rather than embedding an image file could be as follows:
-
When an image file is large, linking reduces the file size of a presentation.
-
Avoiding the duplication of files when the same image file is used in multiple presentations, such as using a background image for all presentations.
-
Ensuring that the linked file is only accessible when the presentation is opened. For example, if the presentation is a slide show of holiday photographs.
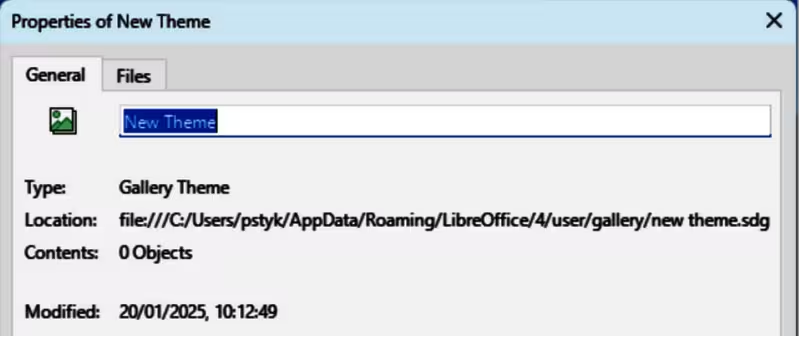
Figure 2: Properties of New Theme dialog — General page
Inserting Gallery images
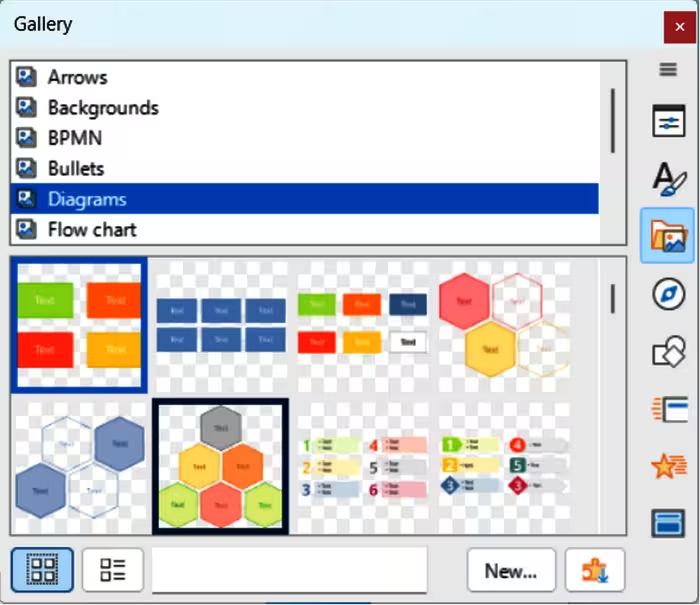
The Gallery deck on the Sidebar (Figure 3) contains a collection of images for use in a presentation. Images can be added to the Gallery, allowing presentations to be quickly created. The Gallery deck is available for all LibreOffice modules.
-
To open the Gallery deck in the Sidebar go to Insert > Media > Gallery on the Menu bar, or click on Gallery in the Sidebar.
-
Select a theme from the available themes and the images for that theme are displayed.
-
Scroll through the available images and select the required image.
-
Click and drag the image onto the slide and the image is inserted centrally into the slide.
-
Format the image to the presentation requirements. See “Formatting images” below for more information.
Gallery themes
Default themes
Gallery images are grouped in themes, such as Arrows, BPMN, Bullets, Diagrams and so on. These default themes are listed alphabetically at the top of the Gallery deck on the Sidebar. Click on a theme to see its images displayed in the Gallery deck.
Gallery default themes installed with LibreOffice are read-only. No images or graphics can be added to or deleted from these themes. The default themes are identified by right-clicking on a theme name and the only available option in the context menu is Properties.
Custom themes
Custom themes are Gallery themes that allow images to be added. Custom themes are listed alphabetically with the list of default themes at the top of the Gallery deck on the Sidebar. Custom themes are identified by right-clicking on a theme name and the options available in the context menu are Delete, Rename, and Properties.
Creating themes
-
Open the Gallery deck in the Sidebar using one of the following methods:
-
Go to Insert > Media > Gallery on the Menu bar.
-
Click on Gallery in the Sidebar.
-
Click New at the bottom of the Gallery deck and the Properties of New Theme dialog opens (Figure 2).
Figure 3: Gallery deck on Sidebar
-
Click on General and type a name for the new theme in the text box.
-
Click OK to save the new theme and close the dialog. The new theme is displayed in the list of themes in the Gallery.
-
Note
The name of the Properties of New Theme dialog changes to show the name of the newly created custom theme in the Gallery deck.
Adding theme images
-
Right-click on a custom theme name in the theme list on the Gallery deck and select Properties from the context menu to open the Properties of New Theme dialog.
-
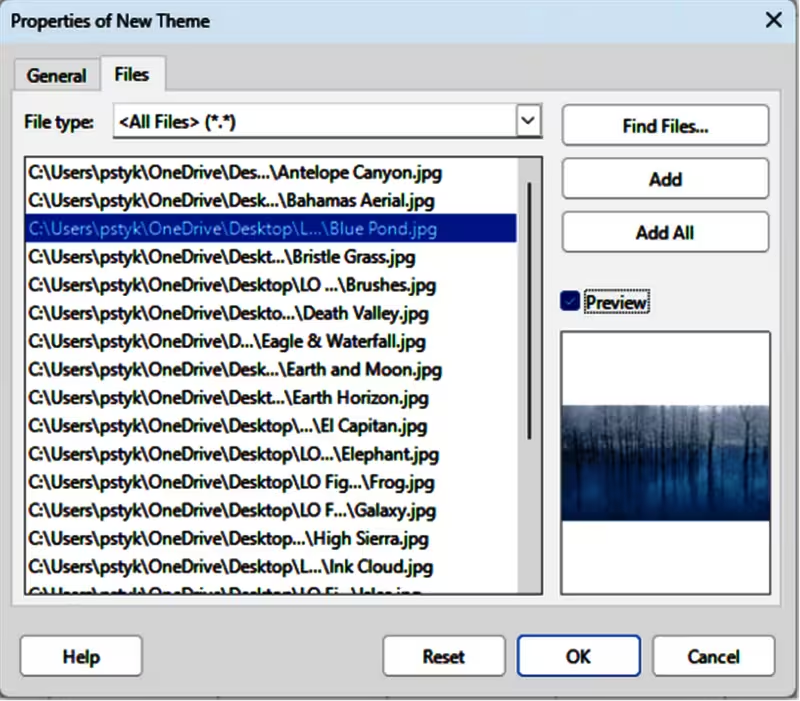
Click on Files to open the Files page (Figure 4), then click on Find Files to open a Select Path dialog.
-
Navigate to the folder that contains the images required and select the folder.
-
Click OK to close the Select Path dialog. The files contained in the folder appear in the Properties of New Theme dialog.
-
If necessary, select Preview and any image selected appears in the preview box.
-
Select the files required for a custom theme and click on Add. The added files disappear from the file list and the images appear in the custom theme on the Gallery deck.
Figure 4: Properties of New Theme dialog — Files page
-
To add all the files in the list, then click Add All. All the files disappear from the list and the images appear in the custom theme on the Gallery deck.
-
Click OK and close the Properties of New Theme dialog.
Deleting theme images
Only images added to a custom theme can be deleted from the Gallery.
-
Open the Gallery deck and select a custom theme.
-
Right-click on the image being deleted and select Delete from the context menu.
-
Click Yes in the confirmation message to delete the image.
-
Note
Images in custom themes are linked files and are deleted from the Gallery only. The original image files are not deleted.
Updating themes
All images in the Gallery are linked files. It is recommended that custom themes are updated on a regular basis to make sure that all the files are still available.
-
Open the Gallery deck and select a new theme that has been created.
-
Right-click on the name of a custom theme that contains at least one image.
-
Select Update from the context menu and the links to all the image files are updated
Formatting images
Moving images
-
Click on an image to select it and display the selection handles.
-
Move the cursor over the image until it changes shape. The cursor shape depends on the computer operating system, for example a clenched hand.
-
Click and drag the image to the desired position, then release the image when it is in the required position.
Resizing images
-
Click on an image to select it and display the selection handles.
-
Position the cursor over one of the selection handles. The cursor changes shape giving a graphical representation of the direction of the resizing, as follows:
-
Corner selection handles resize both the width and the height of the graphic object simultaneously.
-
Top and bottom selection handles resize the image height.
-
Left and right selection handles resize the image width.
-
Click and drag the selection handle to resize the image, then release the image when it is at the required size.
-
Notes
For more information on moving, resizing, rotating, slanting or skewing images and objects, see Chapter 6, Formatting Graphic Objects.
To retain the original proportions of the graphic, hold down the Shift key, then click on and drag a selection handle. Make sure to release the Shift key before releasing the cursor.
To restrict the rotation angles to multiples of 15 degrees, click on a selection handle, hold down the Shift key, then drag to rotate, slant or skew. Make sure to release the Shift key before releasing the cursor.
-
Tip
Re-sizing a bitmapped (raster) image affects the image resolution causing some degree of blurring. It is recommended to use a specialized graphics program to correctly scale the picture to the desired size before inserting it into a presentation. LibreOffice recommends Gimp (https://www.gimp.org).
Rotating, slanting or skewing images
-
Click on an image to select it and display the selection handles.
-
Select rotation mode using one of the following methods. The color and shape of the selection handles changes depending on the computer operating system and setup.
-
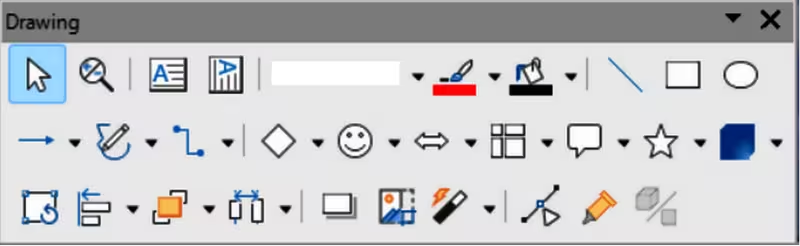
Click on Rotate on the Drawing toolbar (Figure 5).
-
Click again on a selection handle.
Figure 5: Drawing toolbar
-
By default, the selection handle in the center of an object is the normal rotation point for the selected image. If required, click and drag this central rotation point to another position (even outside of the image) to change how the selected image is rotated.
-
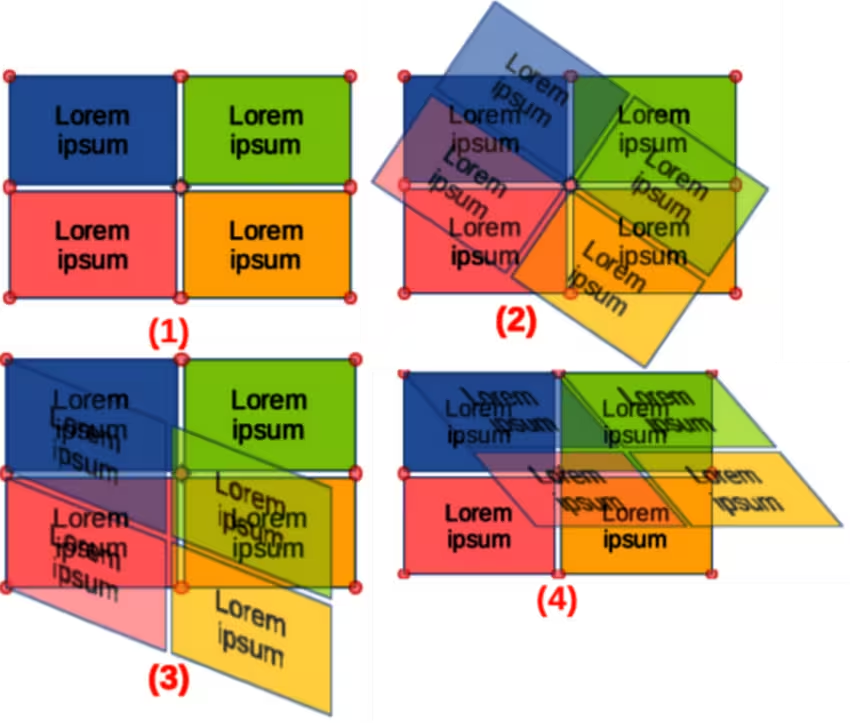
Select rotation mode (as shown in Figure 6) using one of the selection handles.
-
Corner selection handles rotate the image.
-
Left and right selection handles slant the image.
-
Top and bottom selection handles skew the image.
Figure 6: Example of rotating, slanting and skewing images
-
Rotation mode
-
Rotating image
-
Slanting image
-
Skewing image
-
Click, hold and drag a selection handle to rotate, slant or skew the image. A ghost image appears while dragging the cursor.
-
Release the selection handle when the required rotation, slant or skew is reached.
Using Image Filters
Image Filter toolbar
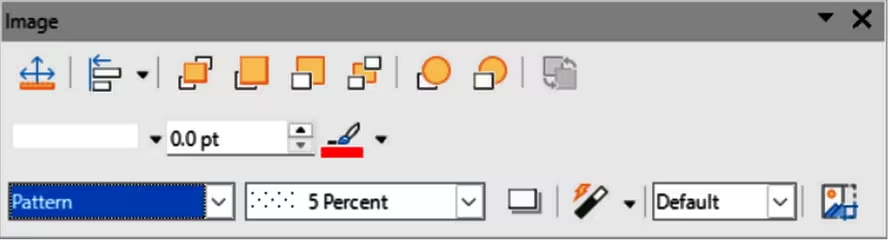
When an image is selected, the Image toolbar (Figure 7) and the Image Filter sub-toolbar (Figure 8) become available to format an image.
-
Select an image on a slide.
-
Go to View > Toolbars > Image on the Menu bar to open the Image toolbar. The Image toolbar only opens when an image is selected.
Figure 7: Image toolbar
-
Click on Filter on the Image toolbar to open the Image Filter toolbar. The Image Filter toolbar only opens when an image is selected.
-
Select the required filter and, if necessary, adjust the filter to the required setting. The filter is applied immediately to the image.
Figure 8: Image Filter subtoolbar

-
Alternatively, go to Format > Image > Filter on the Menu bar and select a filter from the submenu. This applies the image filter at the filter default settings.
-
Click outside the image to deselect it and save the presentation.
Image filters
The effect each image filter has on an image is described below. The best way to judge if a filter works is to try it. See the Draw Guide for more information on image filters and examples of the filter effects.
Invert
Smooth
Sharpen
Remove Noise
Solarization
Aging
Posterize
Pop Art
Charcoal Sketch
Relief
Mosaic
Changing image mode
Options available in the Image Mode drop-down list on the Image toolbar allow the color or image mode of a selected image to be changed. The options for image mode are as follows and an example of using Image Mode is shown in Figure 9.
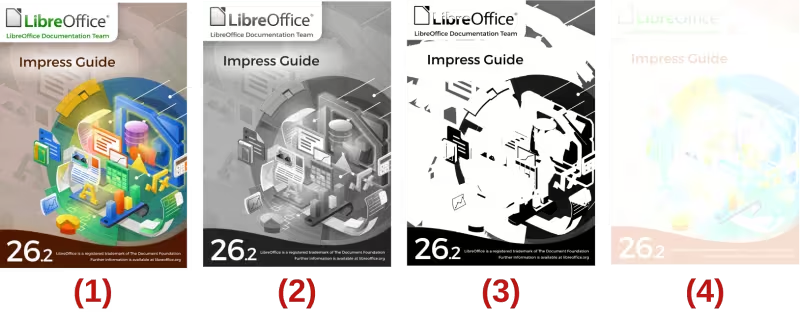
Default
Grayscale
Black and White
Watermark
Color adjustment
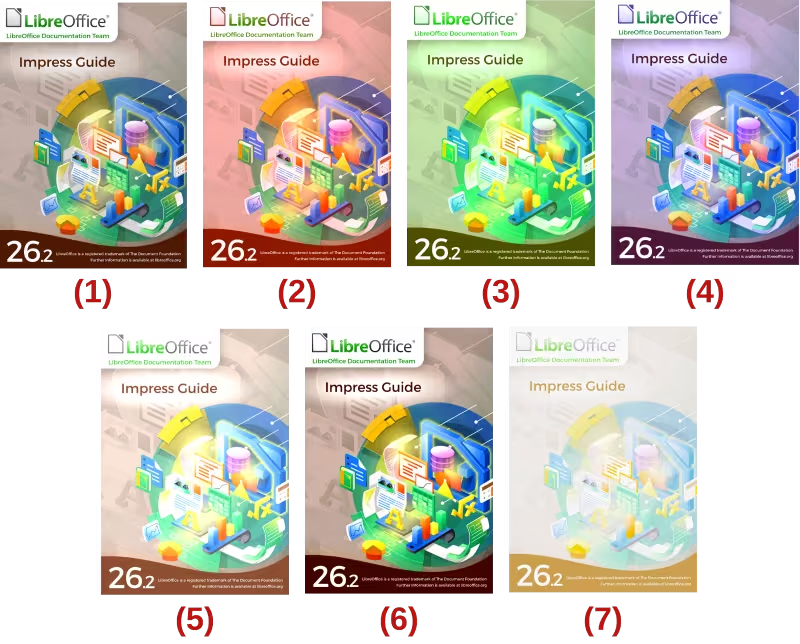
The Color sub-toolbar is used to adjust individual colors within the whole of the image (red, green, blue), as well as the brightness, contrast, and gamma of the image. Increasing the gamma value of an image makes it more suitable for use as a background or watermark as the image has less interference with a dark text. Examples of changing the percentage and levels for color, brightness, contrast, and gamma of an image are shown in Figure 11.
After selecting an image, open the Color sub-toolbar (Figure 10) using one of the following methods to change the values for color adjustment:
-
Click on Color in the Image toolbar.
-
Go to Format > Image > Color on the Menu bar.
Figure 10: Color sub-toolbar
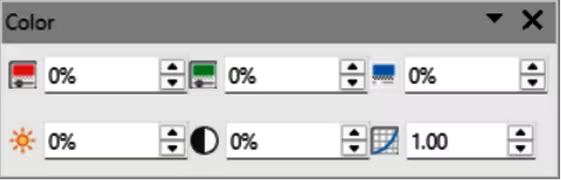
Figure 11: Examples of adjusting color levels
-
Original
-
25% Red
-
25% Green
-
25% Blue
-
25% Brightness
-
50% Contrast
-
Gamma Level 5
Replacing colors and transparent areas
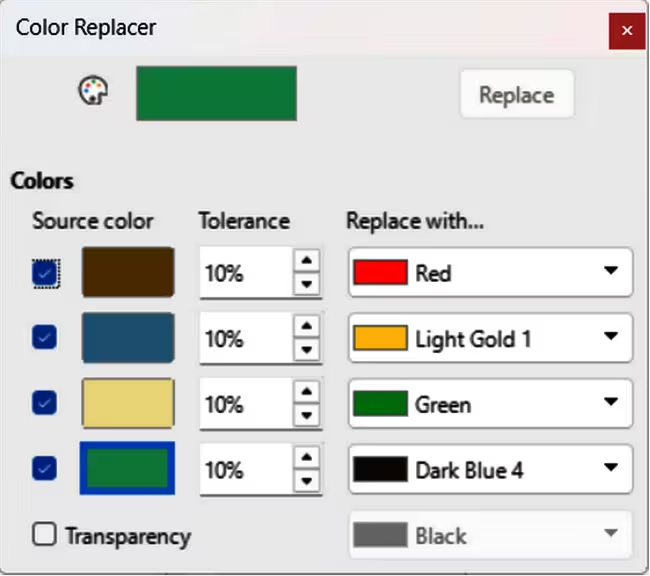
The Color Replacer dialog (Figure 12) allows color to be replaced or changed in embedded images for another color or sets a color to transparent. The embedded image must be a bitmap (for example BMP, GIF, JPG, or PNG), or a metafile (for example WMF). Up to four colors can be replaced at once. Color Replacer only works on one color in the entire image. Individual areas of color in an image cannot be selected for color replacement.
The colors in the Replace with drop-down lists are in the color palettes that installed with LibreOffice. If custom colors have been created, these colors are available in the custom palette. For more information on creating custom colors, see the Draw Guide.
-
The Color Replacer can only be used on embedded images. If the Color Replacer is used on a linked image, the following error message appears This image is linked to a document. Do you want to unlink the image in order to edit it?.
-
If the Replace button does not become active when replacing colors, then the image file format is not the correct type for Impress.
-
Using Color Replacer replaces all occurrences of the Source color in the image.
-
The default selection of Transparent in Replace with removes the selected color from the selected image creating transparent areas.
Figure 12: Color Replacer dialog
Replacing colors
-
Select an embedded image to start using the Color Replacer.
-
Go to Tools > Color Replacer on the Menu bar to open the Color Replacer dialog.
-
Click on Pipette at the top of the Color Replacer dialog to activate color selection mode.
-
Move the cursor over the color being replaced in the selected image and click on the color. A check box is now marked and the selected color appears in Source color.
-
If required, select another three colors in the selected image. A maximum of four colors can be selected.
-
Enter the amount of tolerance required for replacing the color in the Tolerance box. The default selection is 10% tolerance.
-
Select a color from the color palettes available in the Replace with drop-down list for each color selected. Transparent is the default selection.
-
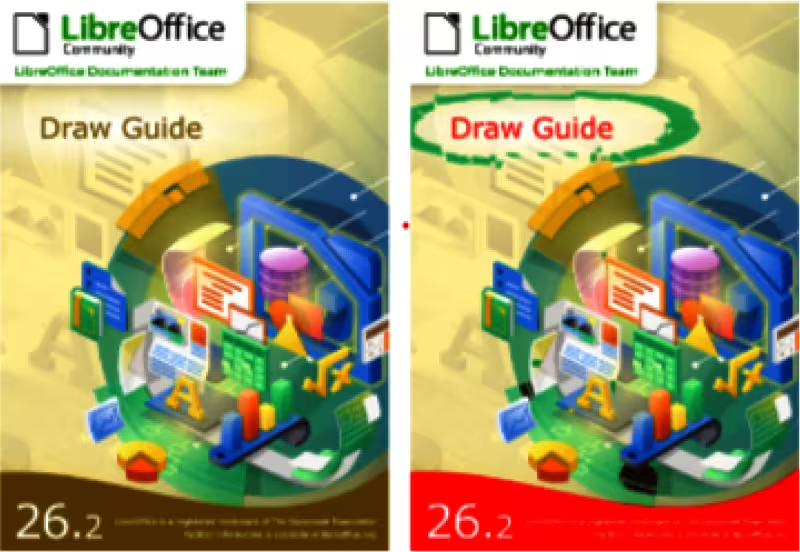
After selecting up to four colors for replacement, click Replace to replace the colors in the selected image. An example of replacing colors is shown in Figure 13.
Figure 13: Example of replacing colors
-
There is no preview of the effect. If the result is not what is required, select Edit > Undo in the Menu bar and repeat the color replacement.
Replacing transparent areas
-
Select an embedded image to start using the Color Replacer.
-
Go to Tools > Color Replacer on the Menu bar to open the Color Replacer dialog.
-
Select Transparency in the Color Replacer dialog.
-
Select a color from the available color palettes in the drop-down list next to Transparency.
-
Click Replace to replace the transparent areas with the selected color.
-
There is no preview of the effect. If the result is not what is required, select Edit > Undo in the Menu bar and repeat the transparency replacement.
Tolerance parameter
The Tolerance parameter is used to set how much of the source color in an embedded image is replaced by another color.
-
Replacing colors that are similar to the color being replaced, enter a low value for the tolerance parameter.
-
Replacing a wider range of colors, enter a higher value for the tolerance parameter.
Image transparency
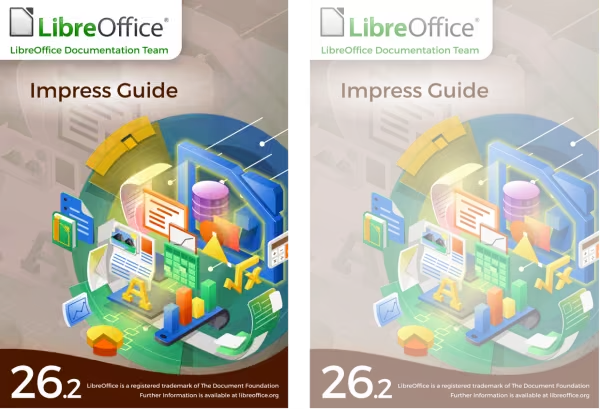
Specifies the level of transparency in an image. A value of 0% indicates complete opacity, while a value of 100% signifies complete transparency. As with the gamma value of an image, increasing transparency level enhances a smooth integration into the background, making any overlay text easier to read.
To adjust the image transparency, click on Transparency on the Image toolbar. Change the percentage value displayed in the text box to the required transparency level. Figure 14 displays an image where the transparency percentage has been adjusted to 50%.
-
Note
After changing shadow settings in the Area dialog, these shadow settings are applied to an image each time Shadow on the Image toolbar is used to apply a shadow.
Figure 14: Example of changing image transparency
Adjusting shadow settings
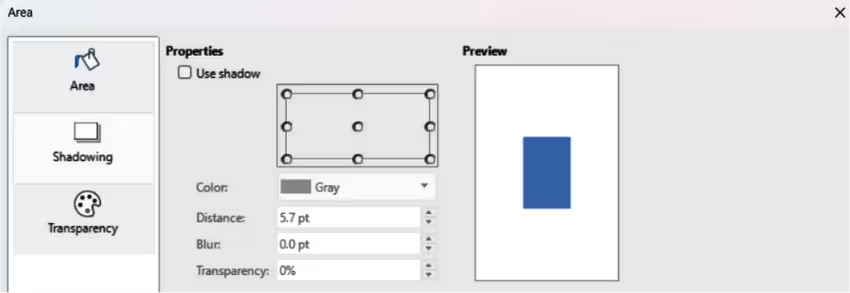
Select an image, then click on Shadow on the Image toolbar to apply a shadow to the image. The shadow applied uses the settings from the Shadowing page of the Area dialog (Figure 15). If a shadow is already applied to the image, clicking on Shadow removes the shadow from the image. The preview box on the Shadow page shows how a shadow looks when the settings are adjusted and applied as follows:
-
Go to Format > Text Box and Shape > Area on the Menu bar to open the Area dialog.
Figure 15: Area dialog — Shadowing page
-
Click on Shadowing to open the Shadow page.
-
Select the option Use shadow in Properties.
-
Select the shadow position from one of nine positions for casting the shadow from the image.
-
Select a shadow color from the available color palettes in the Color drop-down list.
-
Enter a distance for the shadow to be offset from the image in the Distance box.
-
Enter a value in the Blur box to create a softer look for the shadow. The higher the setting, the softer the shadow appears. Value of 0 (minimum), the shadow is sharp. The value of 150 (maximum), the shadow is at its softest.
-
Enter a percentage in the Transparency box. The value of 0% (minimum), the shadow is opaque. The value of 100% (maximum), the shadow is transparent.
-
Click on OK to close the Area dialog and save the changes to the shadow setting.
Cropping images
In Impress, images can be cropped using a cursor or dialog. Cursor cropping is easier, but dialog cropping provides more precise control.
Quick cropping
-
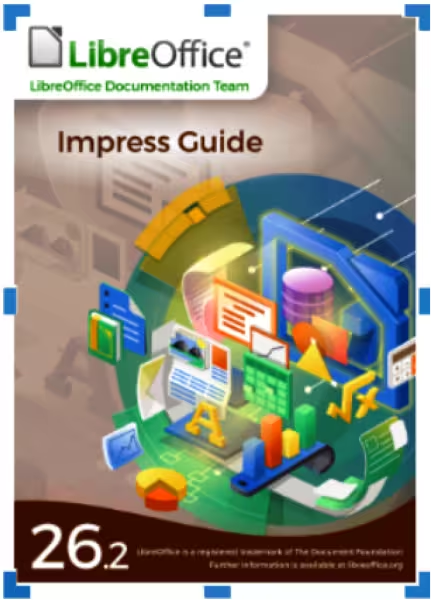
Select an image and use one of the following methods to put the image into cropping mode and crop marks appear around the image (Figure 16):
-
Click Crop Image on the Image toolbar.
-
Go to Format > Image > Crop on the Menu bar.
-
Right click on the image and select Crop from the context menu.
Figure 16: Example of image crop marks
-
Place the cursor over any of the crop marks and the cursor changes shape. Click and drag the crop mark to crop the image using one of the following options:
-
Corner crop marks change width and height of an image.
-
Left and right crop marks change the width of an image.
-
Top and bottom crop marks change the height of an image.
-
Click outside the image to deactivate cropping mode.
-
Note
Press and hold the Shift key, then click and drag a crop mark to proportionally reduce width and height of the image at the same time. Release the cursor before releasing the Shift key.
Dialog cropping
-
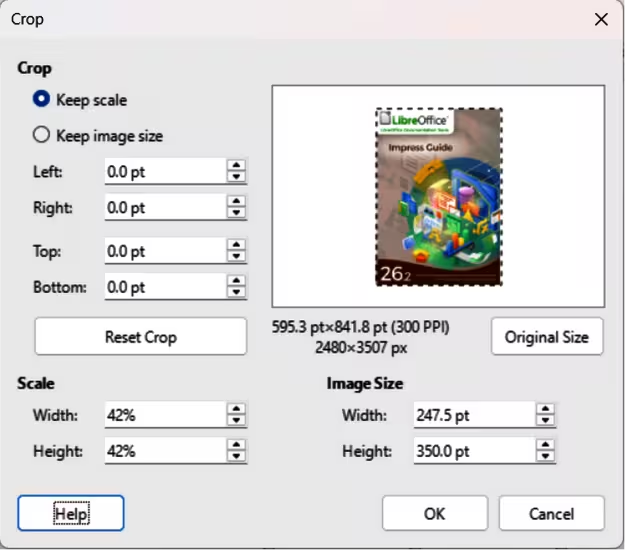
Select an image and go to Format > Image > Crop Dialog on the Menu bar to open the Crop dialog (Figure 17).
-
Crop the image using the options given in the Crop dialog. A preview of the selected image and cropping results appear in the dialog.
-
To return to the original size of the image and cancel the cropping, click on Original Size.
-
Click OK to save the changes and close the dialog.
Figure 17: Crop dialog
Cropping options
Crop
Keep scale
Maintains the original scale of the image when cropped. The size of the image changes to the cropped size (Figure 18).
Left
If Keep scale is selected, enter a positive amount to trim the left edge of the image, or a negative amount to add white space to the left of the image. If Keep image size is selected, enter a positive amount to increase the horizontal scale of the image, or a negative amount to decrease the horizontal scale of the image.
Figure 18: Example of Keep scale cropping

Right
If Keep scale is selected, enter a positive amount to trim the right edge of the image, or a negative amount to add white space to the right of the image. If Keep image size is selected, enter a positive amount to increase the horizontal scale of the image, or a negative amount to decrease the horizontal scale of the image.
Top
If Keep scale is selected, enter a positive amount to trim the top of the image, or a negative amount to add white space above the image. If Keep image size is selected, enter a positive amount to increase the vertical scale of the image, or a negative amount to decrease the vertical scale of the image.
Keep image size
Maintains the original size of the image when cropped. The scale of the image changes (Figure 19). To reduce the scale of the graphic, select this option and enter negative values in the cropping boxes. To increase the scale of the graphic, enter positive values in the cropping boxes.
Bottom
If Keep scale is selected, enter a positive amount to trim the bottom of the image, or a negative amount to add white space below the image. If Keep image size is selected, enter a positive amount to increase the vertical scale of the image, or a negative amount to decrease the vertical scale of the image.
Figure 19: Example of Keep image style cropping

Scale
Width
Enter the width for the selected image as a percentage.
Height
Enter the height of the selected image as a percentage.
Image Size
Width
Enter a width for the selected image.
Height
Enter a height for the selected image.
Original Size
Deleting images
Click on an image to display the selection handles and press the Delete or Backspace key.
Creating image maps
An image map defines areas of the image (called hotspots) associated with a URL (a web address, or a file on the computer). Hotspots are the graphic equivalent of text hyperlinks. In Impress, clicking on a hotspot opens the linked page in the appropriate program (for example, default browser for HTML pages; LibreOffice Writer for ODT files; PDF viewer for PDF files).
Hotspots can be created in various shapes, including rectangles, ellipses, and polygons. Also, several hotspots can be included in the same image. When clicking on a hotspot, the URL opens in a browser window, or frame that has been specified. Also, text can be specified to appear when the cursor hovers over a hotspot.
-
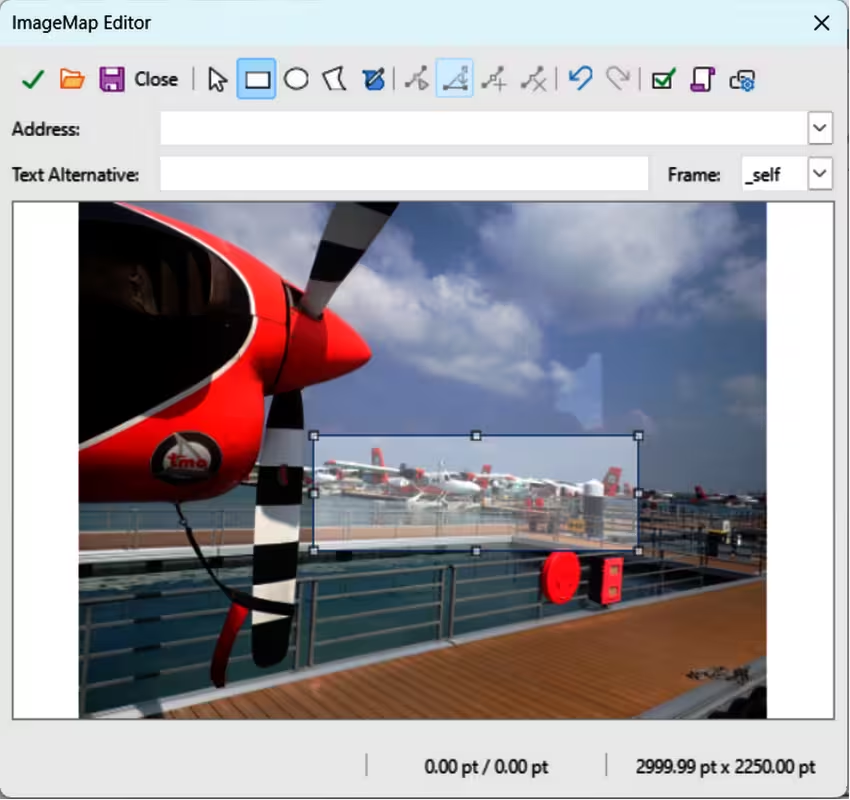
Select an image on a slide and go to Tools > ImageMap on the Menu bar and the ImageMap dialog opens (Figure 20). The main part of the dialog shows the selected image where hotspots will be defined.
-
Use the tools at the top of the dialog and the fields to define hotspots and their links.
-
Click on Apply to apply the settings.
-
When finished, click on Save to save the image map to a file and open a file browser.
-
Navigate to the folder where the image map is going to be saved and enter a name for the image map.
-
Click on Save and the file browser closes.
Figure 20: ImageMap Editor dialog
-
Click on Close to close the ImageMap dialog.
ImageMap Editor tools
Apply
Open
Save
Close
Select
Rectangle, Ellipse, Polygon and FreeForm Polygon
Edit Points, Move Points, Insert Points, Delete Points
Undo
Redo
Active
Macro
Properties
Address
Text
Frame
_blank
Opens in a new browser window.
_self
Default selection and opens in the current window.
_top
File opens in the topmost frame in the hierarchy.
_parent
File opens in the parent frame of the current frame. If there is no parent frame, the current frame is used.
-
Tip
The value _self for the target frame works on the vast majority of occasions. It is not recommended to use the other values, if available, unless absolutely necessary.