Copyright
This document is Copyright © 2026 by the LibreOffice Documentation Team. Contributors are listed below. This document may be distributed and/or modified under the terms of either the GNU General Public License (https://www.gnu.org/licenses/gpl.html), version 3 or later, or the Creative Commons Attribution License (https://creativecommons.org/licenses/by/4.0/), version 4.0 or later. All trademarks within this guide belong to their legitimate owners.
Contributors
To this edition
Peter Schofield
To previous editions
Kees Kriek, Peter Schofield, Rachel Kartch, Vasudev Narayanan.
Feedback
Please direct any comments or suggestions about this document to the Documentation Team Forum at https://community.documentfoundation.org/c/documentation/loguides/ (registration is required) or send an email to: loguides@community.documentfoundation.org.
-
Note
Everything sent to a forum, including email addresses and any other personal information that is written in the message, is publicly archived and cannot be deleted. Emails sent to the forum are moderated.
Publication date and software version
Published August 2026. Based on LibreOffice 26.2 Community.
Introduction
By default, commands and tools used in Impress are grouped in a user interface consisting of cascading menus and toolbars. The functions and use of these cascading menus and toolbars are described in previous chapters of this user guide. This chapter describes the user interface variants that are available for Impress. A user then has the option to select which user interface that suits their requirements and methods of creating presentations using Impress.
-
Note
When changing the user interface, the variant can be applied only to Impress, or applied to all LibreOffice modules.
Selecting user interface variants
To select a user interface variant or switch between the user interface variants:
-
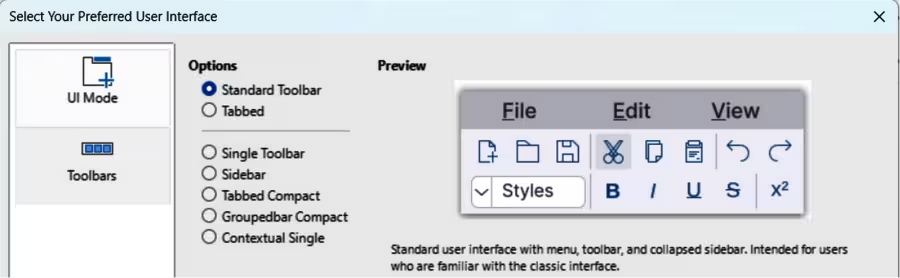
Go to View > User Interface on the Menu bar to open the Select Your Preferred User Interface dialog (Figure 1).
-
In UI variants, select the required variant. An example of the selected user interface is shown in the Preview box with a short description.
Figure 1: Select Your Preferred User Interface dialog
-
Click on Apply to Impress to immediately apply the selected user interface to Impress only, or click on Apply to All to immediately apply the selected user interface to all LibreOffice modules. The LibreOffice window changes to match the selected user interface.
-
Click on Close to close the dialog.
-
Note
If Enable experimental features has been selected in the Tools > Options > Advanced (macOS LibreOffice > Preferences > LibreOffice > Advanced), several more variants appear under UI variants. Being experimental, these user interfaces are not described in this chapter.
Standard Toolbar
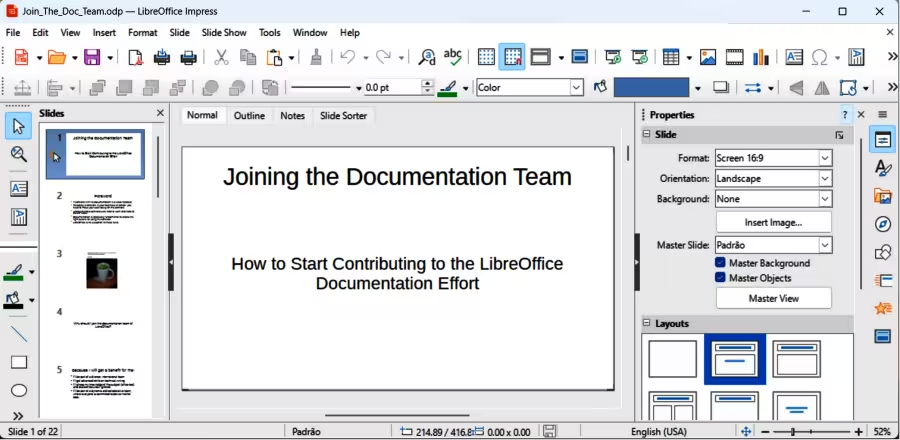
The Standard Toolbar user interface is the default view when LibreOffice is installed and Impress is opened for the first time. For more information on the Impress Workspace, see Chapter 1, Introducing Impress. Figure 2 shows an example of the default Workspace view in Impress consisting of the following:
-
Menu bar at the top of the Workspace.
-
Standard, and Line and Filling toolbars positioned below the Menu bar.
-
Drawing toolbar positioned vertically on the left side of the Workspace.
-
Sidebar on the right of the Workspace.
Figure 2: Standard Toolbar User Interface
Tabbed
The Tabbed user interface provides a user interface that is similar to other office software applications, for example Microsoft Office. The tabs in this user interface consists of a set of tools grouped by context. The context changes automatically depending on the LibreOffice module and the object selected. Figure 3 shows an example of the default Workspace view using the Tabbed user interface in Impress.
Figure 3: Tabbed User Interface
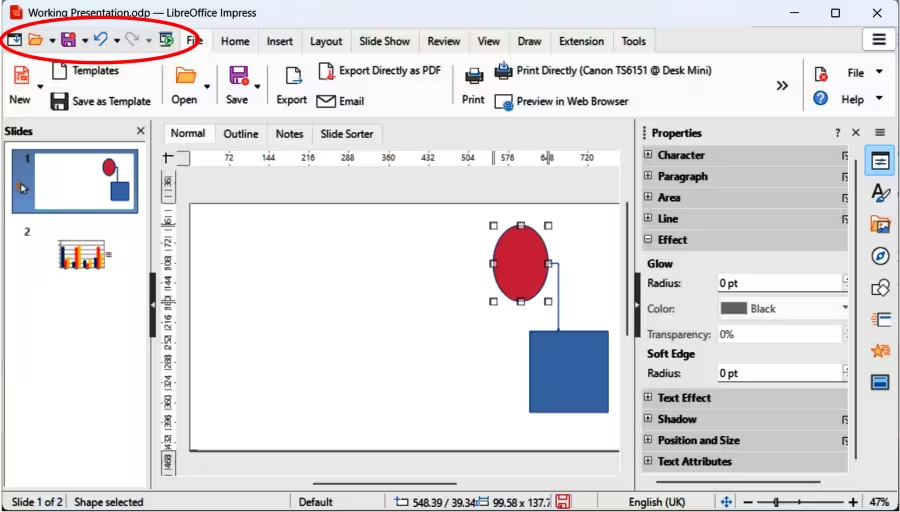
It includes Menu bar, Tab bar, and tool icons grouped in context for use in Impress. If the tool icons on a tab page do not fit into the width of the Impress window, a double chevron >> appears at the right end of the tab row. Click on this double chevron >> to display more available options for the Tabbed user interface.
At the left end of the Tab bar, an Icon bar (highlighted in Figure 3) is available giving access to some commonly used tools — Menubar; Open; Save; Undo; Redo; Start from First Slide. In Windows and Linux operating systems, the Menu bar can be hidden or displayed by clicking on Menubar at the left end of the Tab bar.
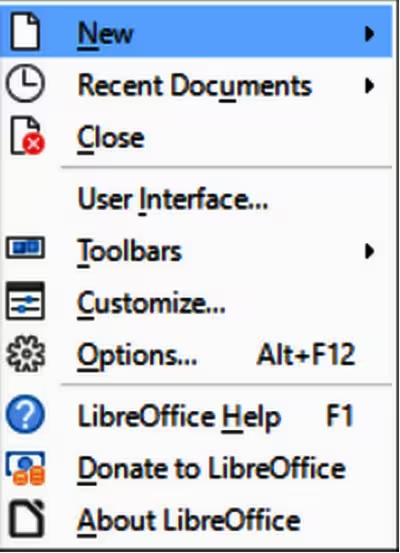
At the top of the Workspace and on the right side, click on the 3 horizontal lines (≡) to access commonly used commands and links, as shown by the example in Figure 4. Some commands have submenus with more commands and this is indicated by a triangle ►, or a single chevron >, on the right of a command.
Figure 4: User Interface Quick Menu
-
Note
When using the Tabbed user interface, Impress toolbars are no longer visible. If required, it is possible to open toolbars by going to View > Toolbars on the Menu bar, or select Toolbars on the quick menu.
Permanent tabs
File tab
The File tab provides commands to create new documents; open, save, print, and close documents; manage templates; export to PDF and EPUB; display document properties; add a digital signature; and sign an existing PDF. The File tab has two menus: File and Help.
-
File menu contains the same commands as the tools available on the tab.
-
Help menu provides links to a variety of resources.
Home tab
The Home tab provides tools to cut, copy, paste, and format text; insert common items (for example images, tables, charts); apply, update, and edit drawing styles; and so on. Click on Home at the right end of the Home tab bar to open a drop-down menu with additional tools not available on the Home tab bar.
Insert tab
The Insert tab provides tools to insert many commonly used items. Click on Insert at the right end of the Insert tab bar to open a drop-down menu listing some of the tools displayed on the Insert tab bar.
Layout tab
The Layout tab provides tools to insert many commonly used items. Click on Layout at the right end of the Layout tab bar to open a drop-down menu listing some of the tools displayed on the Layout tab bar.
Slide Show tab
The Slide Show tab provides tools for creating slide shows. Click on Slide Show at the right end of the Slide Show tab bar to open a drop-down menu listing some of the tools displayed on the Slide Show tab bar.
Review tab
The Review tab provides tools for reviewing slide shows. Click on Review at the right end of the Review tab bar to open a drop-down menu with additional text editing tools. Some of the text tools only appear if the text options Asian or Complex Text Layout are selected in LibreOffice options. To access these text options, go to Tools > Options > Advanced (macOS LibreOffice > Preferences > LibreOffice > Advanced).
View tab
The View tab provides tools for controlling how slides are displayed. Click on View at the right end of the View tab bar to open a drop-down menu providing additional tools for displaying slides on a screen.
Extension tab
The Extension tab is a fixed tab containing only the Extension Manager tool. When selected, this tool opens the Extension Manager dialog allowing for installation and deletion of extensions that are compatible with LibreOffice.
Tools tab
The Tools tab provides tools for working with and editing slides. For example macros, color replacer, media player, and so on. Click on Tools at the right end of the Tools tab bar to open a drop-down menu listing some of the tools displayed on the Tools tab bar.
Additional tabs
The following additional tabs only open in the Tabbed user interface between the View and Extension tabs when a compatible object is selected.
Draw tab
The Draw tab only becomes available when a compatible drawing object is selected in a slide. It provides tools for editing, transforming, grouping, aligning, and distributing draw objects. Click on Draw at the right end of the Draw tab bar to open a drop-down menu with some of the same tools to edit, transform and convert drawing objects.
Image tab
The Image tab only becomes available when a compatible image is selected in a slide, for example a photograph. It provides tools for working with images, such as cropping, borders, area styles, colors, and so on. Click on Image at the right end of the Image tab bar to open a drop-down menu listing some of the tools displayed on the Image tab bar.
Object tab
The Object tab only becomes available when a compatible object is selected in a slide, for example a chart. It provides tools to position, resize, select colors, and so on for the selected compatible object. Click on Object at the right end of the Object tab bar to open a drop‑down menu with two extra tools to name and describe the object.
Table tab
The Table tab only becomes available when a compatible table is selected in a slide. It provides tools to position, resize, select colors, and so on for the selected table. Click on Table at the right end of the Table tab bar to open a drop-down menu provides extra tools for editing a table.
Media tab
The Media tab only becomes available when a media object is selected in a slide. It provides tools for positioning and running an audio or video file. Click on Media at the right end of the Media tab bar to open a drop-down menu provides extra tools for editing a media object.
Single Toolbar
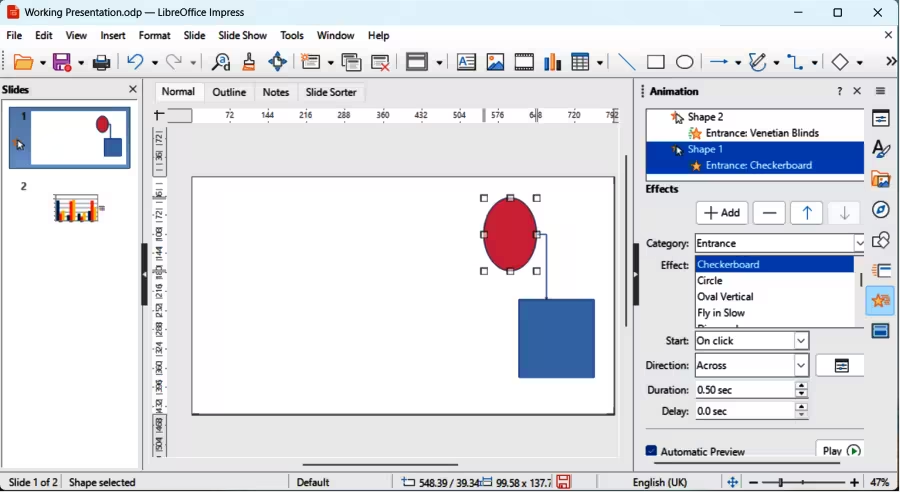
When selected, the Single Toolbar user interface (Figure 5) only shows the Menu bar and the Standard (Single Mode) toolbar. However, toolbars can be added to the user interface by going to View > Toolbars on the Menu bar and selecting the required toolbar from the options available. For more information on toolbars, see Appendix B, Toolbars and the Getting Started Guide.
Figure 5: Single Toolbar User Interface
Sidebar
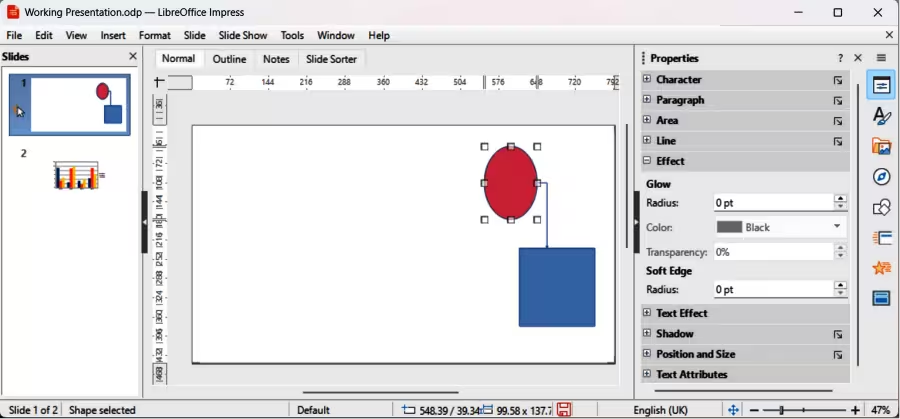
When selected, the Sidebar user interface (Figure 6) shows the Menu bar with no toolbars. However, toolbars can be added to the user interface by going to View > Toolbars on the Menu bar and selecting the required toolbar from the options available. For more information on toolbars, see Appendix B, Toolbars in this guide and the Getting Started Guide.
Figure 6: Sidebar User Interface
Tabbed Compact
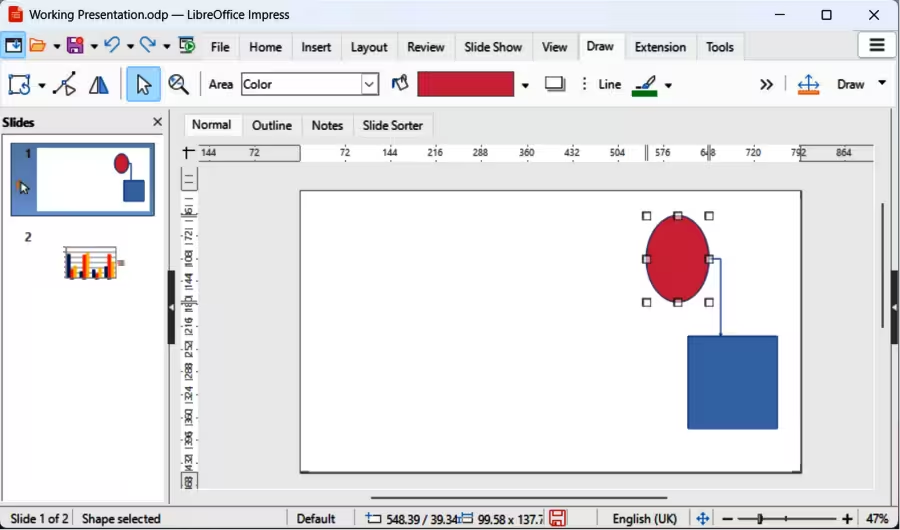
The Tabbed Compact user interface (Figure 7) uses the same tabs as the Tabbed user interface, but the tools on each tab are arranged as a single row of tools. Some of these tools have drop‑down menus with extra options. The tab menu on the right of the Tabbed Compact user interface provides the same options as the tab menus in the Tabbed user interface, see “Tabbed” above for more information.
Figure 7: Tabbed Compact User Interface
Groupedbar Compact
The Groupedbar Compact user interface (Figure 8) is divided into groups that contain commands organized as sets of tools and menus. The tools and menus that are available change to suit the type of object selected. If necessary, clicking on the double chevron >> displays more tools for editing an object.
Figure 8: Groupedbar Compact User Interface
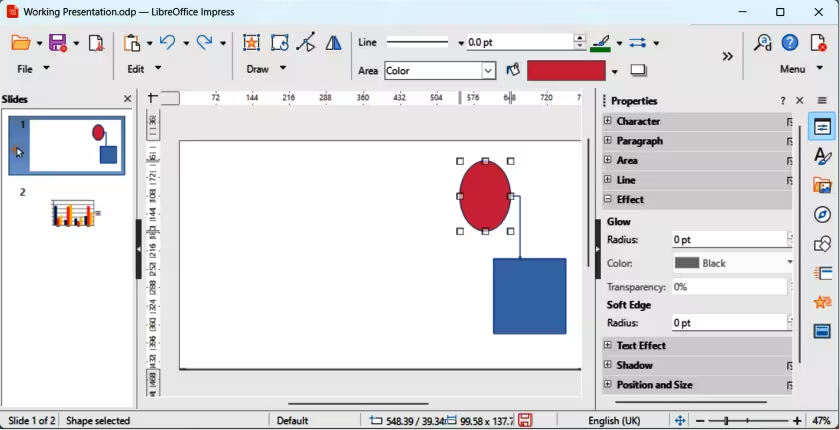
The Menu on the right of the Groupedbar Compact interface provides extra tools for working with LibreOffice Impress, including methods to change the user interface and access toolbars.
Contextual Single
The Contextual Single user interface (Figure 9)displays a single toolbar to suit object type that has been selected. If necessary, clicking on a double chevron >> displays more tools for editing an object.
Figure 9: Contextual Single User Interface