
Math Guide 25.2
This document is Copyright © 2025 by the LibreOffice Documentation Team. Contributors are listed below. This document may be distributed and/or modified under the terms of either the GNU General Public License (https://www.gnu.org/licenses/gpl.html), version 3 or later, or the Creative Commons Attribution License (https://creativecommons.org/licenses/by/4.0/), version 4.0 or later. All trademarks within this guide belong to their legitimate owners.
To this edition
For previous editions
Please direct any comments or suggestions about this document to the Documentation Team Forum at https://community.documentfoundation.org/c/documentation/loguides/ (registration is required) or send an email to: loguides@community.documentfoundation.org.
Note
Everything sent to a forum, including email addresses and any other personal information that is written in the message, is publicly archived and cannot be deleted. Emails sent to the forum are moderated.
Published April 2025. Based on LibreOffice 25.2 Community.
Other versions of LibreOffice may differ in appearance and functionality.
Some keystrokes and menu items are different on macOS from those used in Windows and Linux. The table below gives some common substitutions used in this document. For a detailed list, see LibreOffice Help.
|
Windows or Linux |
macOS equivalent |
Effect |
|
Tools > Options |
LibreOffice > Preferences |
Access setup options |
|
Right-click |
Control+click, Ctrl+click, or right click depending on computer setup |
Open a context menu |
|
Ctrl or Control |
⌘ and/or Cmd or Command, depending on keyboard |
|
|
Alt |
⌥ and/or Alt or Option depending on keyboard |
Used with other keys |
|
F11 |
⌘+T |
Open the Styles deck in the Sidebar |
When a formula is inserted into a document, Writer inserts the formula into a frame and treats the formula as an OLE object. For more information on creating and editing formulas, refer to Chapter 1, Creating and Editing Formulas.
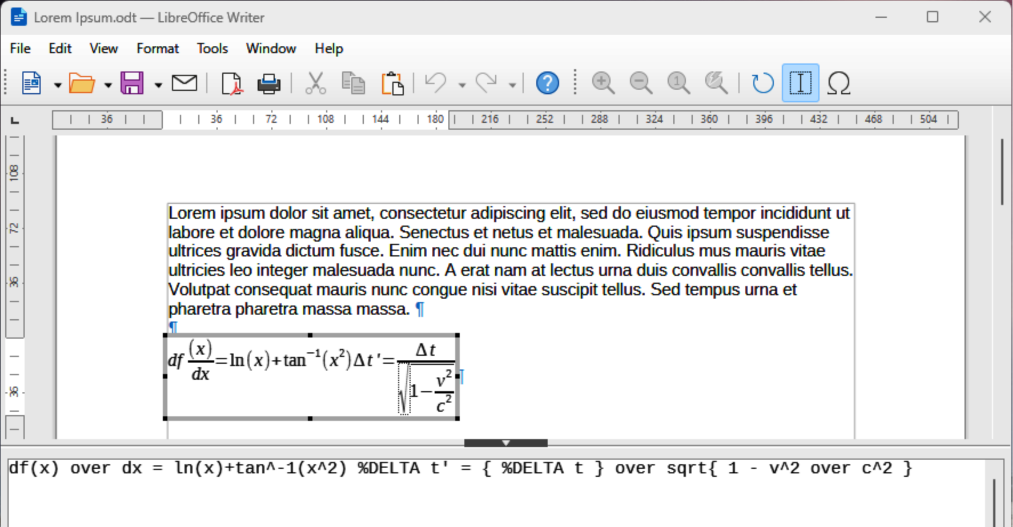
When a formula is selected for editing, the Writer Formula Editor opens, as shown by the example in Figure 1.
Double-clicking on an inserted formula opens Math with the formula selected for editing in the Math Formula Editor.
Note
This chapter explains what options can changed for a formula within a Writer document. See the Writer Guide for information on how to change the settings for frame styles for OLE objects.
Figure 1: Example formula selected for editing in Writer
Automatic numbering of formulas to create formula cross references can only be carried out in Writer. The AutoText entry fn (formula numbered) is used to automatically add a numbered cross reference to formulas.
Start a new line in a document at the required position for the formula.
Type fn and press the F3 key to insert a two column table with no borders. The left column contains a sample formula and the right column contains the cross reference number, as shown by the following example.
|
|
(1) |
Delete the sample formula and insert the required formula into the left column.
Click in the document at the position where a cross reference for a formula is required.
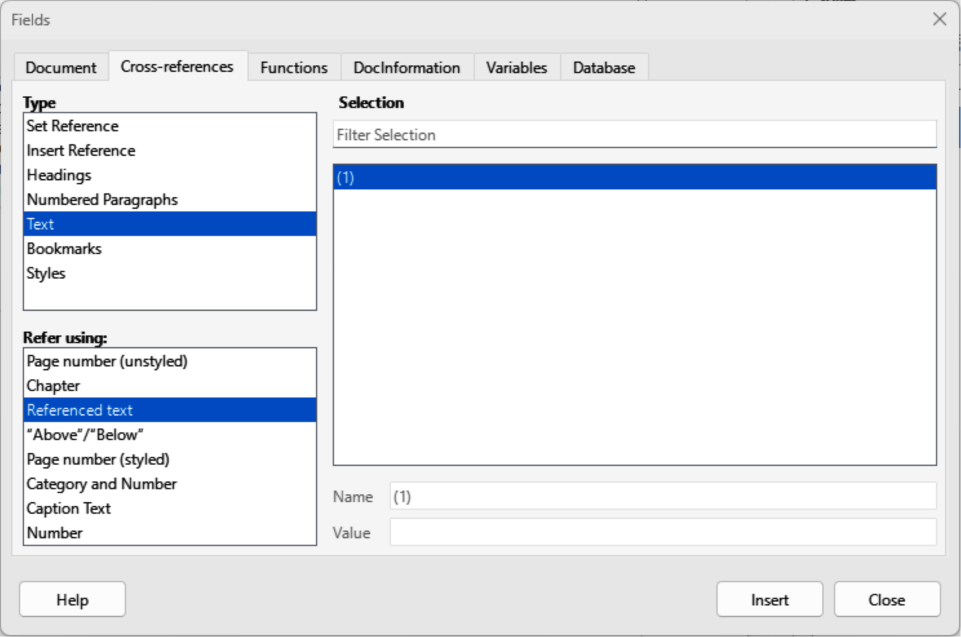
Go to Insert > Cross-reference on the Menu bar to open the Fields dialog (Figure 2).
Click on Cross-references, then select Text in Type.
In Selection, select the formula number required for the cross reference.
In Refer using, select Referenced text, then click on Insert to insert the cross reference for the selected formula.
Click on Close to close the Fields dialog.
Figure 2: Fields dialog — Cross-references — Referenced text
Note
To use square parentheses instead of curved parentheses, or require the cross reference number to be separated from the formula by tabs instead of using a table, see the Writer Guide for more information.
A formula is an object when inserted into a Writer document. The default anchoring for a formula is As character when inserted into a document. To change the formula anchoring in a document:
Right-click on the selected formula and select Anchor from the context menu.
Select an anchoring option from the context menu. The anchoring options available are To paragraph, To character, or As character.
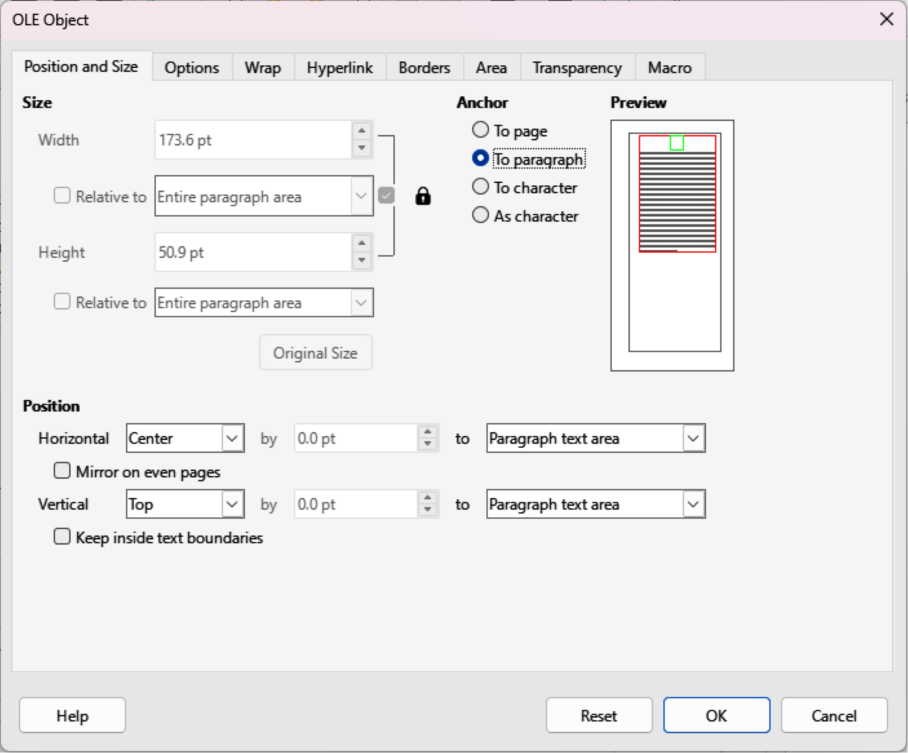
Alternatively, right-click on the selected formula and select Properties from the context menu, or go to Format > Frame and Object > Properties on the Menu bar to open the OLE Object dialog (Figure 3).
Make sure Position and Size is selected, then select a new anchoring position from the options available in Anchor. The anchoring options available are To page, To paragraph, To character, or As character.
Click OK to save the changes and close the OLE Object dialog.
Figure 3: OLE Object dialog — Position and Size page
The normal default setting for vertical alignment for formulas is to use the text base line as a reference. This default setting can be changed by modifying the frame style for formulas, see the Writer Guide for more information.
Make sure the To paragraph or To character option for formula anchoring is selected to change vertical formula alignment. Vertical alignment is NOT available for the As character anchoring option.
Right-click on the selected formula and select Align Objects from the context menu.
Select a vertical alignment option from the context menu. The options available are Align Top to Anchor, Align Middle to Anchor, and Align Bottom to Anchor.
Alternatively, right-click on the selected formula and select Properties from the context menu, or go to Format > Frame and Object > Properties on the Menu bar to open the Object dialog (Figure 3).
Make sure Position and Size is selected, then select a new vertical alignment from the options available in Position Vertical. The vertical alignment options available are Center, Top, Bottom, or From bottom.
If the From bottom option is selected for vertical alignment, enter a plus or minus value for vertical alignment.
Select the type of text alignment from the drop-down list in Position Vertical. The text alignment options available are Base line, Character, and Row.
Click OK to save the changes and close the OLE Object dialog.
The normal default setting for horizontal alignment for formulas is to use the text base line as a reference. This default setting can be changed by modifying the frame style for formulas, see the Writer Guide for more information.
Right-click on the selected formula and select Align Objects from the context menu.
Select a horizontal alignment option from the context menu. The options available are Left, Centered, and Right.
Alternatively, right-click on the selected formula and select Properties from the context menu, or go to Format > Frame and Object > Properties on the Menu bar to open the Object dialog (Figure 3).
Make sure Position and Size is selected, then select a new horizontal alignment from the options available in Position Horizontal. The horizontal alignment options available are Left, Right, Center, or From left.
If the From left option is selected for horizontal alignment, enter a plus or minus value for horizontal alignment.
Select the type of text alignment from the drop-down list in Position Horizontal. The text alignment options available are Entire paragraph area, Left of paragraph text area, Right of paragraph text area, Left of page text area, Right of page text area, Entire page, Page text area, and Character.
Click OK to save the changes and close the OLE Object dialog.
A formula, when inserted into a document, has text wrap and spacing on each side of the formula. The default settings used for wrap and spacing is set within the frame style for formulas. This default settings can be changed by modifying the formula frame style, see the Writer Guide for more information.
To individually adjust the wrap for a formula positioned in a Writer document:
Make sure the To paragraph or To character option for formula anchoring is selected to change object wrap. Object wrap is NOT available for the As character anchoring option.
Right-click on the selected formula and select Wrap from the context menu.
Select a wrap option from the context menu. The options available are None, Parallel, Optimal, Before, After, Through In Background and Edit Contour.
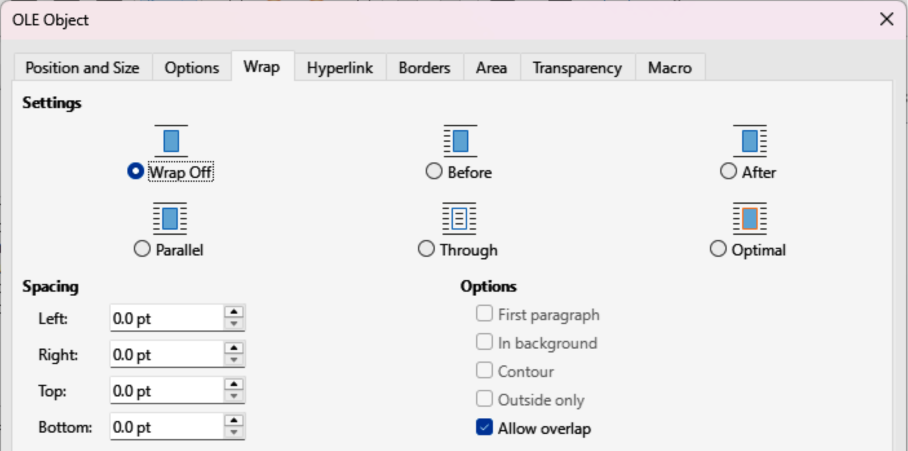
Right-click on the selected formula and select Properties in the context menu, or go to Format > Frame and Object > Properties to open the Object dialog.
Click on Wrap to open the Wrap page in the Object dialog (Figure 4).
In Settings, select the type of wrap required for the formula. The options available are Wrap Off, Before, After, Parallel, Through and Optimal.
Click OK to save the changes and close the Object dialog.
Figure 4: OLE Object dialog — Wrap page
To individually adjust the spacing for a formula positioned in a Writer document:
Right-click on the selected formula and select Align Objects from the context menu.
Select a horizontal alignment option from the context menu. The options available are Left, Centered, and Right.
Right-click on the selected formula and select Properties in the context menu, or go to Format > Frame and Object > Properties to open the Object dialog.
Click on Wrap to open the Wrap page in the Object dialog (Figure 4).
In Spacing, enter the spacing value for Left, Right, Top, and Bottom spacing.
Click OK to save the changes and close the Object dialog.
When large formulas are placed within a line of text, the formula elements can be higher than the text height. To make large formulas easier to read, it is recommended to always insert large formulas into a separate paragraph to separate a formula from the text.
If it is necessary to place a large formula within a line of text, double-click on the formula to open the Formula Editor and then go to Format > Text Mode on the Menu bar. The Formula Editor reduces the formula size to match text height, as shown in the following example.
The same formula embedded into a line of text using text mode format :
The default setting for background (area fill) and borders for formulas is set by the Formula frame style. For more information on changing the background and borders for Formula frame style, see the Writer Guide. If required, individual formulas in a document can use different backgrounds and borders.
Note
The size of the frame that a formula is placed in when inserted into a document cannot be changed. The frame size for a formula depends on the setting of the formula font size. See Chapter 1, Creating and Editing Formulas for more information.
The following example is a formula using background color and borders. Note that the background and border properties are part of the Math OLE object and cannot be defined using markup language.
Select a formula in a document to change the background.
Right-click on the formula and select Properties from the context menu, or go to Format > Frame and Object > Properties on the Menu bar to open the OLE Object dialog.
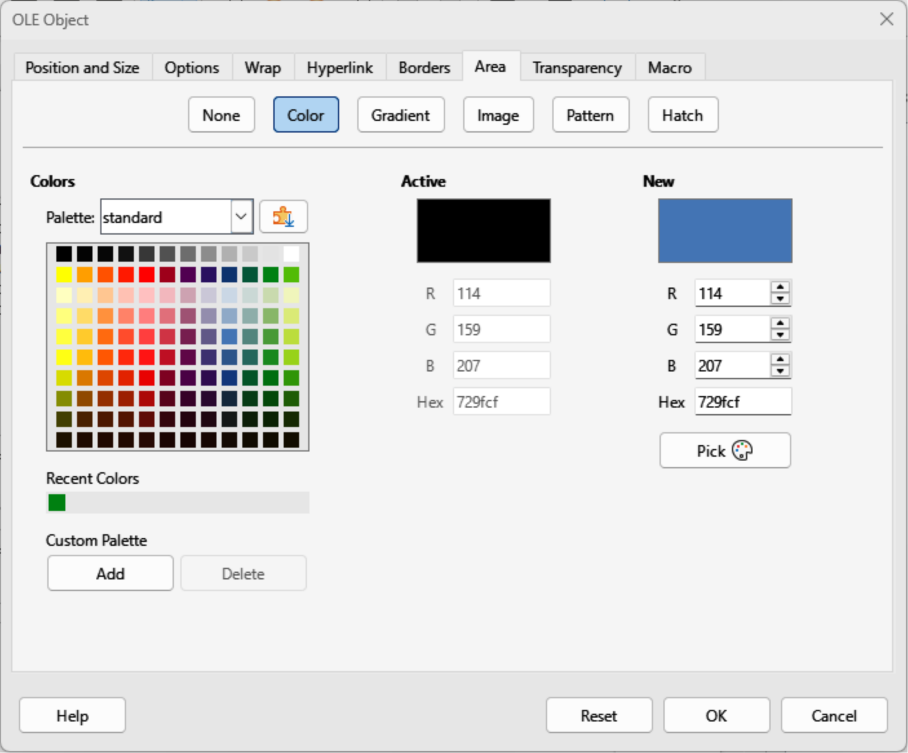
Click on Area, then select the type of fill required for the formula from the available options (Figure 5). The options available are None, Color, Gradient, Image, Pattern, and Hatch.
Figure 5: OLE Object dialog — Area page
After selecting the background type, select the properties for the formula background. The area properties change depending on the type of area fill selected.
Click OK to save the changes and close the OLE Object dialog.
Select a formula in a document to change the borders.
Right-click on the formula and select Properties from the context menu, or go to Format > Frame and Object > Properties on the Menu bar to open the OLE Object dialog.
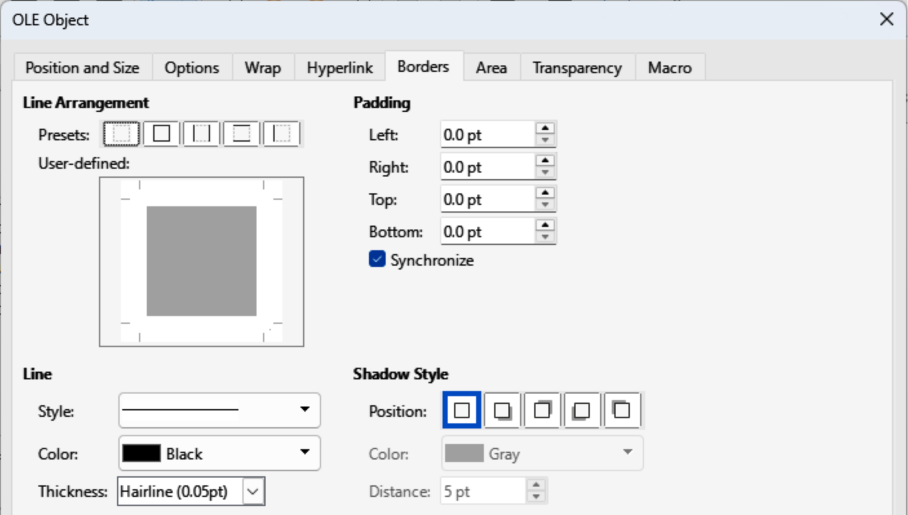
Click on Borders, then select the of border properties required for the formula from the available options (Figure 6). The options available are Line Arrangement, Line, Padding, and Shadow Type.
Click OK to save the changes and close the OLE Object dialog.
Figure 6: OLE Object dialog — Borders page
If the markup language for a formula is available, the formula can be quickly inserted into a document without opening the Formula Editor:
Copy the formula markup language required, then paste into the document at the required position, as shown by the above example.
Select all of the formula markup language.
Go to Insert > OLE Object on the Menu bar and select Formula Object to create a formula using the selected markup language. The formula is inserted replacing formula markup language.