
Math Guide 25.2
This document is Copyright © 2025 by the LibreOffice Documentation Team. Contributors are listed below. This document may be distributed and/or modified under the terms of either the GNU General Public License (https://www.gnu.org/licenses/gpl.html), version 3 or later, or the Creative Commons Attribution License (https://creativecommons.org/licenses/by/4.0/), version 4.0 or later. All trademarks within this guide belong to their legitimate owners.
To this edition
For previous editions
Please direct any comments or suggestions about this document to the Documentation Team Forum at https://community.documentfoundation.org/c/documentation/loguides/ (registration is required) or send an email to: loguides@community.documentfoundation.org.
Note
Everything sent to a forum, including email addresses and any other personal information that is written in the message, is publicly archived and cannot be deleted. Emails sent to the forum are moderated.
Published April 2025. Based on LibreOffice 25.2 Community.
Other versions of LibreOffice may differ in appearance and functionality.
Some keystrokes and menu items are different on macOS from those used in Windows and Linux. The table below gives some common substitutions used in this document. For a detailed list, see LibreOffice Help.
|
Windows or Linux |
macOS equivalent |
Effect |
|
Tools > Options |
LibreOffice > Preferences |
Access setup options |
|
Right-click |
Control+click, Ctrl+click, or right click depending on computer setup |
Open a context menu |
|
Ctrl or Control |
⌘ and/or Cmd or Command, depending on keyboard |
|
|
Alt |
⌥ and/or Alt or Option depending on keyboard |
Used with other keys |
|
F11 |
⌘+T |
Open the Styles deck in the Sidebar |
This chapter explains how to customize LibreOffice Math when creating formulas for use in LibreOffice documents. Also, refer to the Getting Started Guide for more information on customizing LibreOffice.
If required, the Formula Editor can become a floating window allowing the Formula Editor to be positioned at a convenient location when creating formulas.
Position the cursor on the frame of the Formula Editor, NOT in the Formula Editor.
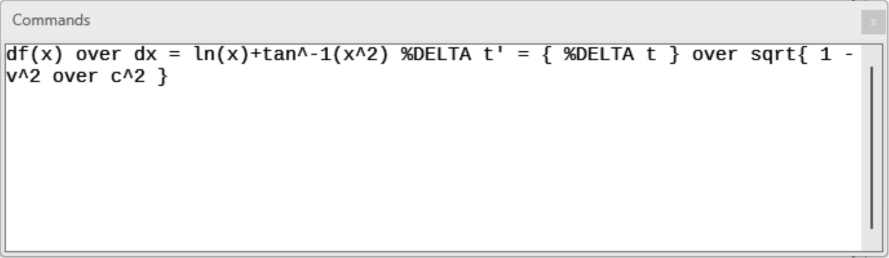
Press and hold Ctrl key (macOS ⌘) and double-click on the frame. This turns the Formula Editor into a floating window labelled Commands (Figure 1).
Figure 1: Example of floating Formula Editor window
To return the Formula Editor back to its position in the Math window:
Position the cursor on the frame of the Commands floating window, NOT on the title bar at the top of the window.
Press and hold Ctrl key (macOS ⌘) and double-click. The floating window closes and the Formula Editor appears at its previous position in the Math window.
The Formula Editor can be positioned at the top or bottom of the Math window. The default position is the bottom of the Math window.
Position the cursor on the frame of the Formula Editor, NOT in the Formula Editor.
Press and hold Alt key (macOS ⌥) and drag the Formula Editor to a new position at the top or bottom of the Math window.
The Sidebar Elements panel can be used as a floating dialog allowing the Elements panel to be positioned at a convenient location when creating formulas.
Position the cursor on the title bar of the Elements panel on the Sidebar.
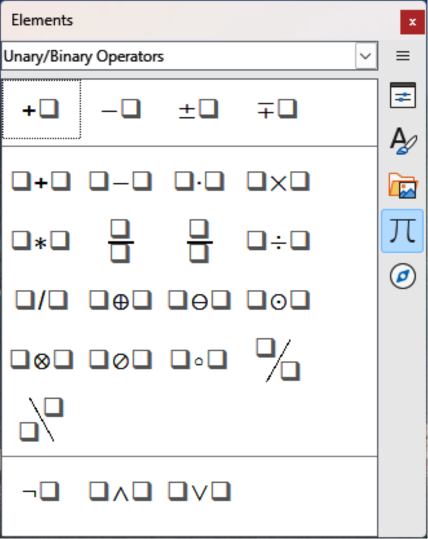
Press and hold Alt key (macOS ⌥), then double-click to create a floating Elements panel (Figure 2).
To move the Elements panel back to its position as a Sidebar, press and hold Alt key (macOS ⌥), then drag the Elements panel back to its Sidebar position.
Figure 2: Example of a floating Elements panel
Keyboard shortcuts can be added to LibreOffice when creating documents. Following is an example of how to add a keyboard shortcut for inserting a formula into a LibreOffice document. For more information on creating keyboard shortcuts, see the Getting Started Guide.
Note
When creating new keyboard shortcuts, make sure that the keyboard shortcut is NOT already in use by LibreOffice or the computer system.
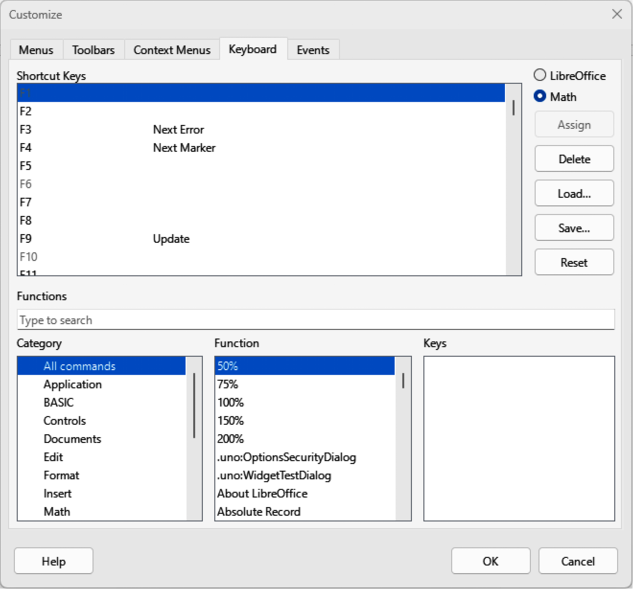
Go to Tools > Customize on the Menu bar to open the Customize dialog, then click on Keyboard to access the options available for creating keyboard shortcuts (Figure 3).
Select the type of the new keyboard shortcut, as follows:
Select LibreOffice to create a new keyboard shortcut for all components of LibreOffice.
Select Math to create a new keyboard shortcut for Math.
In the Category, select Insert.
In the Function, select Import Formula.
Figure 3: Customize dialog — Keyboard page
In Keys, select the key or keyboard combination required for the new keyboard shortcut.
Select Modify and the new keyboard shortcut appears in Keys.
If required, continue to add keyboard shortcuts using Steps 1) to 6).
Click OK to save the keyboard shortcuts and close the Customize dialog.
LibreOffice
Math
Assign
Delete
Load
Save
Reset
Shortcut Keys
Functions
Category
Function
Keys
If a symbol is regularly used and is not available in Math, it can be added to the Symbols dialog (Figure 4) using the Edit Symbols dialog (Figure 5). Symbols can be modified, have names assigned, or redefined.
Go to Tools > Symbols on the Menu bar or click on Symbols on the Tools toolbar to open the Symbols dialog (Figure 4).
Figure 4: Symbols dialog — Greek page
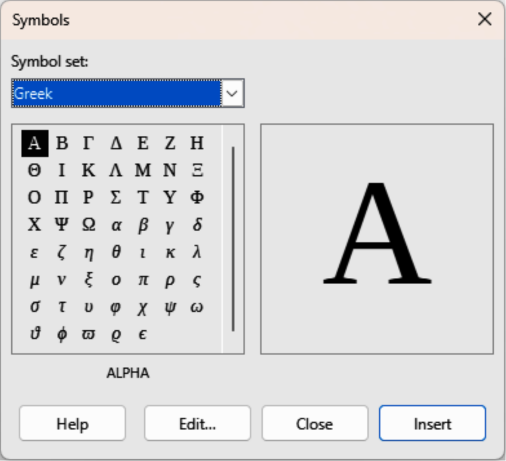
In Symbol set select a font to use for the new symbol from the available options in the drop-down list.
Click on Edit to open Edit Symbols dialog (Figure 5).
Figure 5: Edit Symbols dialog
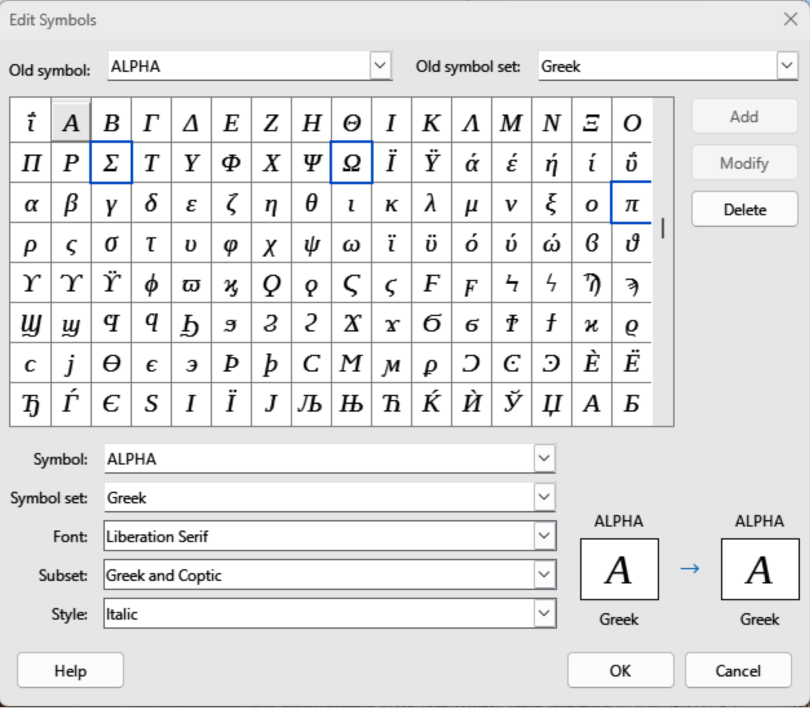
Select the symbol character required and it appears in the preview box. If necessary, scroll down in the preview box to locate the required symbol.
In Symbol, enter a memorable name for the required symbol.
In Symbol set, select a symbol set in the drop-down for the selected symbol, or create a new name for the selected symbol.
In Font and if required, select a font for the selected symbol.
In Subset, select a subset from the available options for the selected symbol.
In Style and if required, select a font style from the available options for the selected symbol.
Click on Add, to add the symbol to Math.
If required, click on Modify after making any changes to an existing symbol.
If required, click on Delete if an existing symbol is no longer required.
Click on OK to close the Edit Symbols dialog. The new symbol and, if created, new symbol set are now available for use.
Notes
When a new symbol is added to the catalog, a percentage sign (%) followed by the name of the symbol is typed into the markup language in the Formula Editor and the symbol appears in the formula. Symbol names are case sensitive, for example, %prime is a different symbol to %Prime.
There are numerous free fonts available that contain several symbols if the required symbol is not available on the computer. For example, the STIX font was developed for use in mathematical and technical texts. Also, DejaVu and Lucida fonts have a wide range of symbols.
By default, only user defined symbols that are used in the document are stored with the document. It is useful to embed all user defined symbols so that when a document is transferred to another computer it is available for editing. Go to Tools > Options > LibreOffice Math > Settings (macOS LibreOffice > Preferences > LibreOffice Math > Settings) on the Menu bar and uncheck Embed only used symbols (smaller file size) in Miscellaneous Options.
In the Edit Symbols dialog (Figure 5), select the symbol name that is to be changed in the Old symbol drop-down list. The symbol appears in the left preview box at the bottom of the dialog.
Type a new name for the symbol in the Symbol text box, or select a new name from the Symbol drop-down list. The new symbol name appears in the right preview pane.
Click Modify to change the symbol name, click OK to close the Edit Symbols dialog.
In Old symbol set, select the symbol set from the options available in the drop-down list in the Edit Symbols dialog (Figure 5).
Select a symbol from options available in the Old symbol drop-down list. In the left preview box of the dialog, the name, symbol, and symbol set are displayed.
In Symbol, select a symbol name from the drop-down list.
In Symbol set, select the required symbol set from the drop-down list. In the right preview box at the bottom of the dialog, the name, symbol, and symbol set are displayed.
If required, select an option from the drop-down lists in Font, Subset, and Style.
Click on Modify and the symbol is moved to the new symbol set.
Click on OK to close the Edit Symbols dialog.
In Old symbol set, select the symbol set from the options available in the drop-down list in the Edit Symbols dialog (Figure 5).
In Old symbol, select the symbol for deletion from the drop-down list. The selected symbol appears in the left preview pane at the bottom of the Edit Symbols dialog.
Click on Delete and the symbol is deleted from the symbol set without any confirmation.
Click on OK to close the Edit Symbols dialog.
Note
To delete a symbol set all of the symbols in the selected set have to be deleted. The last symbol is deleted, the symbol set is also deleted.
Old symbol
Old symbol set
Symbol
Symbol set
Font
Subset
Style
Add
Modify
Delete
The grave accent (`) inserts an additional small space and the tilde (~) inserts an additional large space into formulas. However, in a LibreOffice basic installation, these symbols are ignored when they occur at the end of a formula. When working with running text in a formula, it may be necessary to also include spacing at the end of formulas. This customization is only required when working with a Math document and is not required when inserting a formula into another LibreOffice module.
To add spacing at the end of formula in Math, go to Tools > Options > LibreOffice Math > Settings (macOS LibreOffice > Preferences > LibreOffice Math > Settings) on the Menu bar and uncheck Ignore ~ and ` at the end of the line in Miscellaneous Options.
By default, the code in the Formula Editor input window is scaled to 100%. To change the scaling factor go to Tools > Options > LibreOffice Math > Settings (macOS LibreOffice > Preferences > LibreOffice Math > Settings) and change the percentage in the Scaling code input window in Miscellaneous Options.
For example, to change the scaling to 150%, the code in the input window appears larger. This setting affects the Formula Editor in all LibreOffice modules. However, the LibreOffice Math options can only be accessed when using LibreOffice Math. It is not available for editing formulas in other LibreOffice modules.
Creating formulas frequently in documents, LibreOffice can be customized by adding extensions that are designed to help in the creation of formulas. Extensions are installed using the Extension Manager. For more information on how to install extensions, see the Getting Started Guide.
A commonly used extension is Formatting of All Math Formulas. This extension allows formatting of formulas in Writer, Calc, Draw, or Impress documents. Using this extension the font names and sizes of all formulas used in LibreOffice documents. For more information on this extension, go to https://extensions.libreoffice.org/en/extensions/show/formatting-of-all-math-formulas.